


I. Introduction▲
Emmabuntüs is a GNU/Linux distribution. This project was launched in 2011 by the Emmabuntüs Community. It is a complete “ready to use work and leisure station” distribution which greatly eases the refurbishing of old computers given to humanitarian associations like Emmaüs, helps the beginners to discover the GUN/Linux world and expands the lifetime of aging computer hardware.
This tutorial explains how to install Emmabuntüs Debian Edition, based on Debian Jessie XFCE. Before starting this installation, we strongly suggest to the beginners that they to read the paper Replace the retiring Windows XP with Linux as well as the Debian GNU/Linux Installation Guide.
II. Prerequisites▲
The following steps are mandatory before starting the installation:
- Make sure your hardware configuration includes a 2.0 GHz processor, 40 GB on the hard disk drive and 1024 MB of RAM;
- Download the 3.9 GB ISO Image from this page dedicated to downloading;
- Please verify the MD5SUM of this ISO;
- Burn this ISO image on a DVD with the “burn an image” function of your favorite Burning SoftwareInfrarecorder ;
- An interesting alternative is to put the ISO on an USB key. It is the preferred solution in term of installation speed. To go this route, please see the Chapter VIHow to create a bootable USB Live-CD for Emmabuntüs Debian Edition of this document;
- It is also highly recommended to make a first test in live mode to verify that there is no compatibility issue (1 GB of RAM is needed to run decently a live DVD or live USB session).
As opposed to the Emmabuntüs versions based on Ubuntu, you cannot start an installation during a live mode session. You need to reboot from the Live DVD or USB and choose directly the system installation option.
Emmabuntüs is designed to be installed with no Internet access.
Please unplug our Ethernet cable or disable the WIFI connection.
III. Installation▲
Before any Operating System installation on a computer, it is highly recommended to test it in Live mode by using the USB key.
See Chapter VIHow to create a bootable USB Live-CD for Emmabuntüs Debian Edition for the creation of a bootable Live-USB.
Insert the DVD in the reader or the Live-USB in one USB port and restart your computer.
III-A. Starting up▲
The BIOS must be configured to try to boot first from the DVD or the USB device. Some computers let you choose the boot order during the startup by pressing a function key like F8, F9 or F12. For more information we suggest you read the page dedicated to the startup process on the Debian and Ubuntu sites.
Using the Up and Down navigation keys, select the language you want during the Emmabuntüs installation:
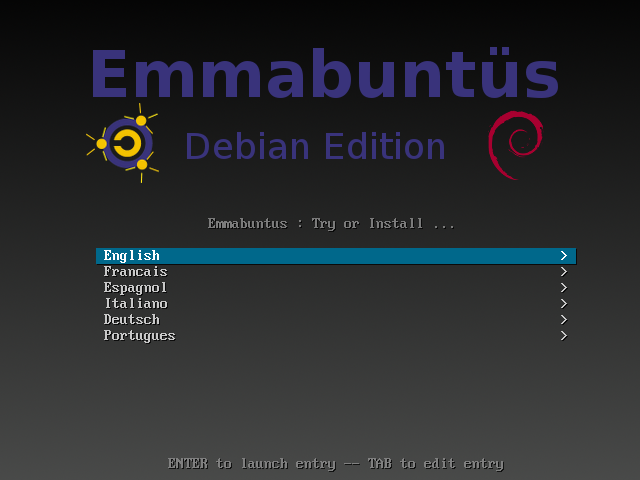
Then select the entry “Install Emmabuntus on your computer”

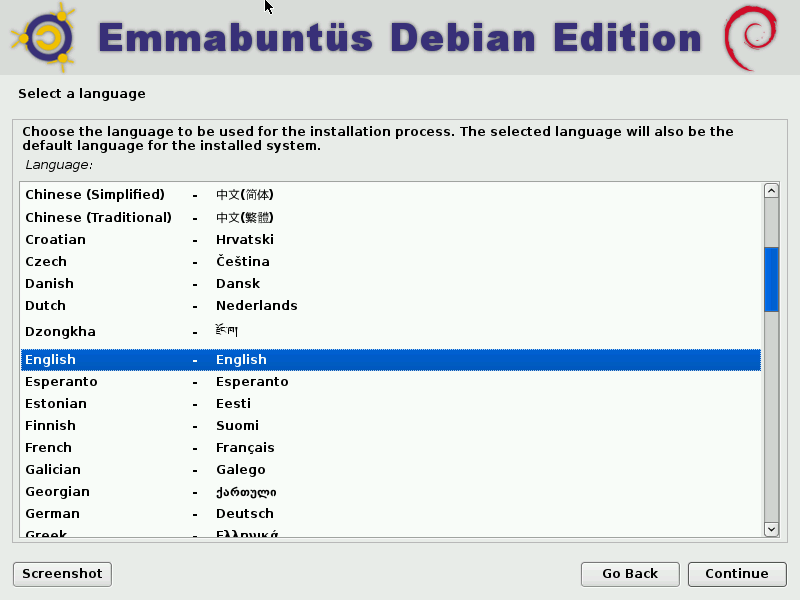
III-B. Language selection▲
Select the system language :
Select your keyboard configuration :

III-C. Network▲
The install process looks at all the different hardware components of the computer, and at the possibility of an Internet connexion. You can skip this Internet connexion step and proceed with the installation. If you want to establish a connection and you have an Ethernet cable, it will be done automatically. If you have a WI-FI device, you will be presented with a choice of connections, and perhaps a proprietary microcode license to accept.
Then you are asked to enter the name of the machine (this name will be visible by the other computers)

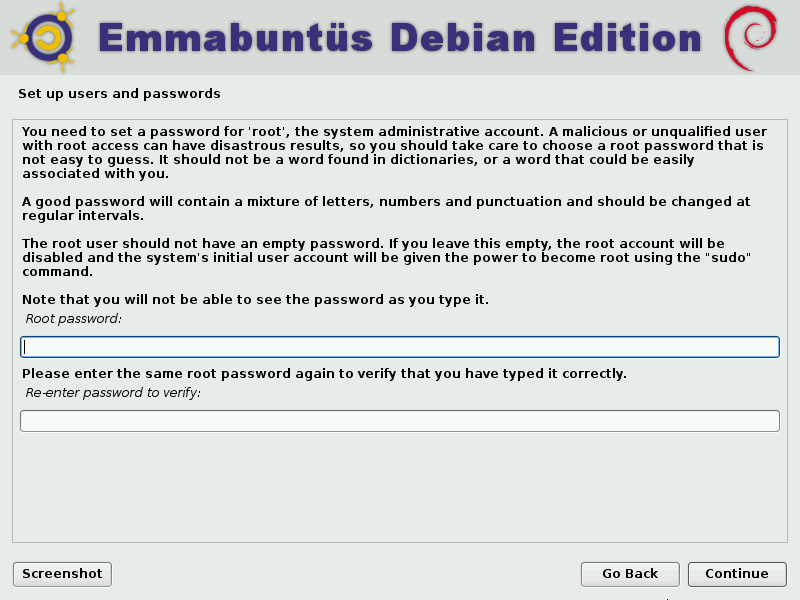
III-D. Users▲
Here you are asked to enter the root user (administrator) password. If you enter it, then the administrative rights will be reserved to the root user (to install an application or a packet, launch an update, or any task which is very touchy for the system); you can leave these fields empty, and then you will be able to gain the administrator rights by using the command sudo together with your own password that you are going to define next.
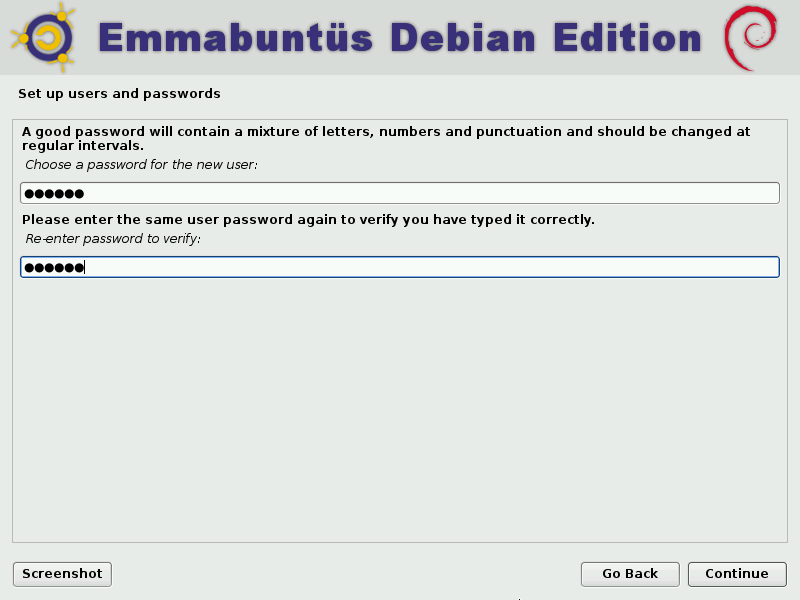
Creation of the first user, enter your name and forename :

Enter your user name (login identifier) :
And then your password :
III-E. Partitioning▲
The partitioning consists in the definition and the formating of various partitions of your hard disk(s).
First of all, remember to save save all your important data : formating is a very dangerous action that can easily rip off your data.
Emmabuntüs Debian Edition offers only a couple of partitioning options:
-
If your disk is empty, or if you want to remove the existing system, select the option « Guided - use entire disk »
If you are a beginner, we strongly suggest you go for this “guided partitioning” which will use automatically the whole disk space.
-
We also suggest you skip the next two options concerning LVM (encrypted or not), but in case you are interested, you can get more information by reading A Beginner's Guide To LVM, or the more detailed document LVM-HOWTOLVM Howto.
- on the other end, if you want to preserve an existing partition containing personal data, or if you want to use several operating system on your computer, select the “Manual” option and follow the procedure described in the chapter III.E.2 “Manual partitioning/multi-boot”. But in this case, please pay a lot of attention to every details of the partitioning process.
III-E-1. Guided partitioning/single-boot▲
Select the option “Guided - use entire disk” :

The Debian installer ask you to choose the disk drive where to install your system :
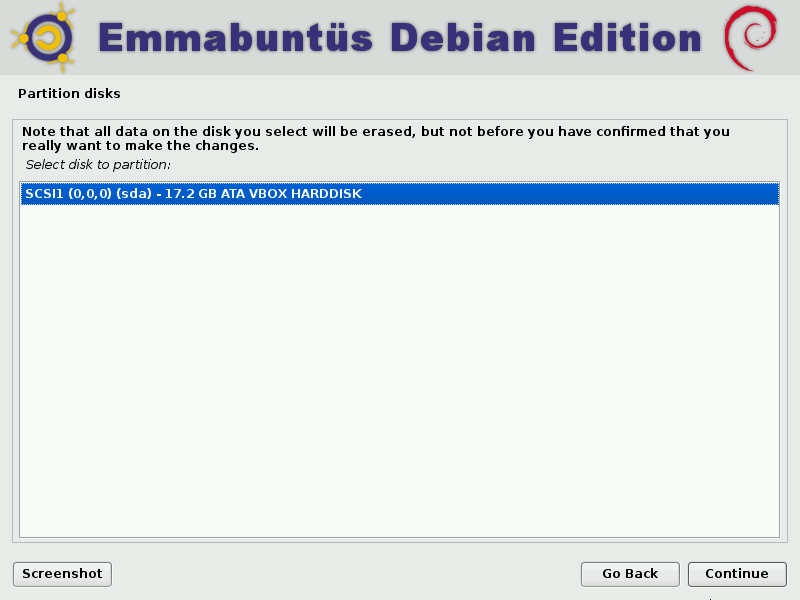
On this image there is only one disk, but if you use an USB key it will show up here. Make sure you don't select it (the size of the key should help you to identify it).
Select one of the three proposed partition schemes :
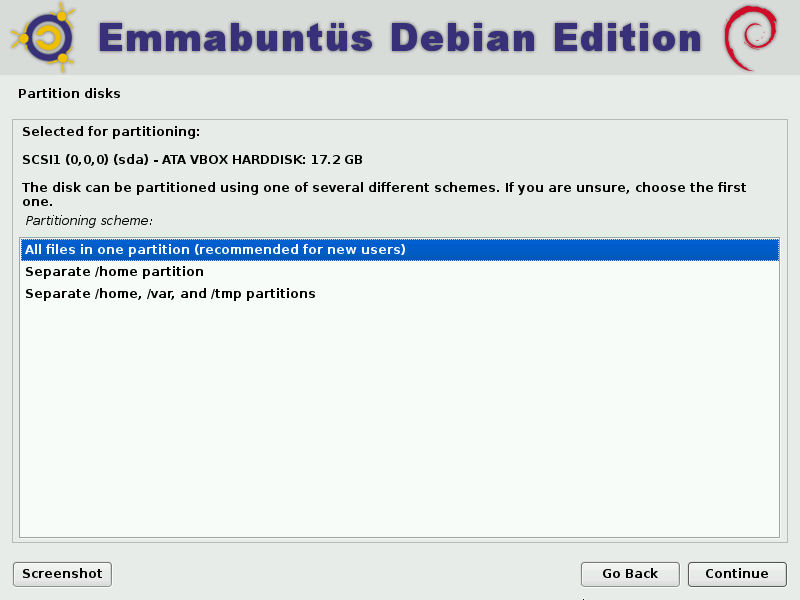
With Emmabuntüs DE, the guided partitioning allows 30GB of disk space to the root partition, regardless the scheme selected, to make sure there is enough room on the disk to install the system.
If you only have a 40 GB disk drive, we suggest you select the “All Files in one partition” scheme.
The next windows displays the partitioning proposal :
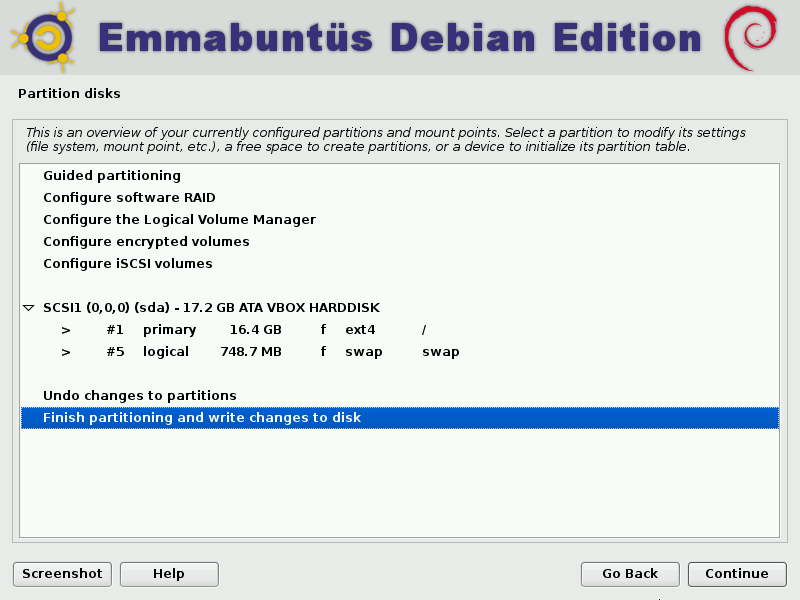
You can clearly see above that for the “All files in one partition” scheme, you could use a 20GB disk, but we recommend you use at least a 40GB disk, otherwise very few space will be left to store your personal data.
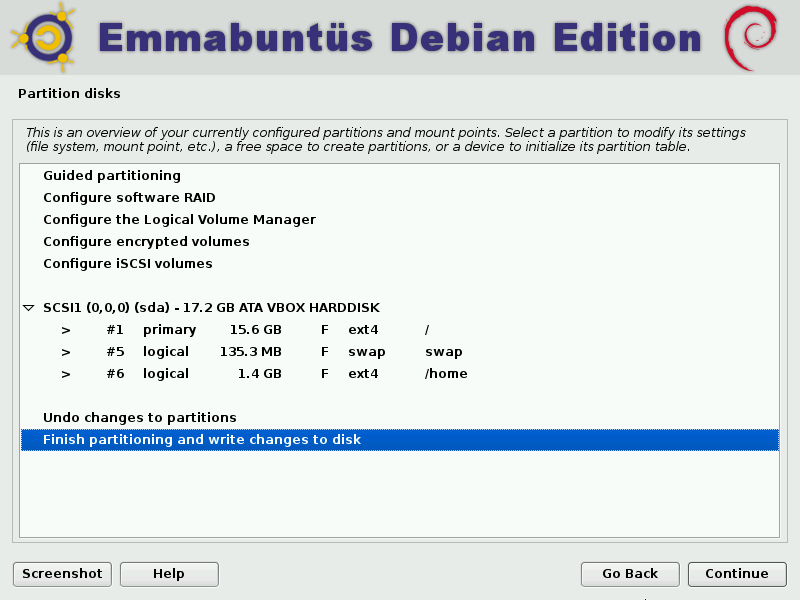
At this stage, you can very well cancel the proposed partitioning scheme and give a try to another scheme (see below a scheme with a separated /home partition). To do so select the option “Undo changes to partitions”.
The next screen let you review and confirm the new partitioning, before it is actually applied on the disk.
After this step all the data on the disk will be erased and lost.
If you want to proceed, select the “Yes” option and press the “Continue” button.
III-E-2. Manual partitioning and multi-boot▲
This procedure is not advised for beginners. It is rather intended for advanced users who want to have several operating system running on their computers.
The beginners who want to test several operating system should use a computer precisely dedicated to this task, or use different separated disk drives, but never test the multi-boot feature on their daily work computer, because a cockpit error can occur very easily :( .
Select the “Manual” option and press “Continue”
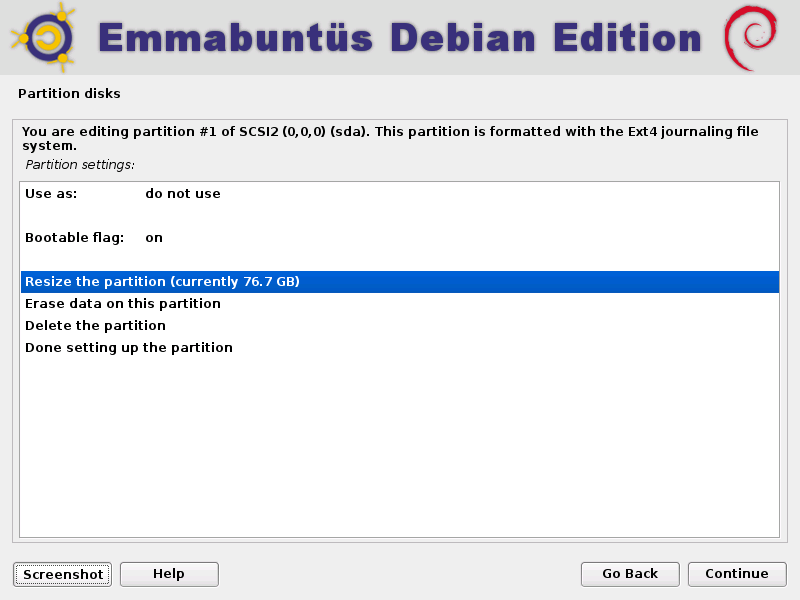
Select the partition containing an operating system (here the partition # 1), and which will be reduced in order to make room next to it for the Emmabuntüs Debian Edition, and then click on “Continue”.

Select the “Resize the partition” operation and press “Continue”.
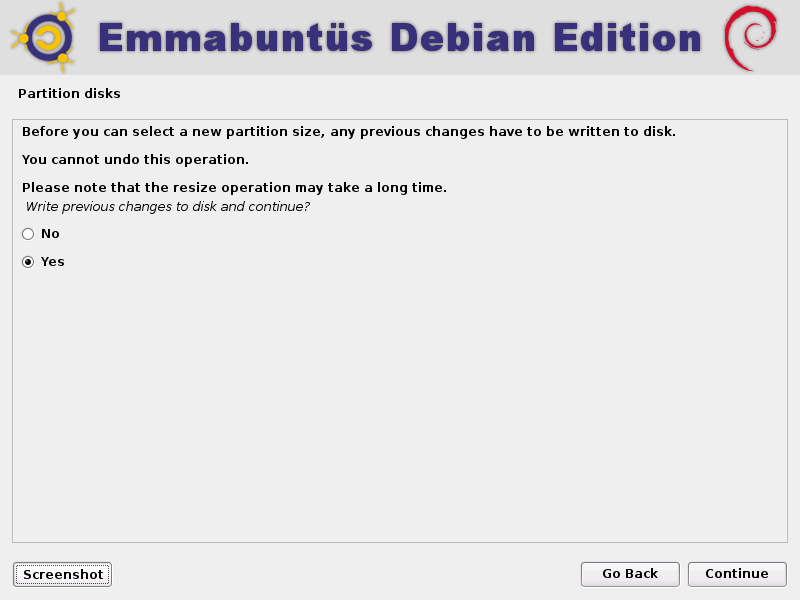
Accept the resizing process, select the “Yes” option and press “Continue”.
Enter the size of the current partition you want to achieve after the resizing.
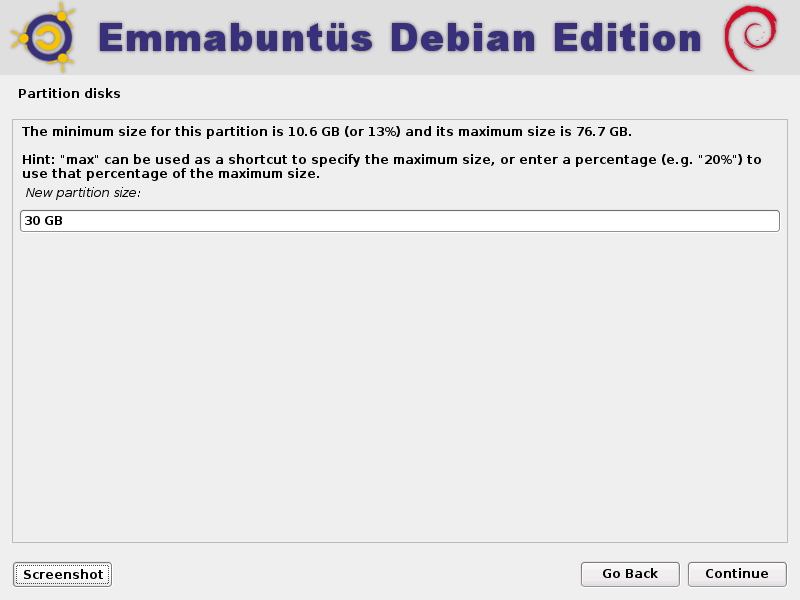
Within the banner above the entry box, you can find the minimum size to which this partition can be reduced.
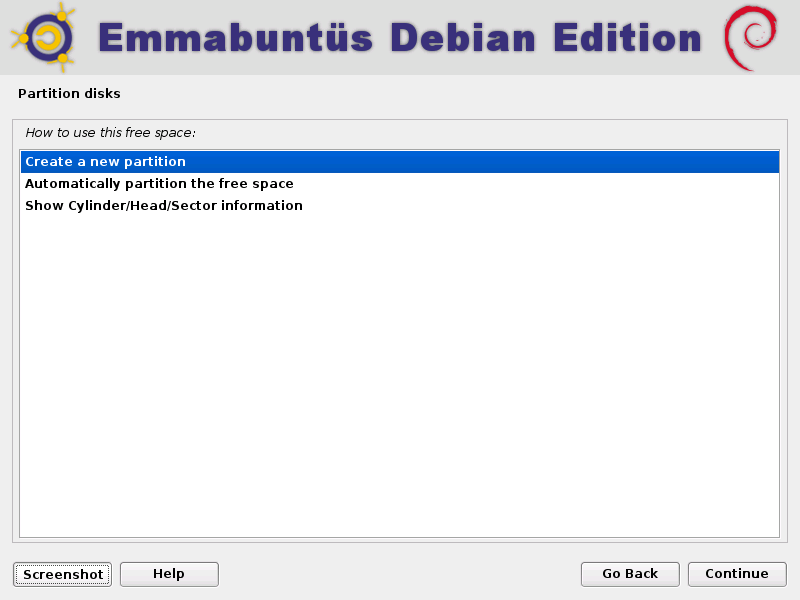
After this partition resizing, you come back the home menu of the partition utility. Now you can select the free partition in order to define its properties, and press “Continue”.
Accept the creation of a new partition.
Define the partition type you want, and continue :
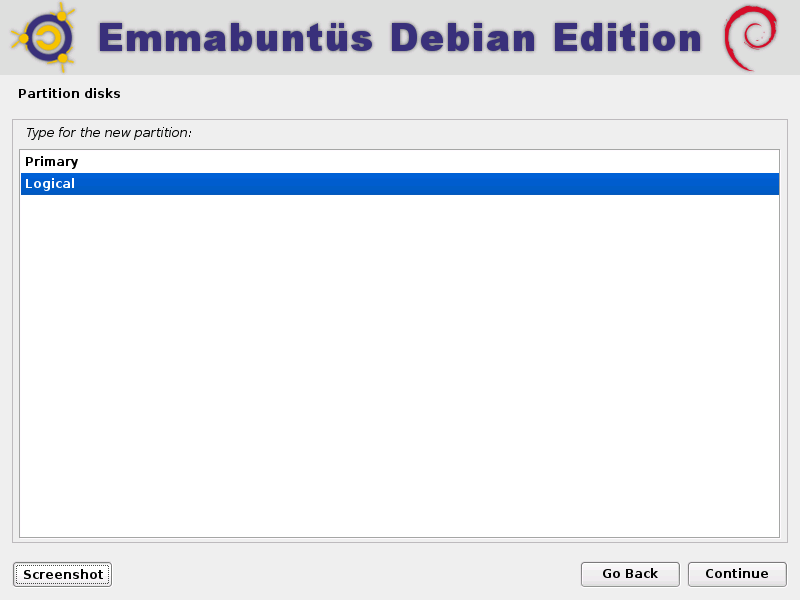
If you are not a partition expert, we suggest you use the logical type, which let you have more than four partitions on a given hard disk drive.
Keep the current size of the free partition.

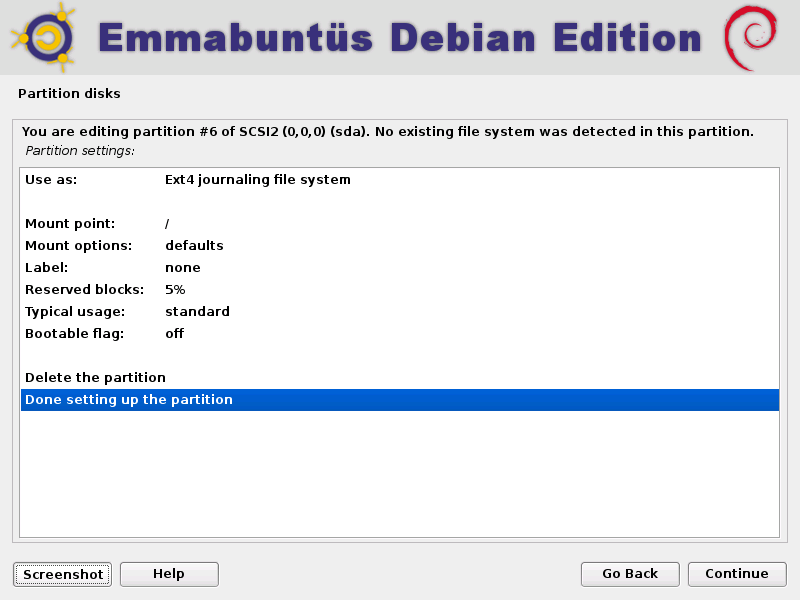
The system automatically create the root partition “/” with the ext4 format.
Keep this proposal and select the “Done setting up the partition” and validate.
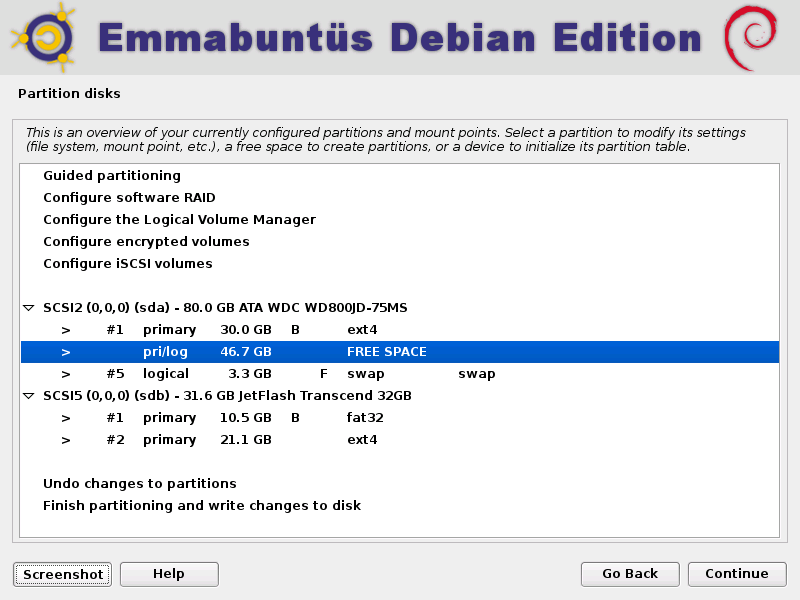
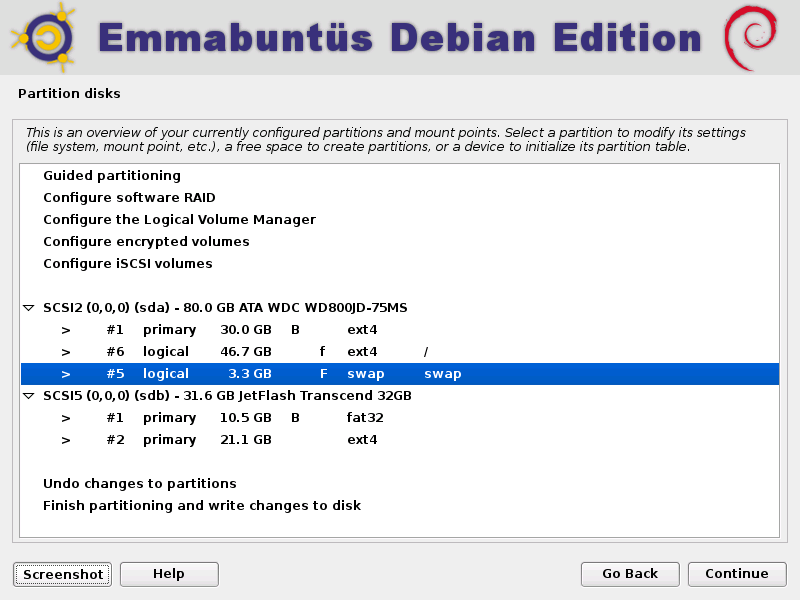
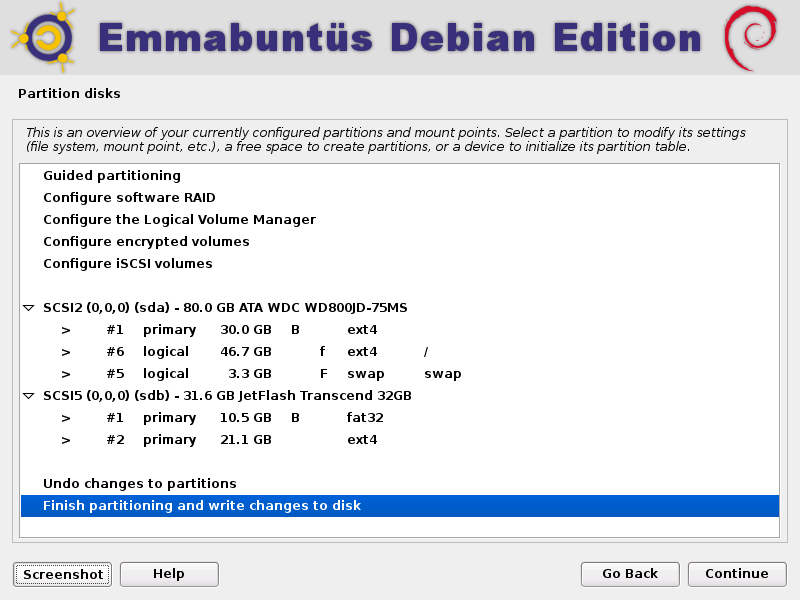
You are back to the disk partitioner home screen. Make sure that on the line corresponding to the swap partition, the word “swap” is shown on the same column as the “/” is written (see example below). If this is the case, then select the line “Finish partitioning and write changes to disk” and press continue.
Otherwise, select this line and press continue to set up correctly the swap partition.
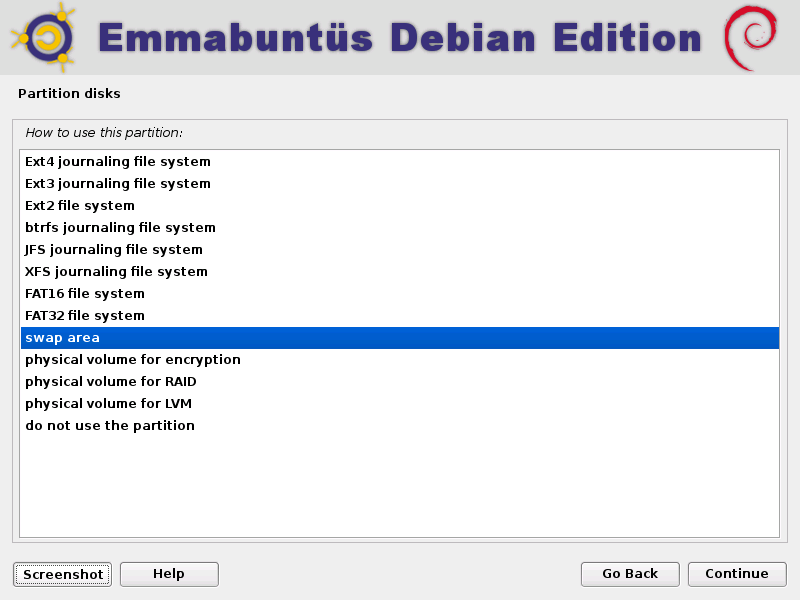
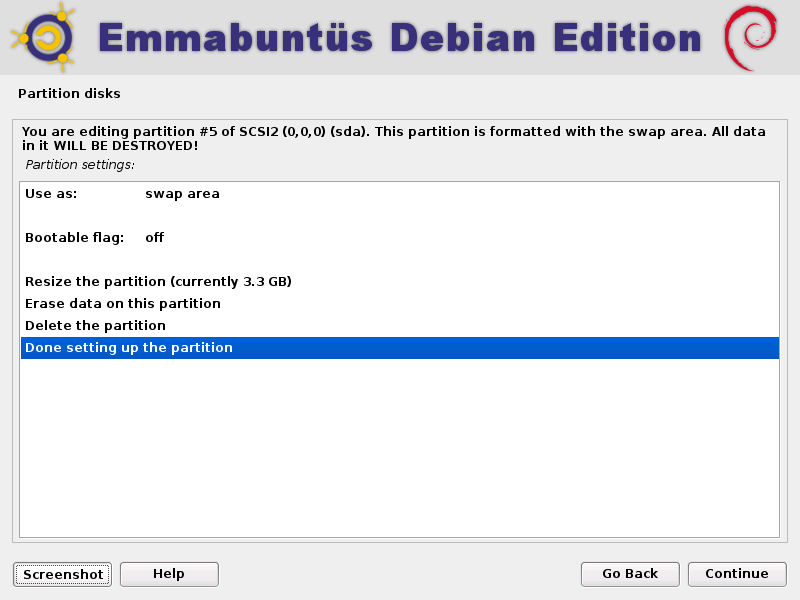
The following windows show you how to set up the swap partition.
Select the “Use as: swap area” and continue.
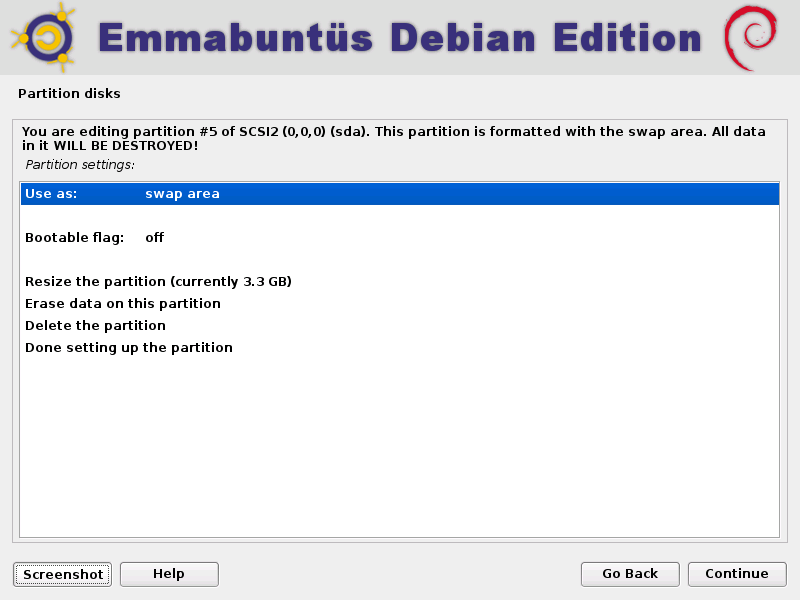
“swap area” and continue.
Select “Done setting up the partition”, and continue.
You are back again to the disk partitioner home screen, and as you can see in our example below, the swap partition contains the word “swap” in the same column where you read the character “/”. Then you can select the line “Finish partitioning and write changes to disk” and continue in order to take the next step of the operating system installation.
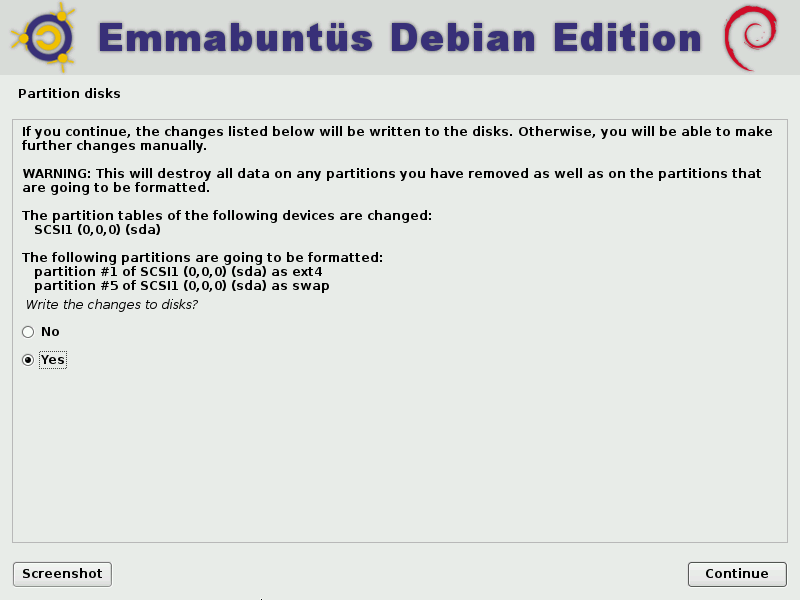
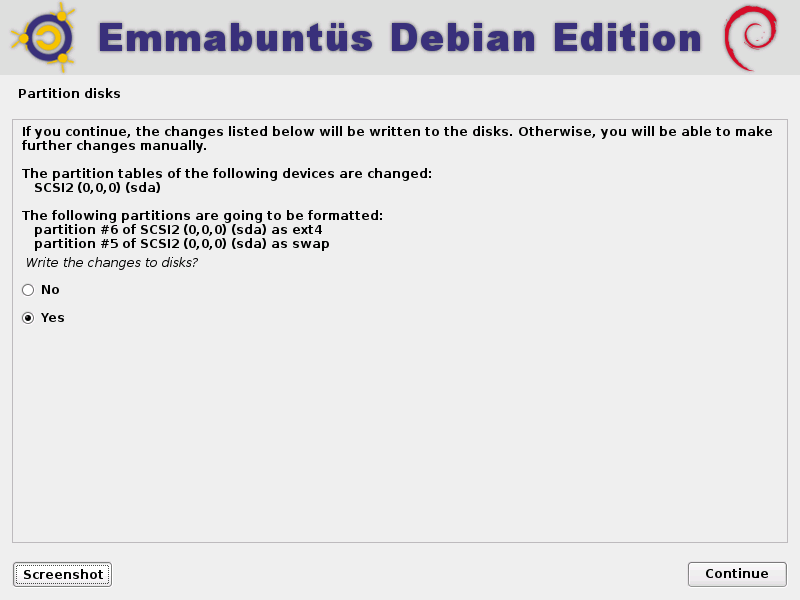
Before actually write the changes on disk, the partitioner ask you to carefully double check that the setting of the new partitions is correct.
After this step, all the data within the partitions to be formated will be definitively lost.
If you agree, select “Yes” and press “Continue”.
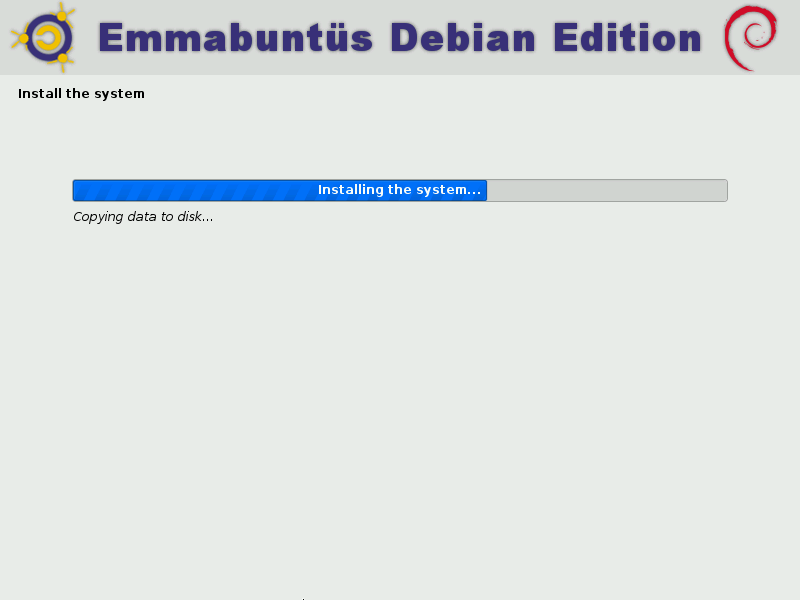
III-F. System installation▲
After you accept the previous step, the disk partitioning is applied ans the system start the installation by copying the data to the disk:
During this installation phase you have to do nothing, except perhaps drink a well deserved coffee ;)
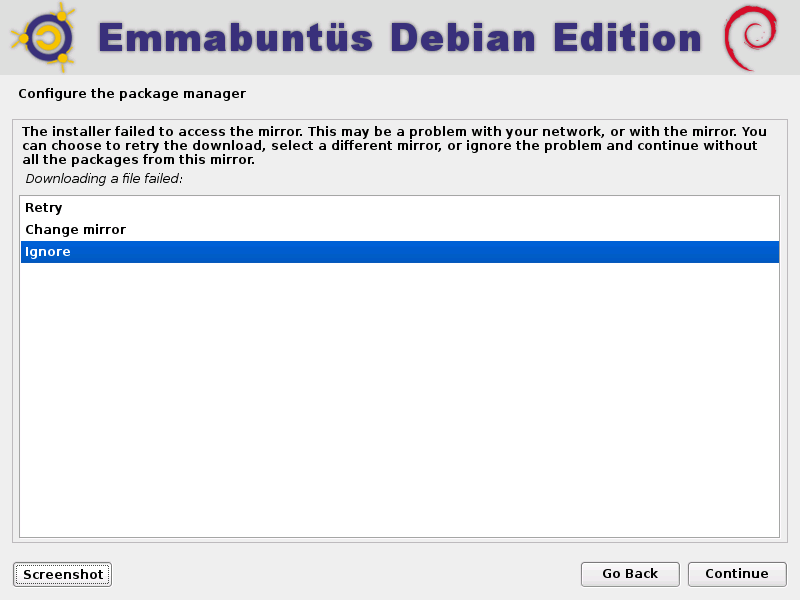
Depending on the media you are using for this install, and the computer on which you are doing it, you might get the information message displayed below. It is not a serious problem and you can ignore it as shown in the following display.
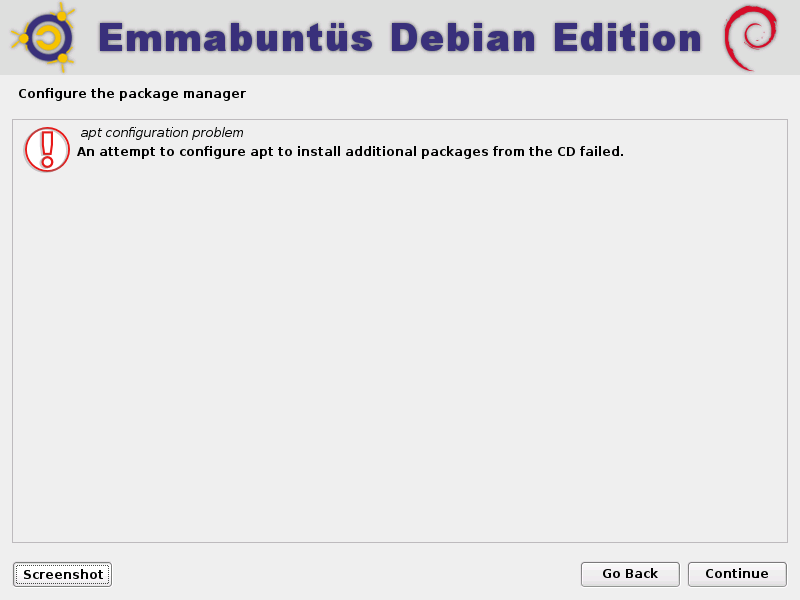
In that case, simply ignore and continue :
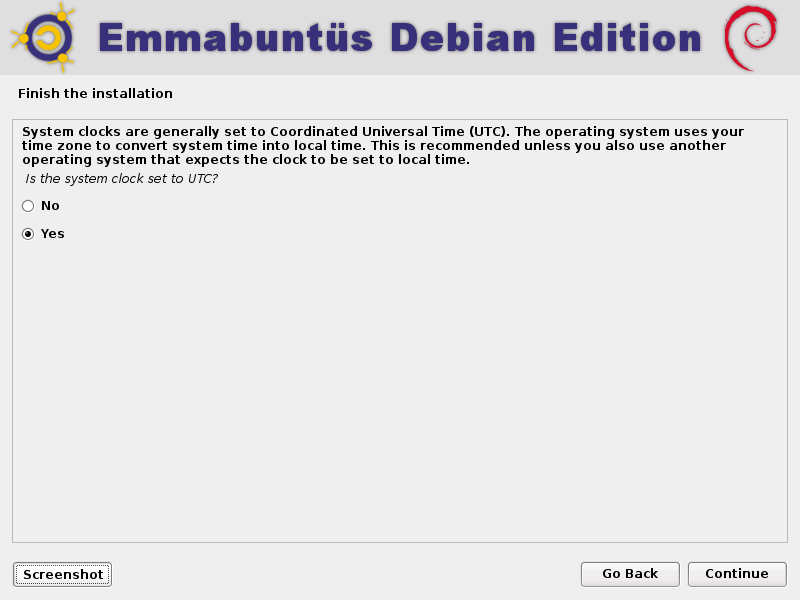
III-G. The clock▲
Then the clock setting ; Select UTC (except if you install a dual-boot with Windows) :
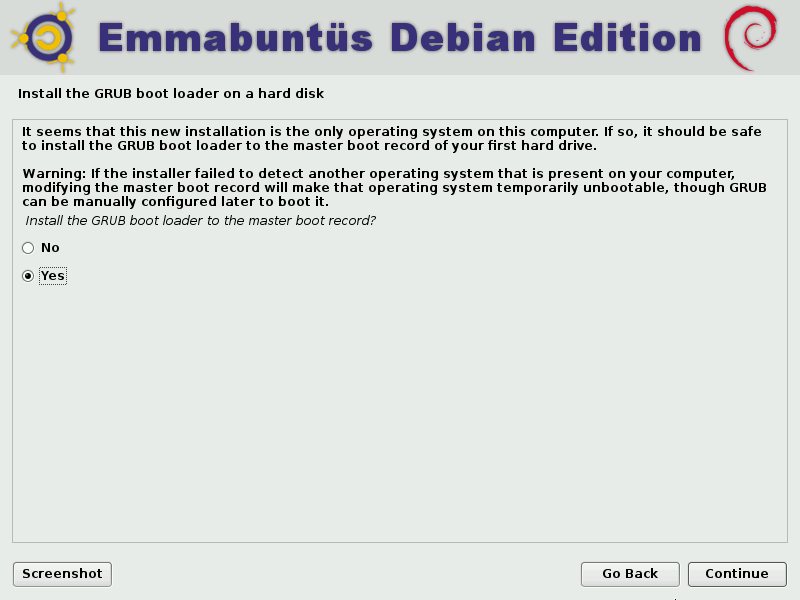
III-H. The GRUB boot loader▲
Finally, you need to select where to install the GRUB boot loader. We choose the disk where the system was just installed. Select “Yes” and continue :
If you install your system in dual-boot mode with another operating system, as explained in the chapter “Manual partitioning and multi-boot”, you should see that the installer detected the other(s) operating system(s). In our example a second Debian 8.5 operating system was detected.
We advise the beginners to answer “Yes” to the next question, in order to install GRUB on the master boot record of the disk where you just install your new Emmabuntüs Debian.
The more advanced users can answer “No” to this question in order to install your GRUB on the partition on which you just install your new Emmabuntüs Debian. But then remember that after the boot, the master operating system should link to the different GRUB (Installing to a Specific_Partition), in order to make visible all the other operating systems during the startup.
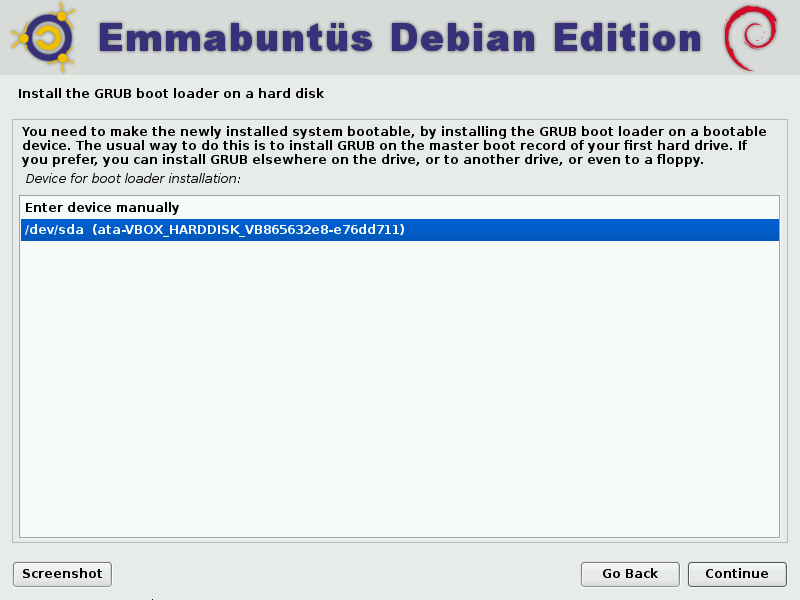
Select the disk on which you just install your new Emmabuntüs Debian :
Be careful not to install the GRUB on the USB key that you used to install the new system, otherwise you will need it every time you want to boot up your computer ;)
At this stage, if by chance you encounter this error message, select “No” and press “Continue” :
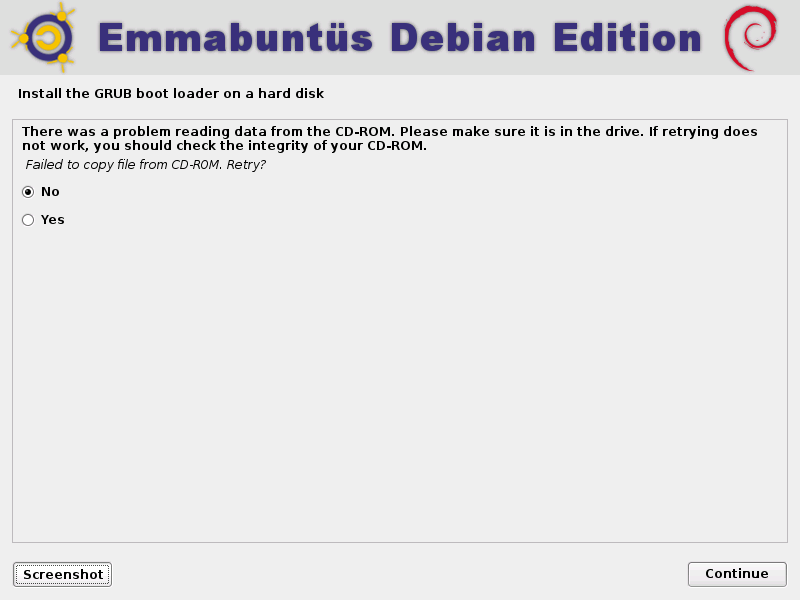
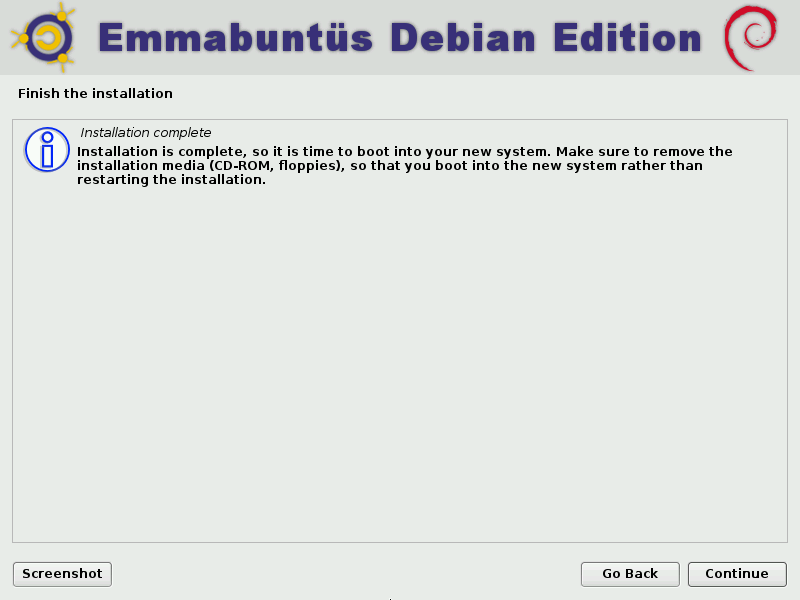
Now, you can restart your computer. Press “Continue” :
IV. Post-installation▲
During the first start-up, the GRUB menu is displayed : you will be able to start the post-installation process of Emmabuntüs Debian Edition.
IV-A. First start-up▲
Once the install is completed, you computer restart automatically on your new Emmabuntüs DE system and the GRUB menu is on screen:
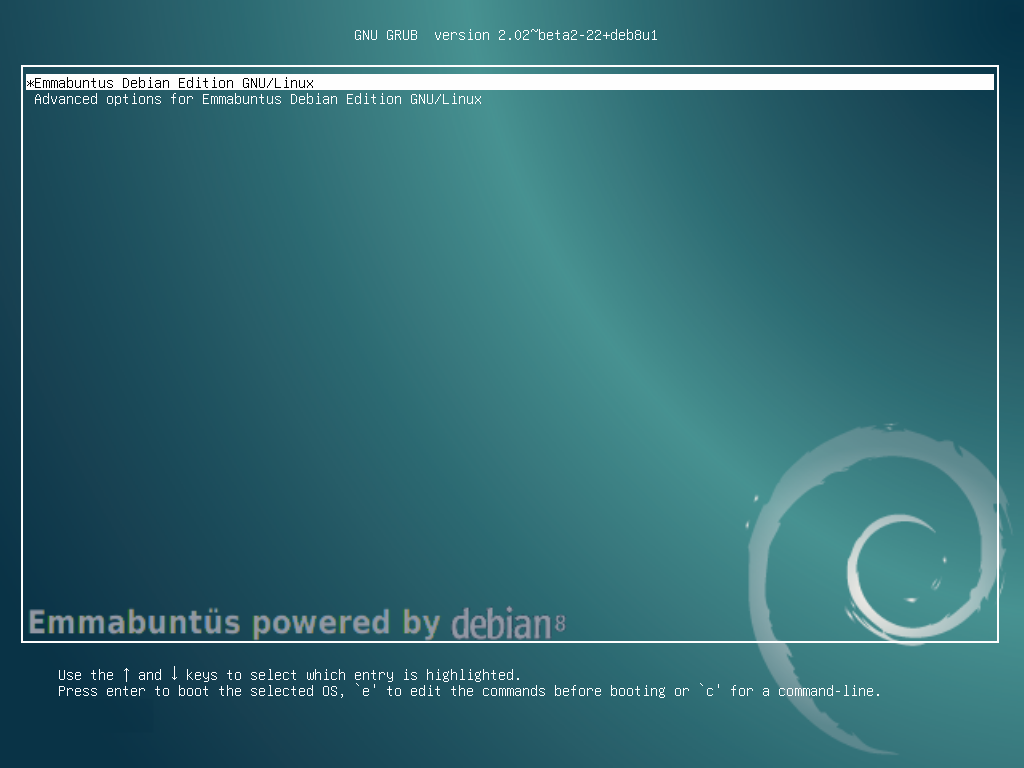
You don't have to do anything wen GRUB displays its starting menu, except to accept (I.E. press Enter) the highlighted entry. Otherwise the system will be launched automatically after 5 seconds.
On the other end, by selecting the entry “Advanced options ... “, you can start the system in recovery mode, for example if you want to unlock it when some updates where mistakenly interrupted during their install.
Emmabuntüs DE includes a new “Friendly Recovery” console which is easier to use than the simple command line offered by Debian during the difficult and sensitive system recovery mode.

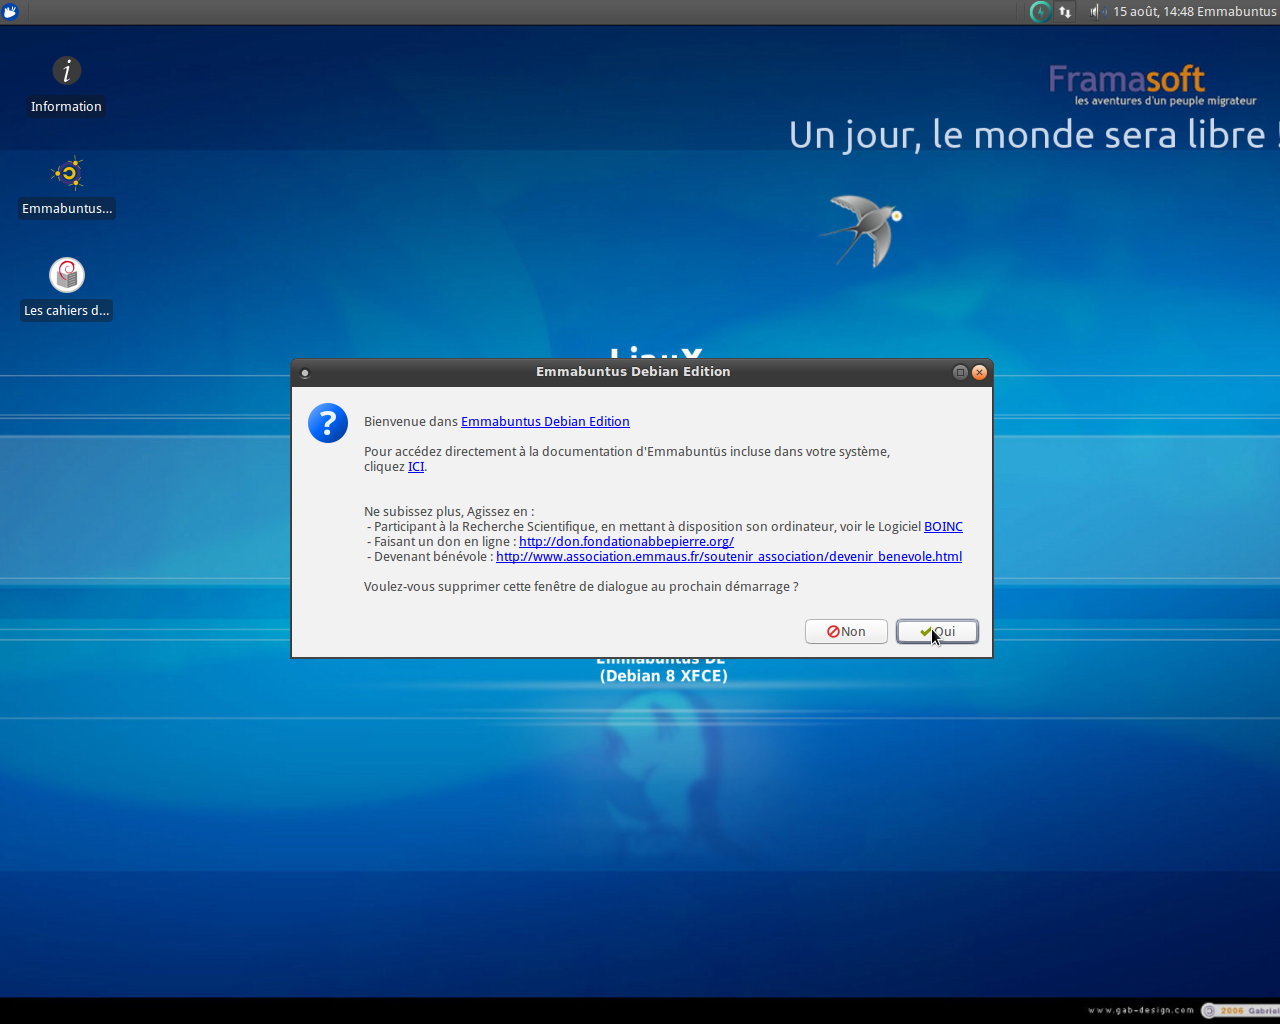
Now, you need to enter your login name and password within the session connection screen :

Home screen :
IV-B. Menu selections▲
The first choice presented concerns the Xfce menu : Classic or Whisker :

This menu choice concerns the application launcher on the left of to top menu bar. You will be able to change it later by using the XFCE top menu utility.
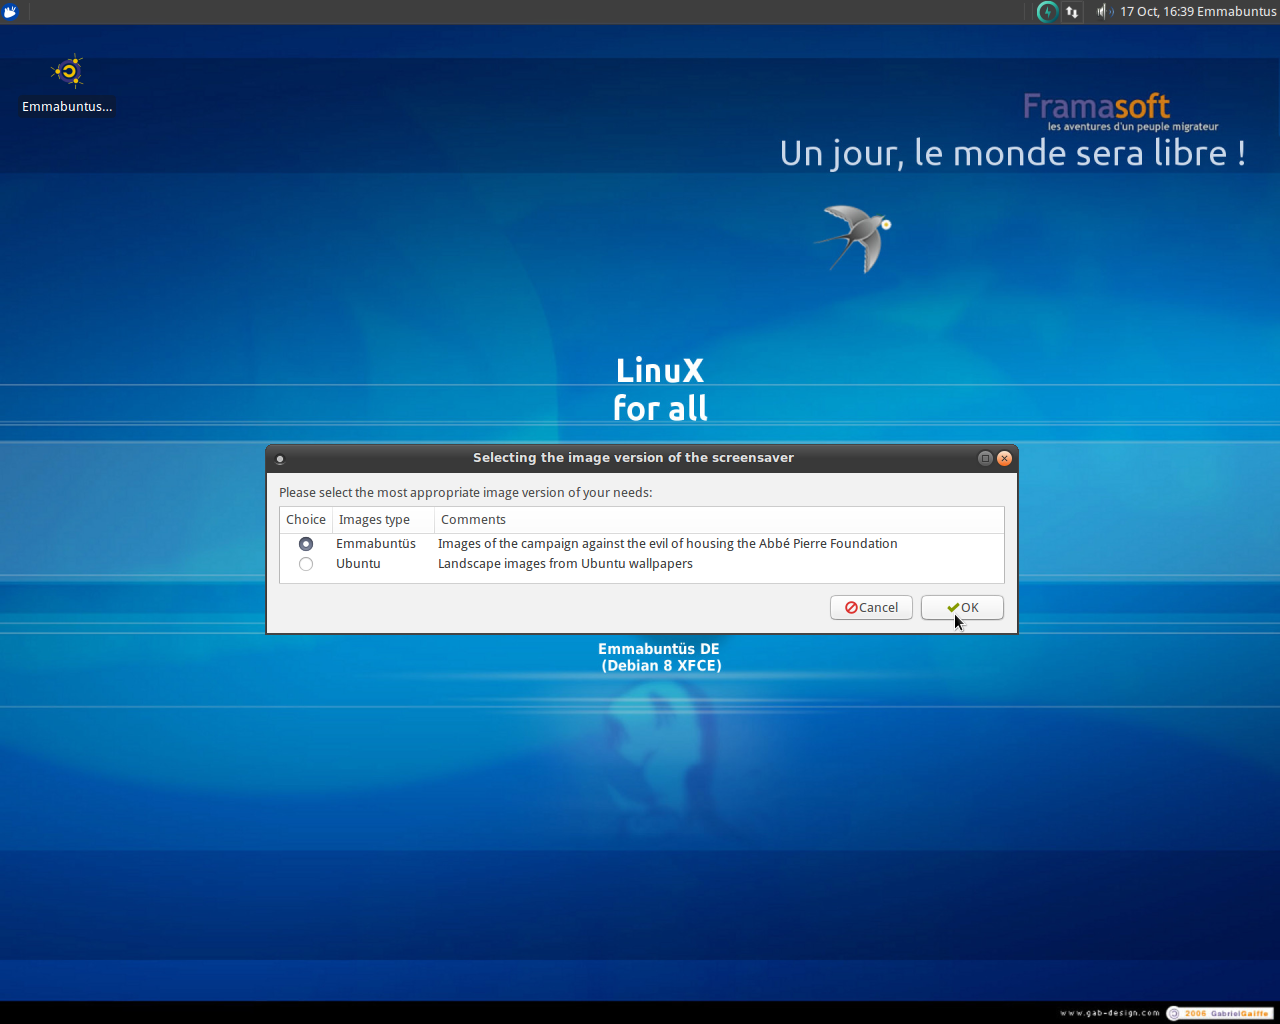
IV-C. Screen saver image selection▲
Selection of the screen saver image when in sleep mode :
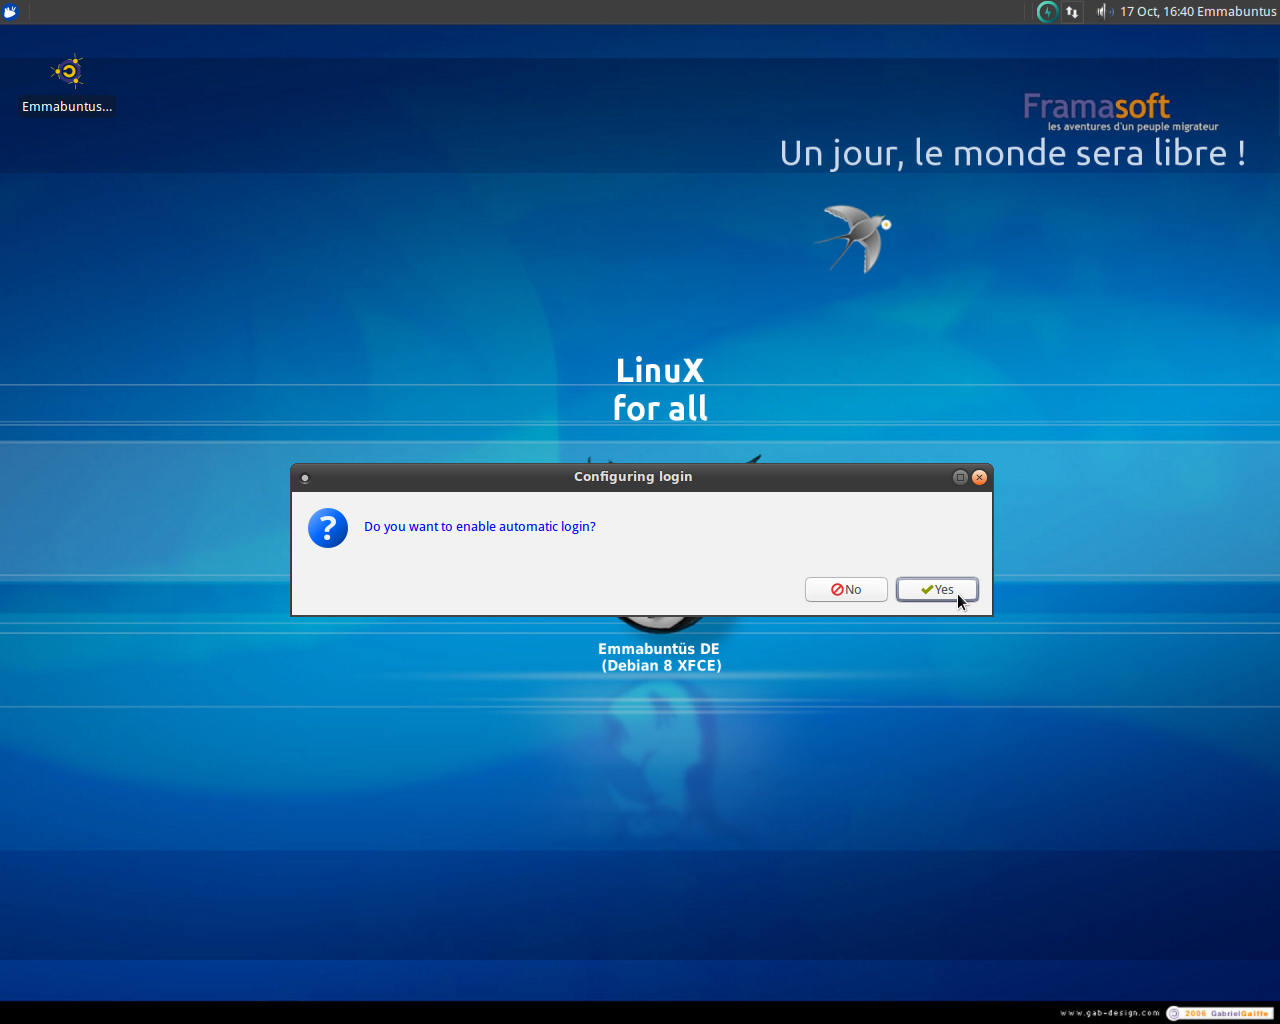
IV-D. Selection of the login mode at start-up▲
You can select to login at start-up by providing or not your password :
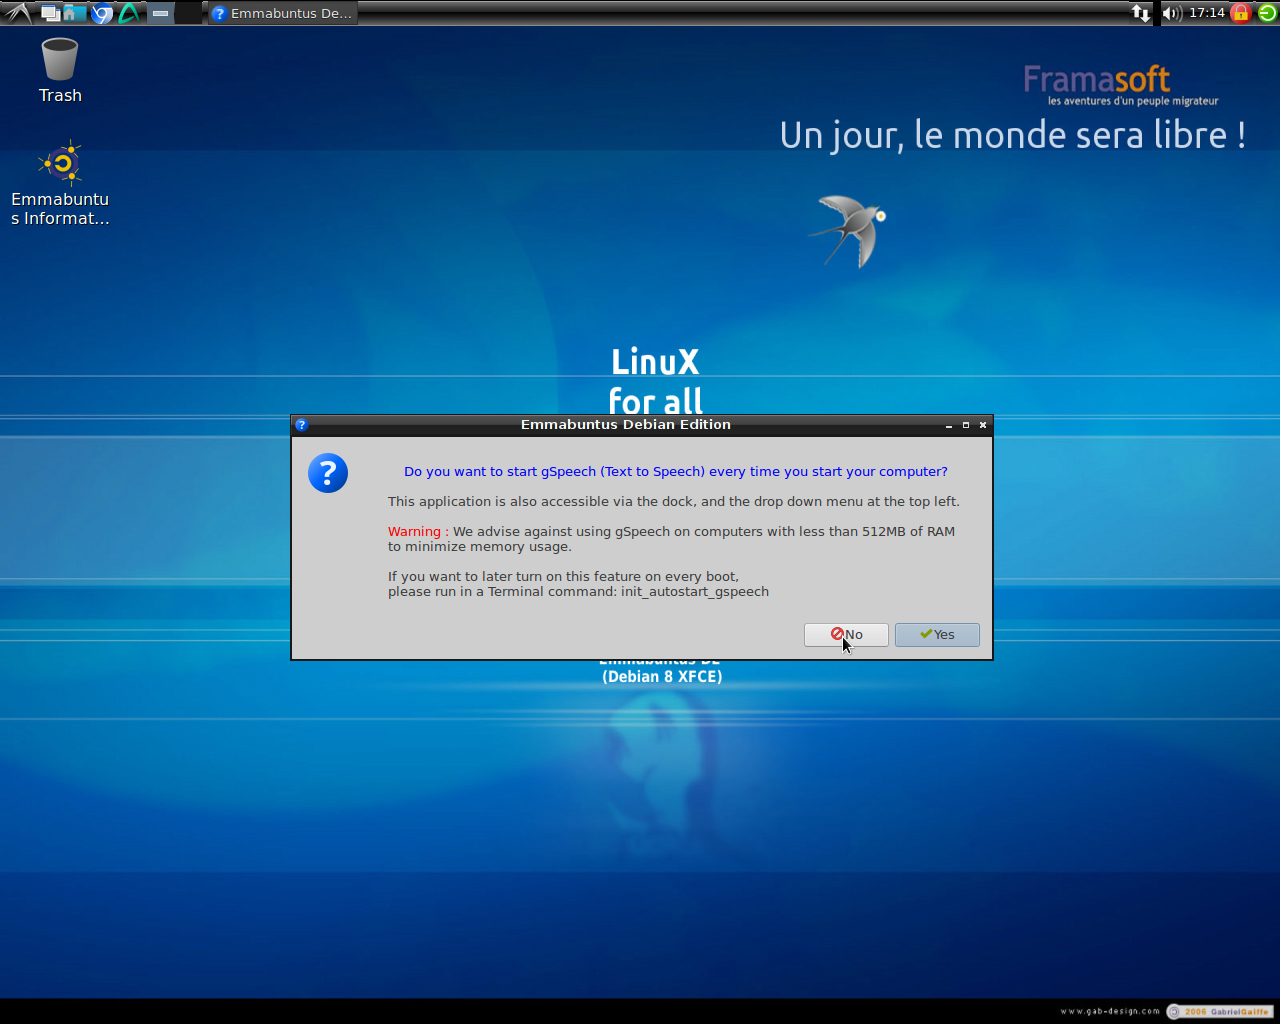
IV-E. Speech synthesis activation ?▲
Do you want to launch the speech synthesis application at each computer start-up ?
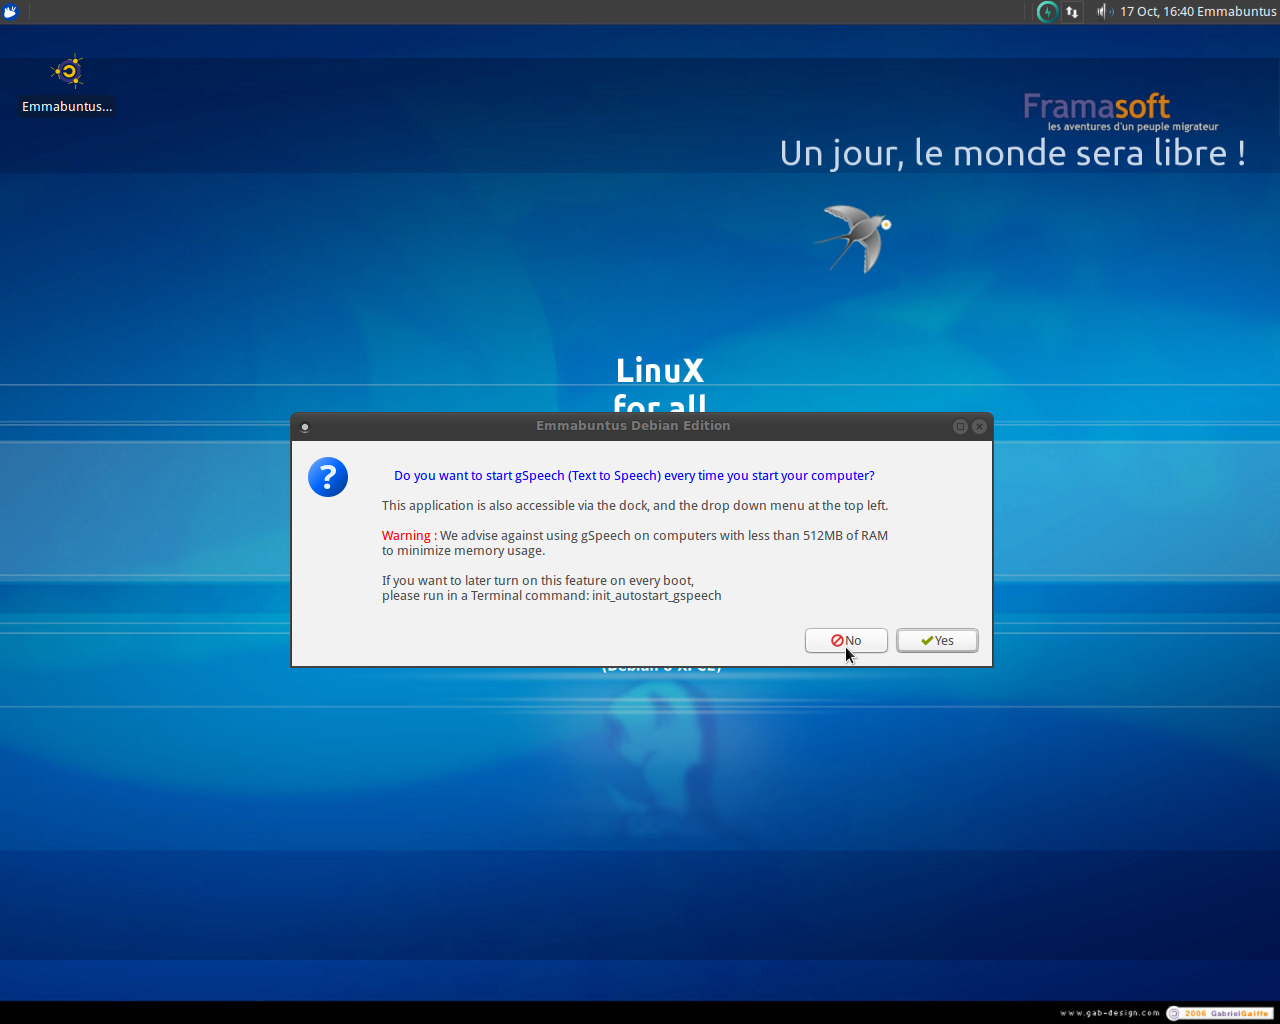
Under Emmabuntüs, the speech synthesis is not an automatic process; you should rather select the text to be read and click on the read button located in the application menu located on the right of the screen top bar, if the synthesis was launched at start-up. Otherwise you need first to launch manually the gSpeech application.
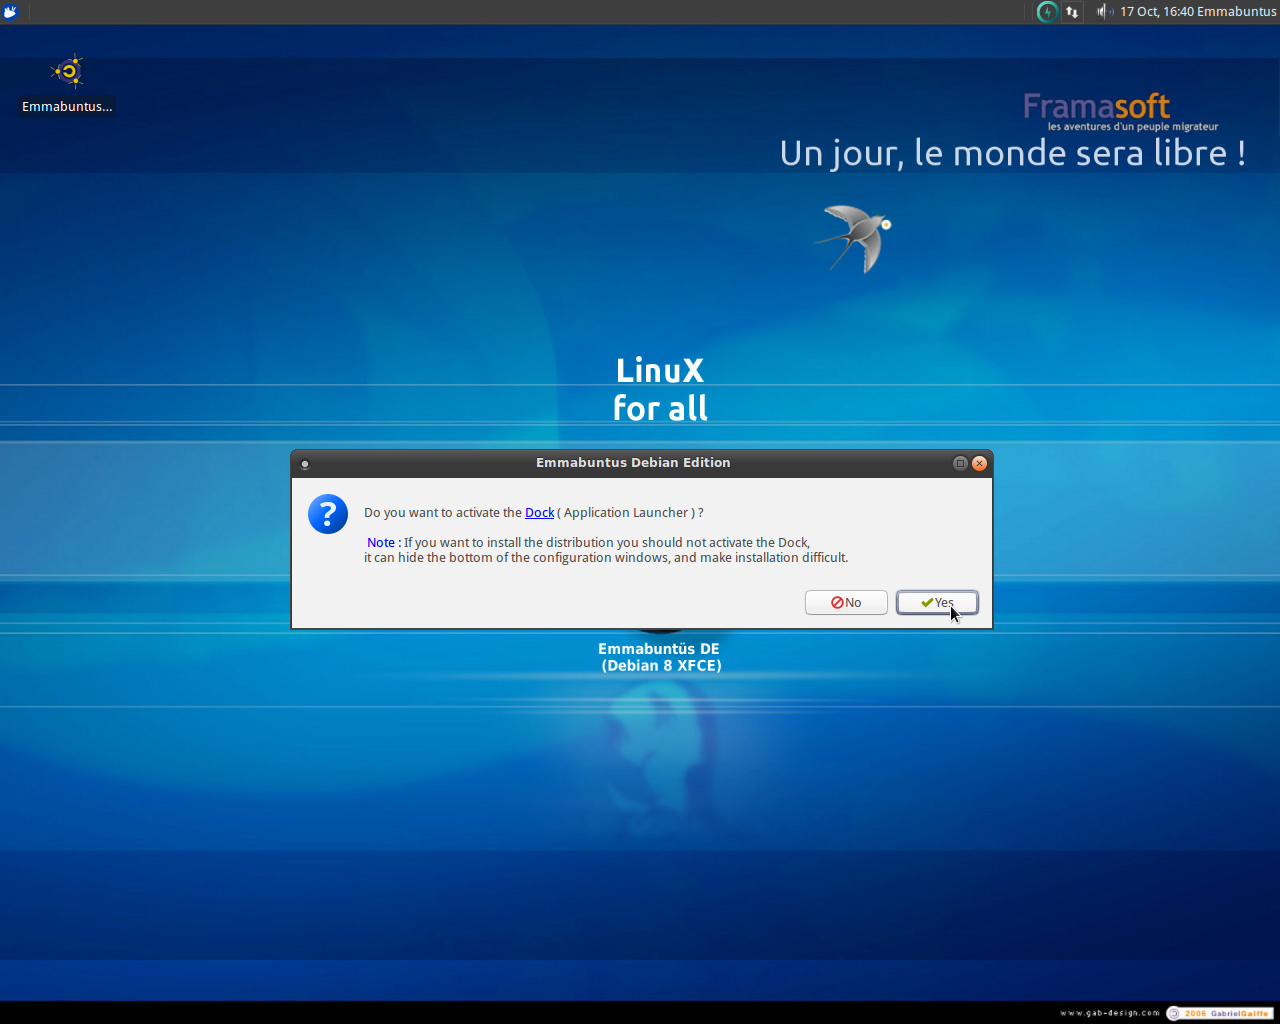
IV-F. Launch bar configuration▲
Request to activate the Dock by default during system start-up :
Request to activate the Dock protection :
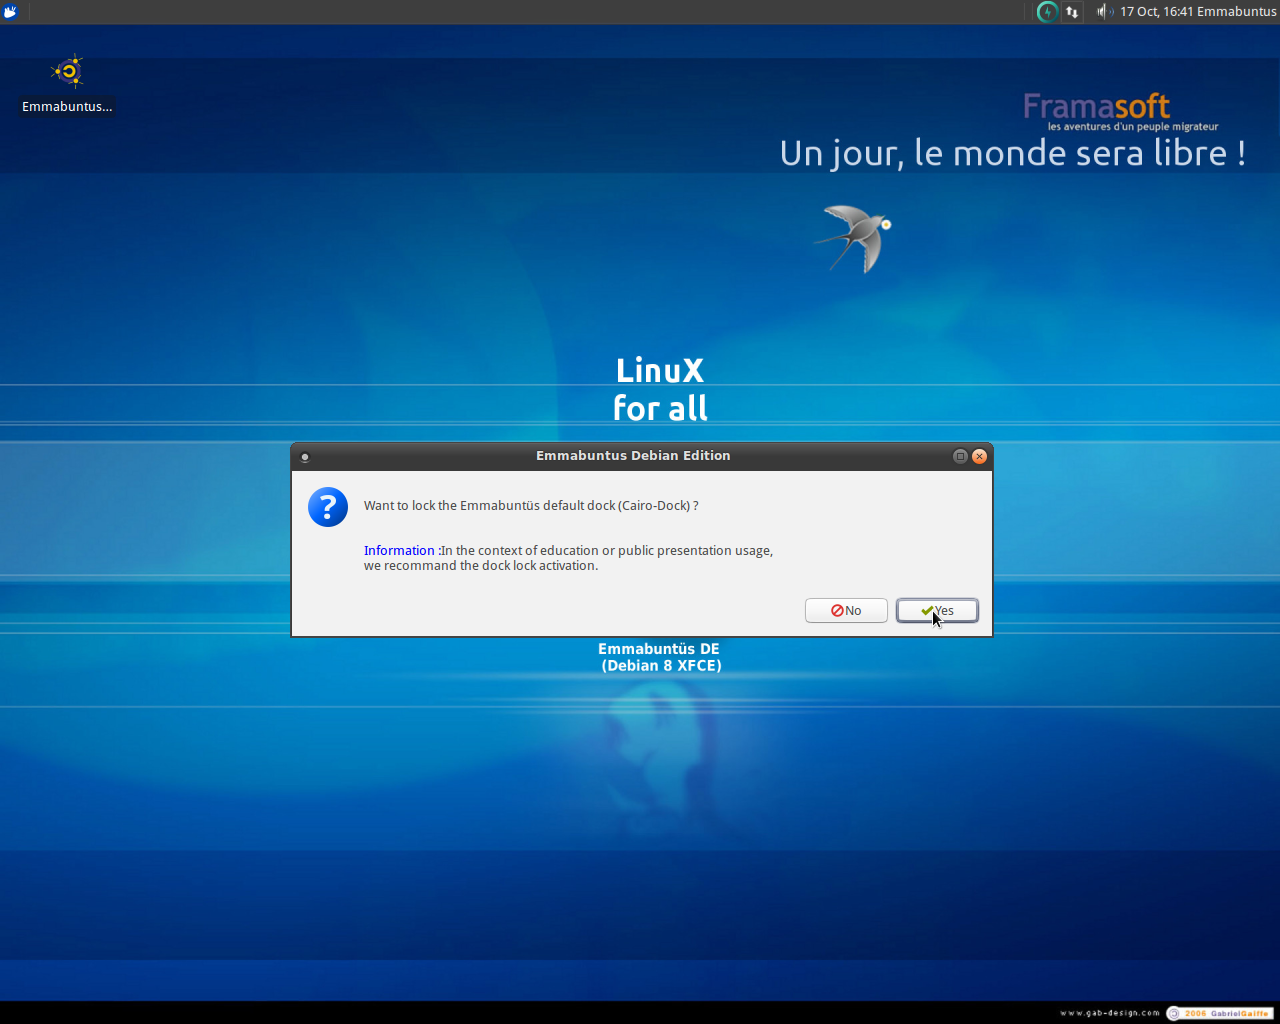
This new feature is very useful when the computer is in a training room, or open to the public. We suggest to lock the dock against some cockpit errors that could happen when it is manipulated.
There are other means to handle the Dock in this new Emmabuntüs DE version, like the re-initialization and the protection against errors. You can find them in the XFCE menu → Others → Utilities
These utilities are protected by system password to avoid wild changes in your configuration.
The dock is located at the bottom of the screen in you can define its type. You can select the configuration “All”, “Simple” or “Basic”, or even cancel the selection operation if you don't want the Dock to be launched automatically.
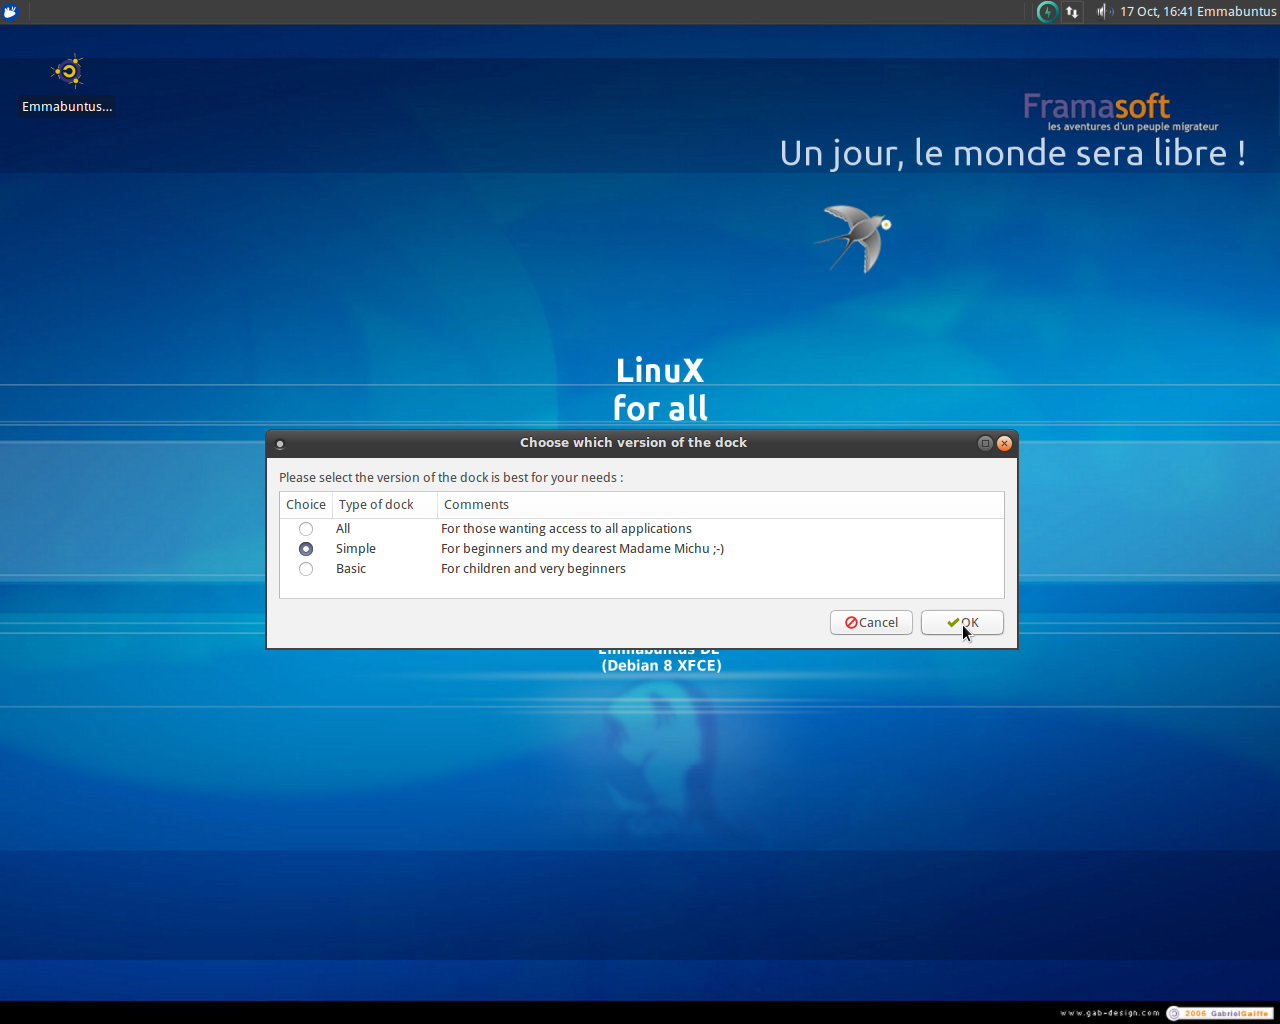
If you have a very old computer and you want to use a desktop environment lighter than XFCE, you should use the ALL configuration of the Dock, which in turn will let you migrate to the LXDE desktop.
If you cancel the selection of the Dock configuration, it will NOT be launched automatically under Emmabuntüs, and you will only have access to the XFCE top menu automatically enriched with the following extensions : task bar, screen selector, desktop display.
You can always punctually launch it by going in the XFCE menu → Others → launch the Dock
IV-G. Non-free software installation.▲
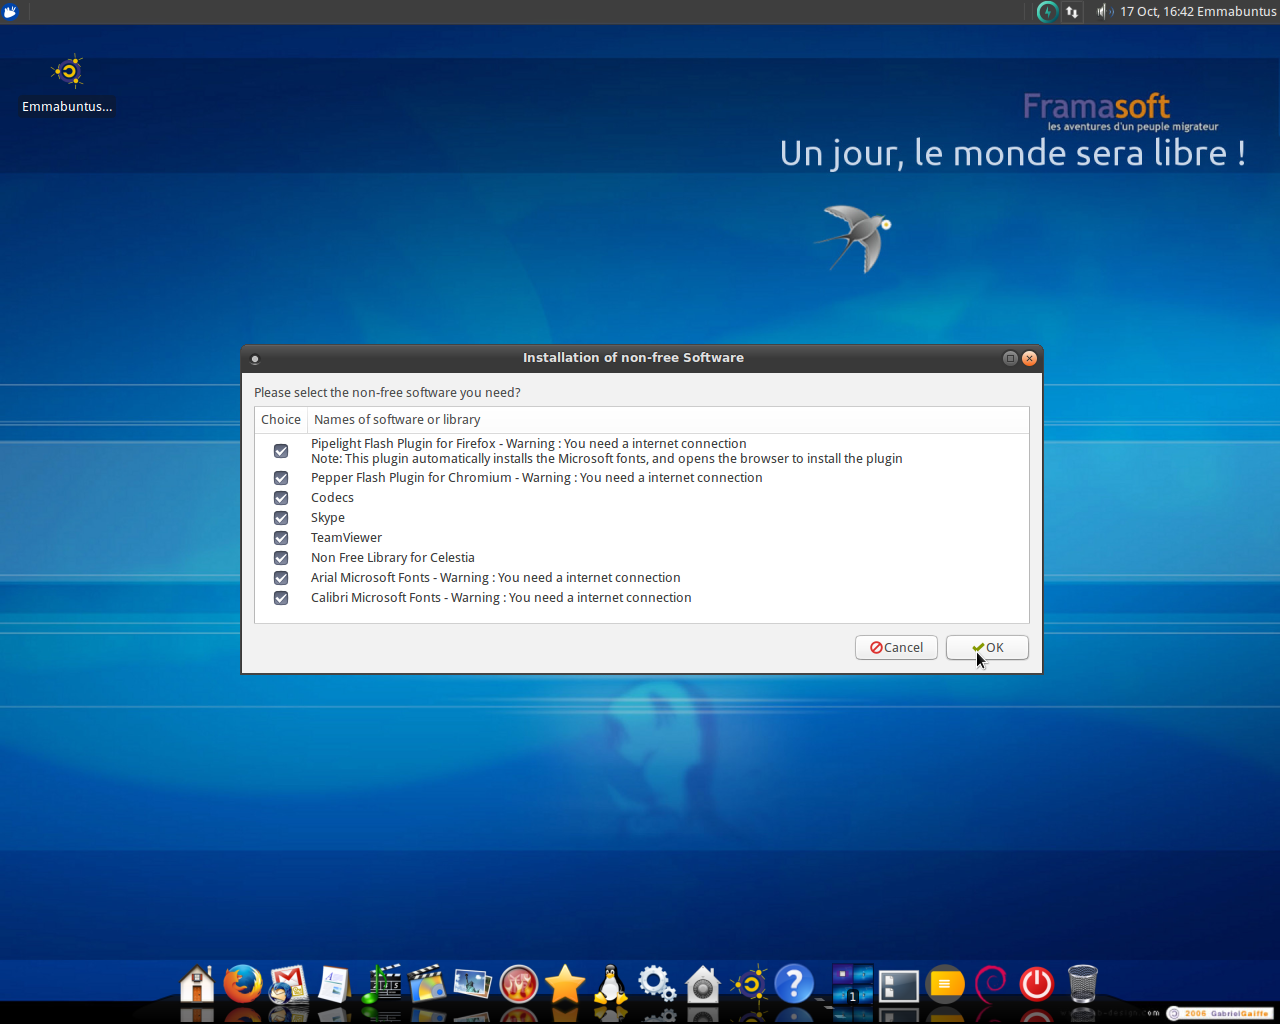
You are given the choice to install or not some non-free software, among which the Microsoft fonts.

You select the on-free software you want to install :
You should then validate this installation request by entering your administrator password.

You will be asked to enter the administrator password (the one you entered during the system installation).
You can refuse to install the non-free software, or install only some of them. You will be able also to install them later on by using the “Maintenance” menu in the application launcher bar at the bottom of the screen.
IV-H. Language removal▲
You are also given the choice of removing the languages you are not going to use. Here too, you have to enter your administrative password.


It is highly recommended to remove the unused languages, in order to dramatically reduce the number of updates.
Don't miss this step !
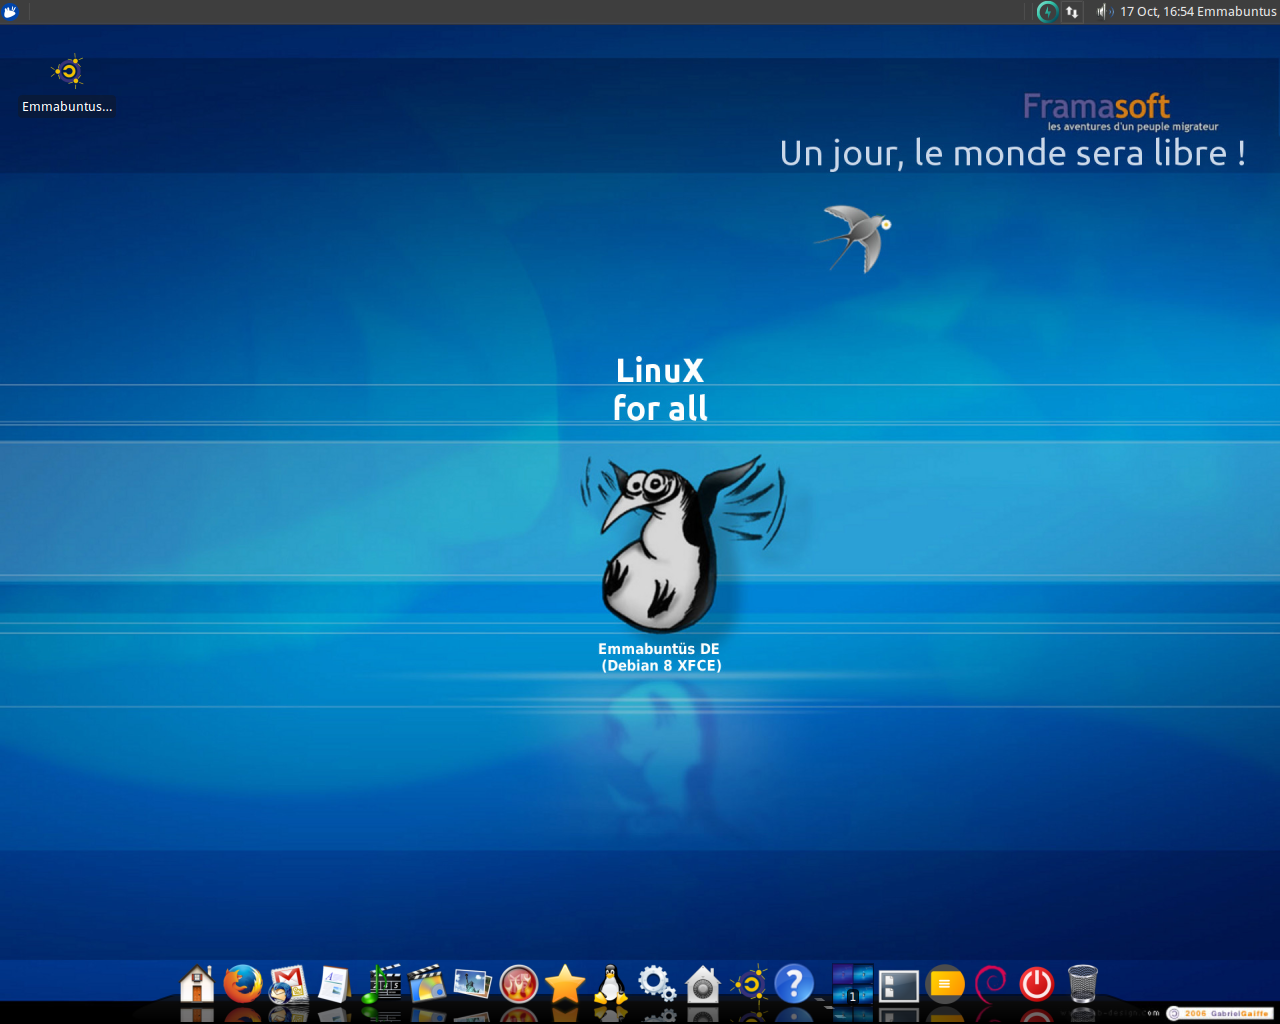
IV-I. This installation is complete. You can start using Emmabuntüs Debian Edition.▲
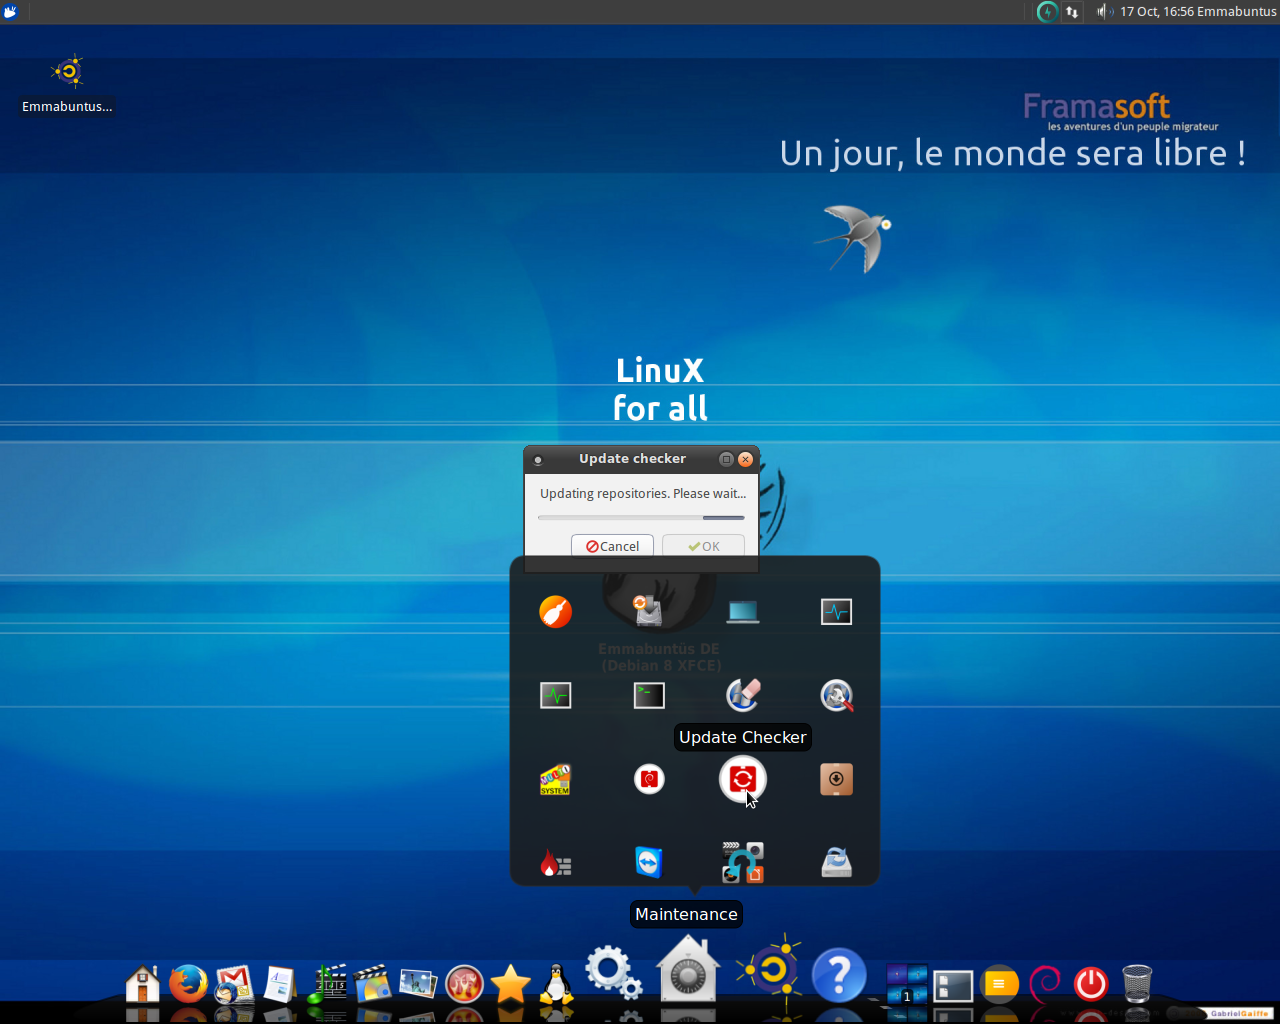
If your computer is connected to Internet, you should install now the available updates. You simply select the Maintenance menu of the Dock and then click on the “Update Checker”.
A system restart will be necessary to take the new kernel into account.
V. LXDE installation▲
If you find out that the Xfce desktop environment is not responsive enough, or consumes too much memory for your hardware configuration, you still have a solution to make your computer more pleasant to use : install the LXDE desktop environment which is included within Emmabuntüs, however knowing that you will lose some of the Xfce features.
V-A. Find the LXDE install icon within the Dock▲
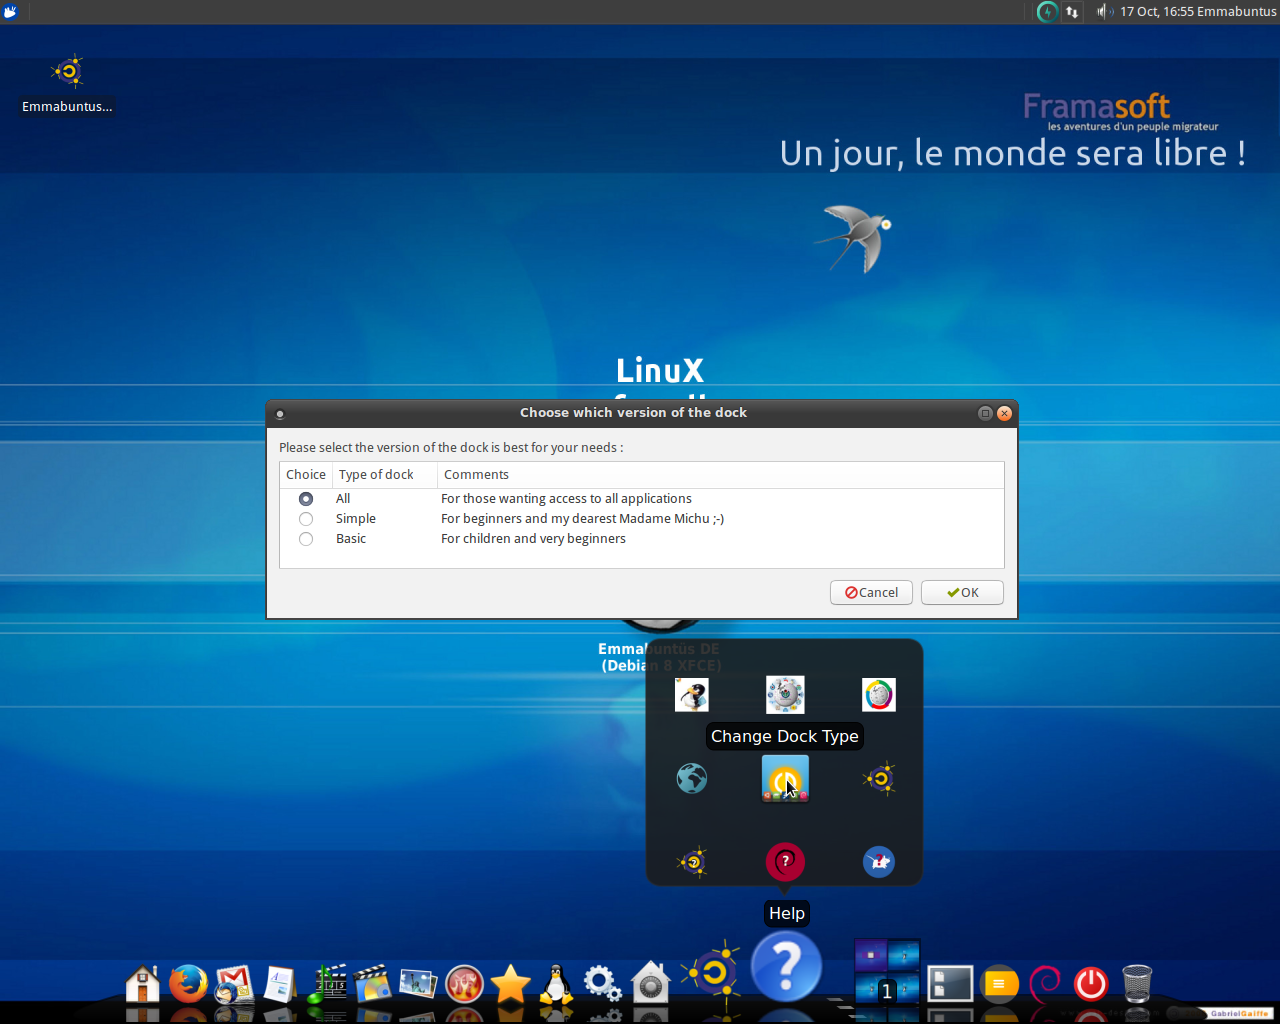
The LXDE Installation icon is only accessible if the Dock is in the “All” configuration. If this is not the case, select the Help menu in the Dock, click on “Change Dock Type”, select the type “All” and press “OK”.
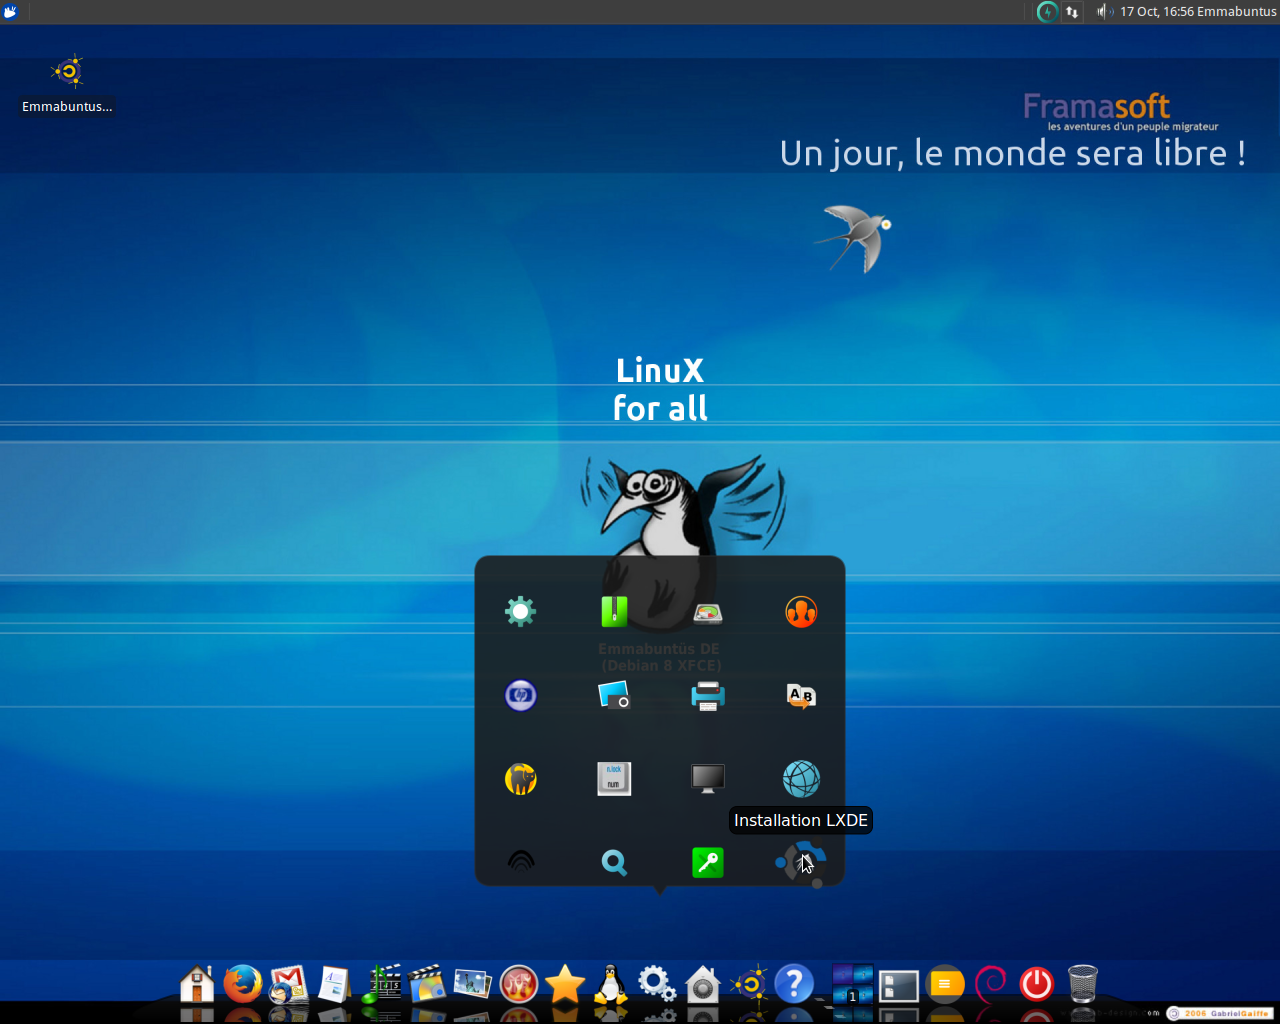
You can then select the “Utilities” menu of the Dock and click on the “Install LXDE” icon :
V-B. LXDE install▲

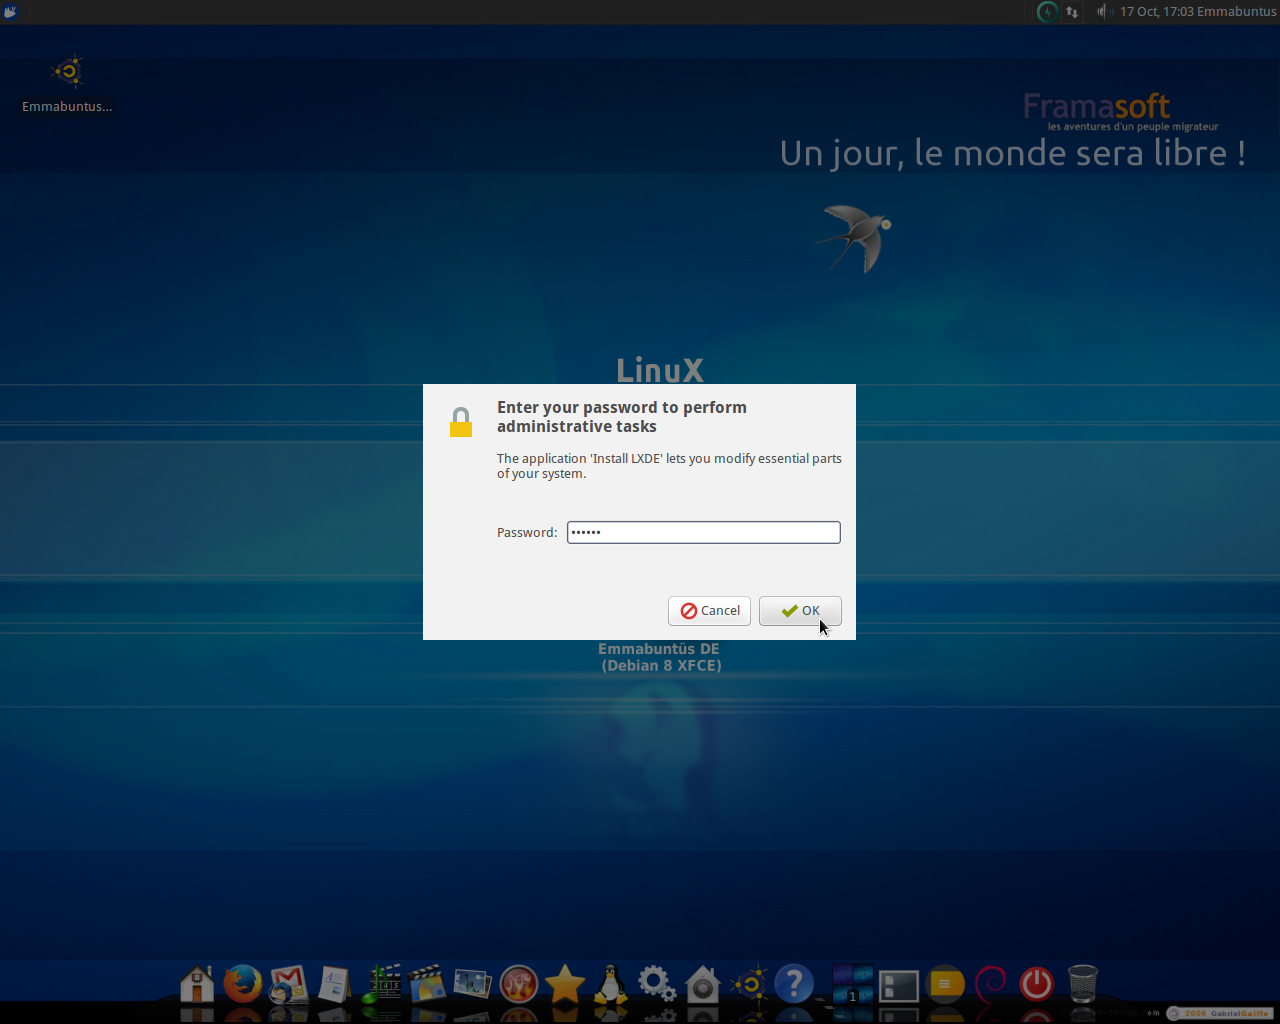
This decision is under the system administrator authority and you must give the password you entered during the installation. You should also confirm.
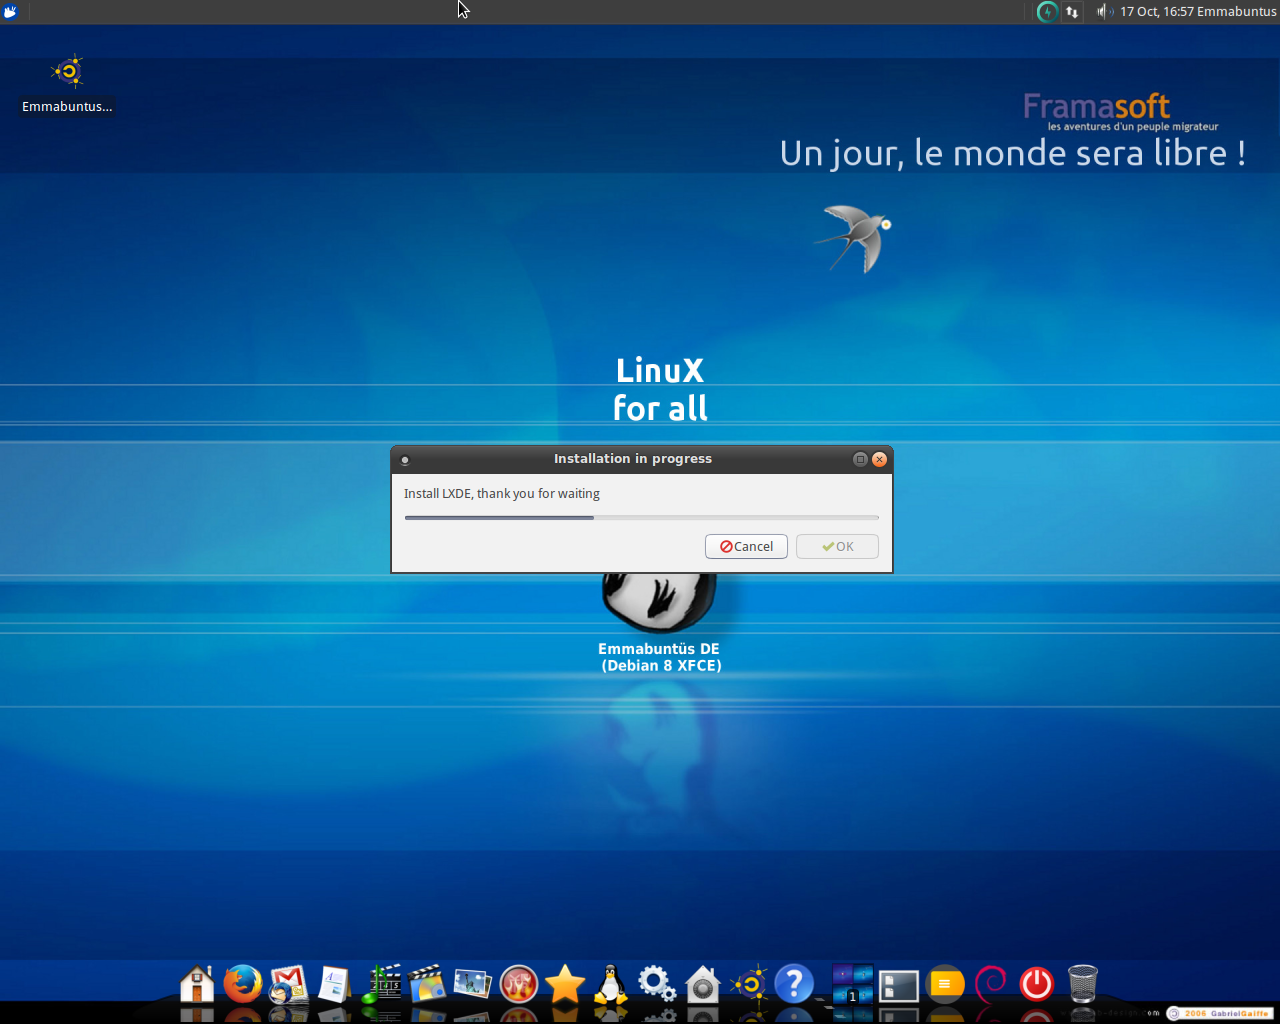
Then the LXDE install is started :
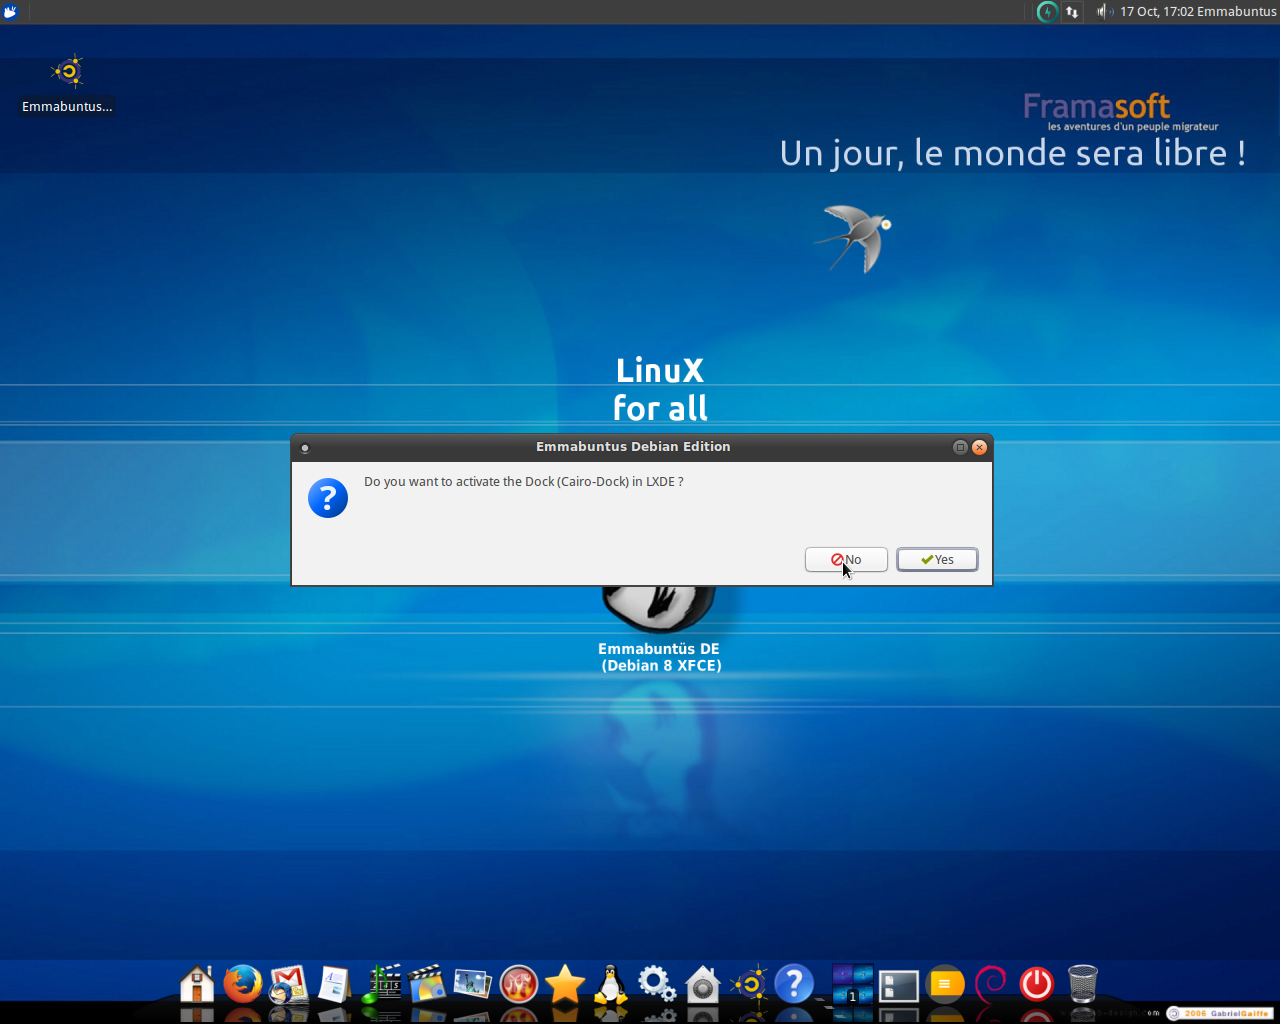
V-C. Activation of the application launch bar▲
If you want an easy access to the various application software, the Dock launch bar is very handy, but as a certain memory footprint. If you really want to optimize an aging computer, select “No”
Si vous voulez un accès aisé aux logiciels, le dock est bien pratique, mais il consomme un peu de mémoire. Si vous voulez vraiment optimiser un vieil ordinateur, choisissez NON.
V-D. Deletion of services▲
In order to make your desktop environment lighter, the removal of several services is suggested. Be aware that once removed, they will no longer be available. Here are some information concerning these services :
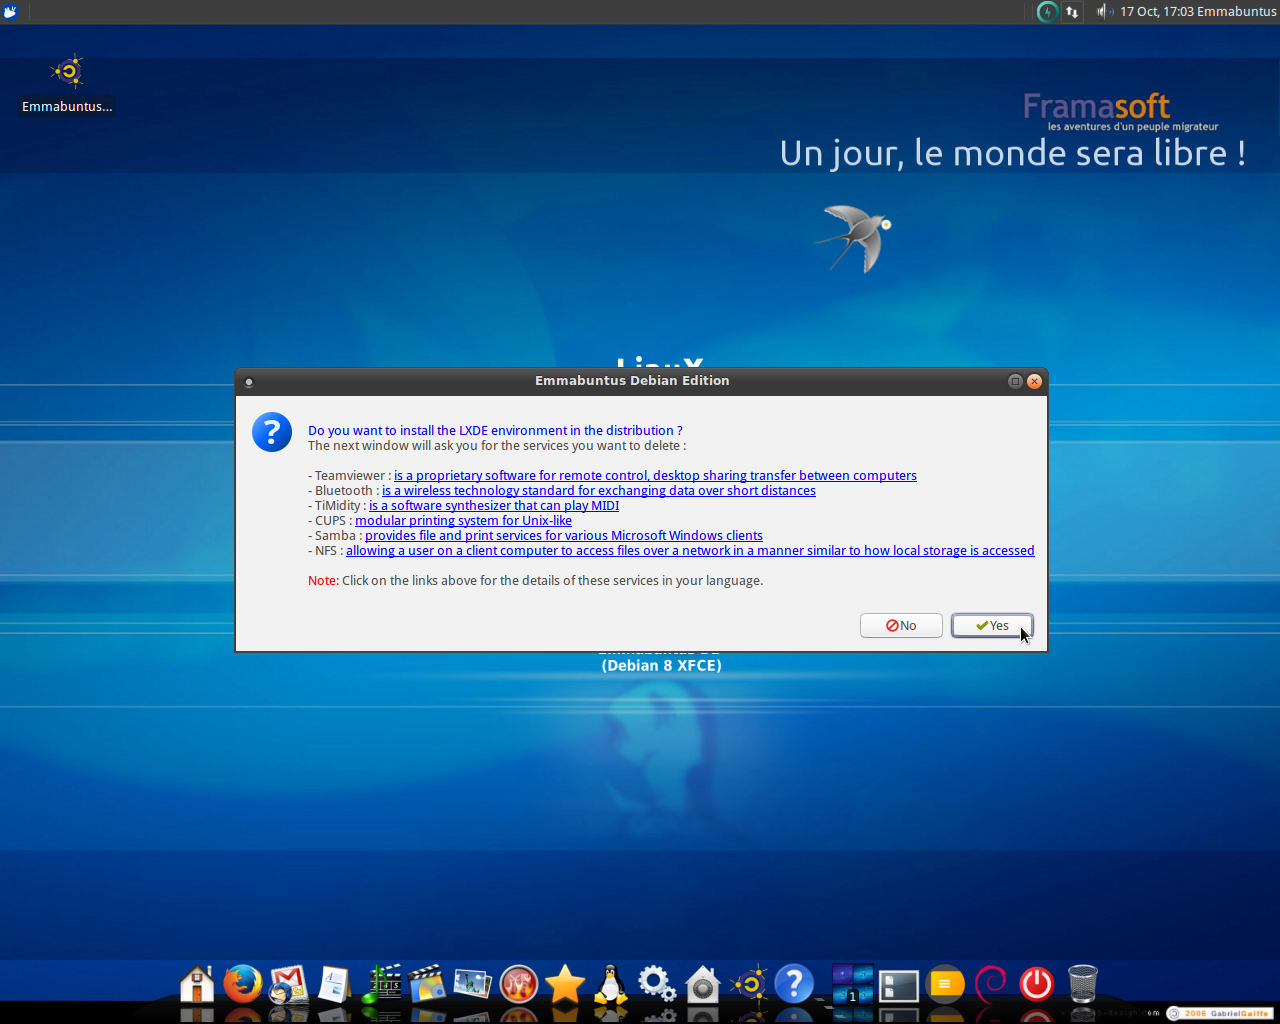
Then you select the services you want to remove :

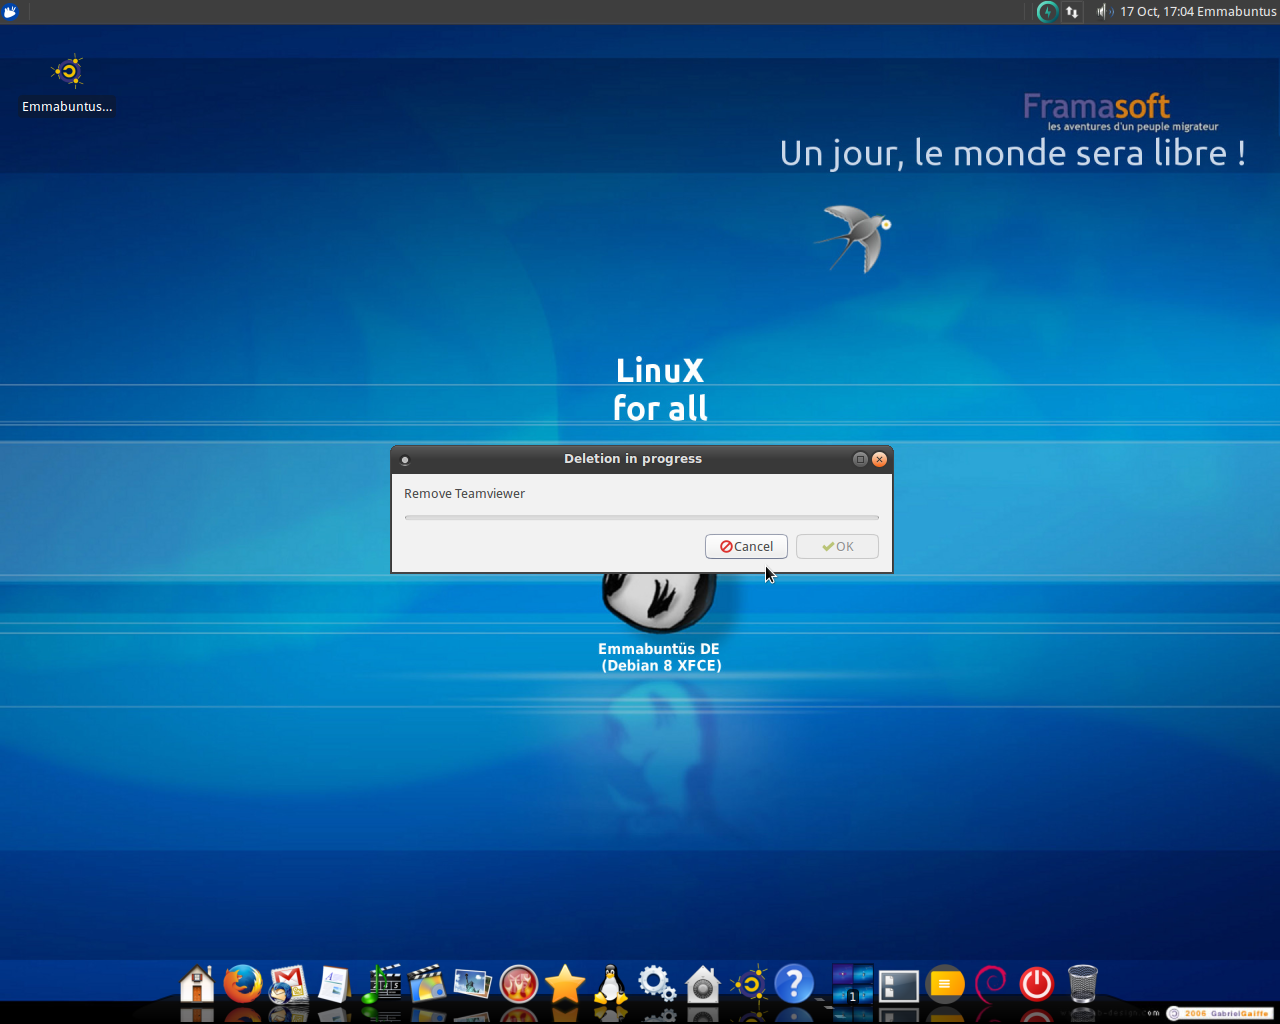
Services being removed :
V-E. Disconnection from the current Xfce session and reconnection to a new LXDE session▲
Logout :
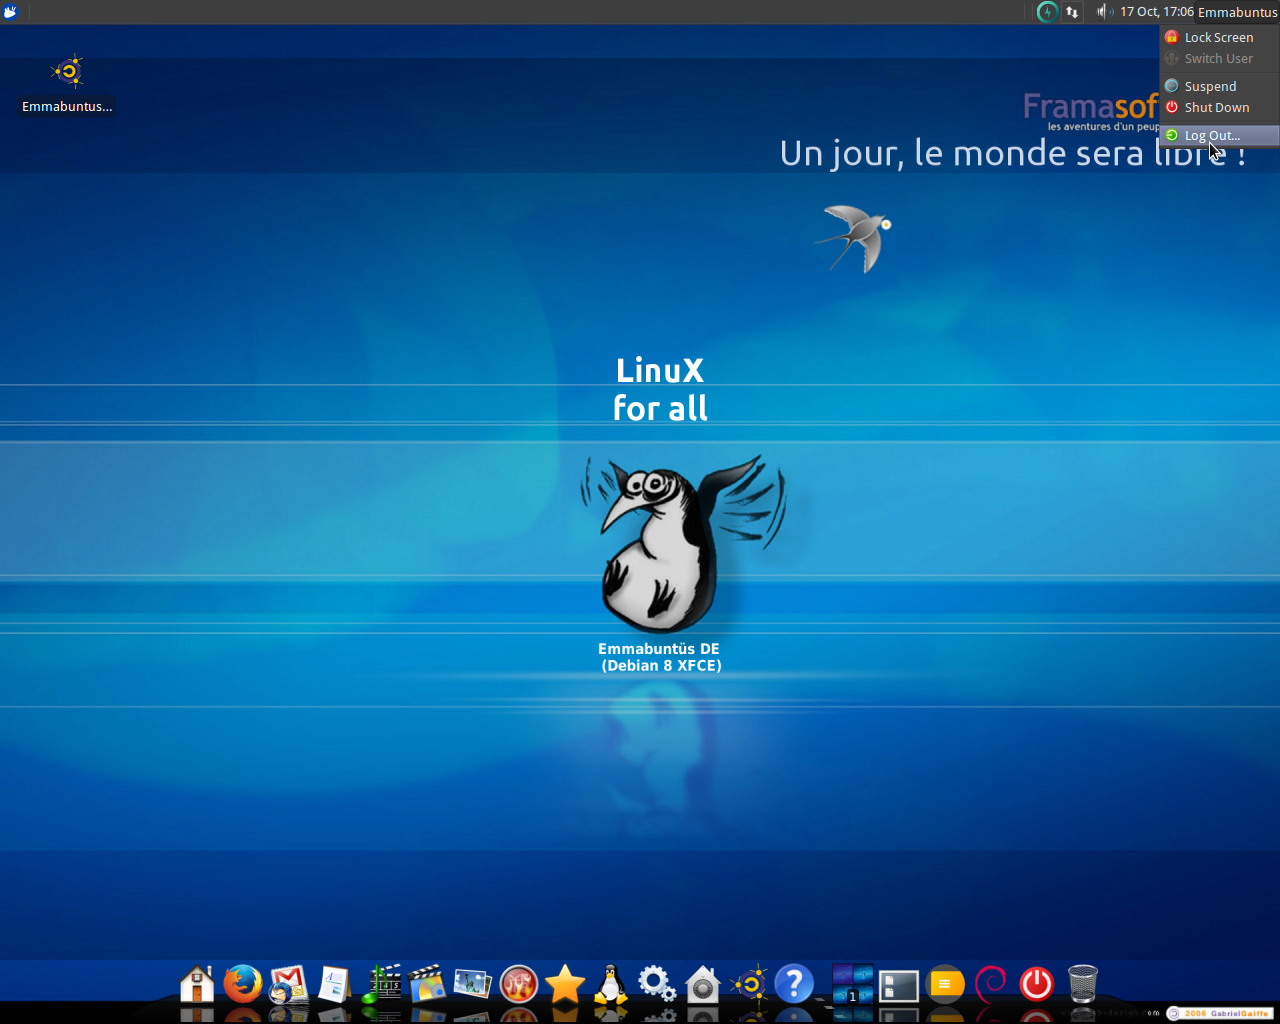

Login back using the LXDE environment:

To select the LXDE environment, click on the icon in the right part of the top menu bar, like shown on the screen capture above.
Welcome in LXDE, your new lightweight desktop environment :

V-F. Speech synthesis activation▲
In order to spare resources, it is recommended not to activate the speech synthesis.
V-G. LXDE memory footprint▲
Using the HtopHtop system utility, you can see that the LXDE environment uses only 126 MB at start-up time.
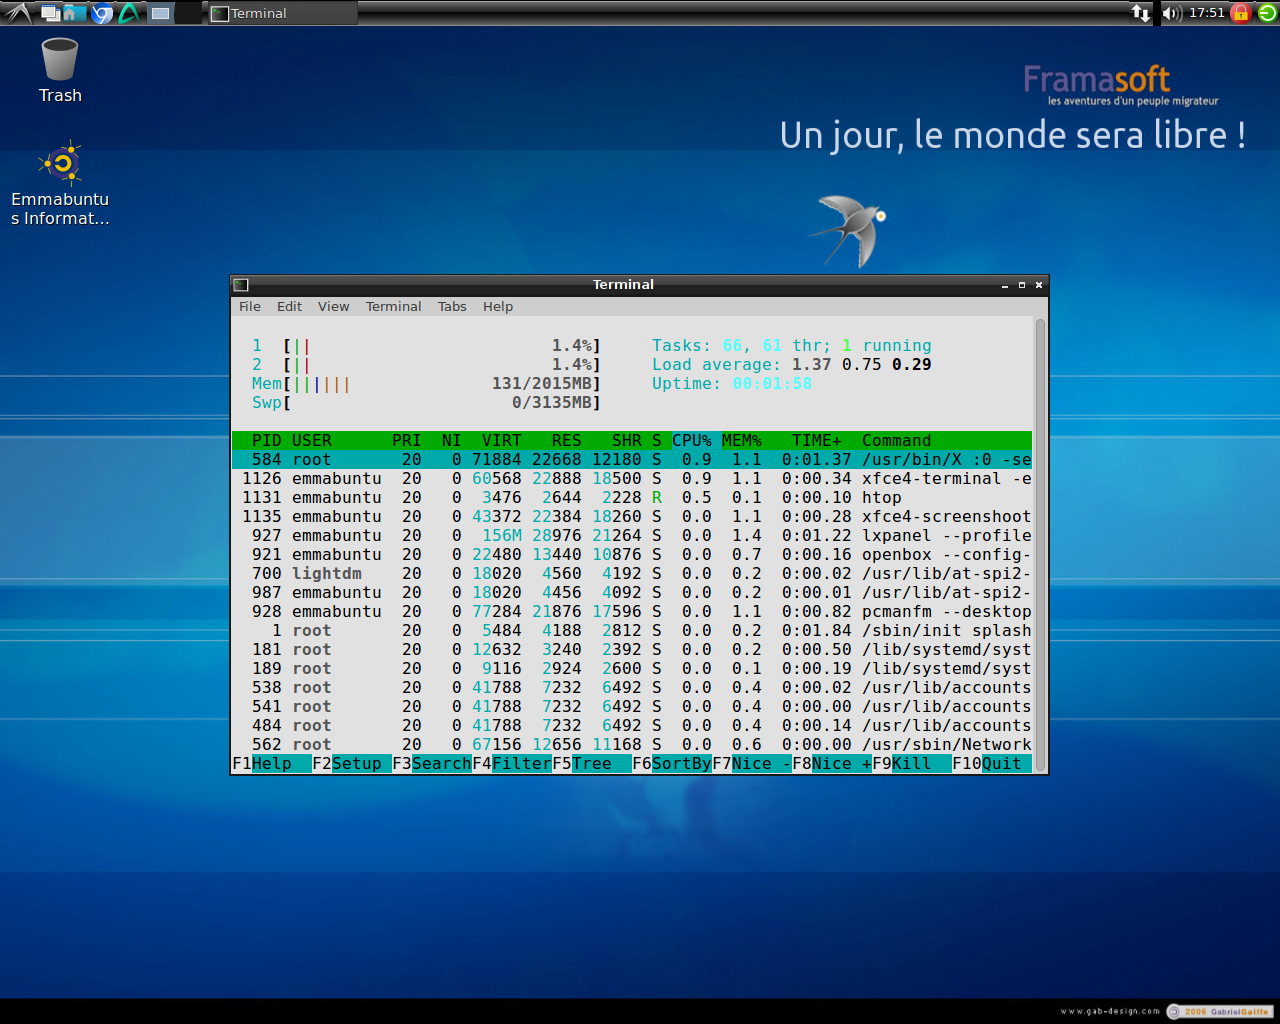
If you run a test where you launch all together the Chromium navigator, the Clementine music player, the Thunar file manager, the Geany text editor, and the Htop system utility itself, you will note a memory utilization of 395 MB, which leaves 117 MB of free memory if you run on a computer equipped with only 512 MB of RAM.

This Emmabuntüs resources optimization with the lightweight LXDE, makes you lose some functionality present in the heavier - but more complete - XFCE. For more information, you can have a look at this comparison of the two desktop environments.
VI. How to create a bootable USB Live-CD for Emmabuntüs Debian Edition▲
VI-A. Create a bootable USB key under GNU/Linux▲
VI-A-1. Using a terminal▲
Plug in your USB key, then launch a terminal in “root” administrator mode, using for example the command
We are going to identify our key by using the command :
blkid
which will give you an output like this :
/dev/sda1: LABEL="system" UUID="3d378712-1b6e-4f66-b9e8-2a6673c62199" TYPE="ext4" /dev/sdb1: UUID="F9B8-E691" TYPE="vfat"
Here we see that our key is identified as UUID=“F9B8-E691”, is formated with the type “vfat”, and holds the partition sdb1. Please take good note of this sdb1, in order not to erase your internal disk by mistake (here it is sda1).
The Debian ISO file should be in the Downloads folder. Let's go there :
cd /$HOME/Downloads
We are now going to transfer the ISO file content to the USB key thanks to the “dd” command.
Please make sure you name the USB Key device “sdb” (the disk) and not “sdb1” (the partition), and change EmmaDE-xx.iso by the ISO file name to be transferred :
sudo dd if=EmmaDE-xx.iso of=/dev/sdb bs=4M ; sync
The time needed to copy all the data on the USB key is obviously depending on the size of the ISO file, as well as the transfer rate of the USB port you use. This operation can last from 10 to 15 minutes without any sign of activity on your terminal.
The terminal will give the control back to you (I.E. display a new command prompt) when the transfer is completed.
VI-B. Create a bootable USB key with a Windows™ PC▲
VI-B-1. With MultiSystem▲
To be able to use MultiSystem with a Windows® PC, you need to boot up first with an Emmabuntüs DVD.
To burn on a DVD your ISO image of the Emmabuntüs Debian Edition distribution, right click on the file and select the command “Burn Disc Image” :

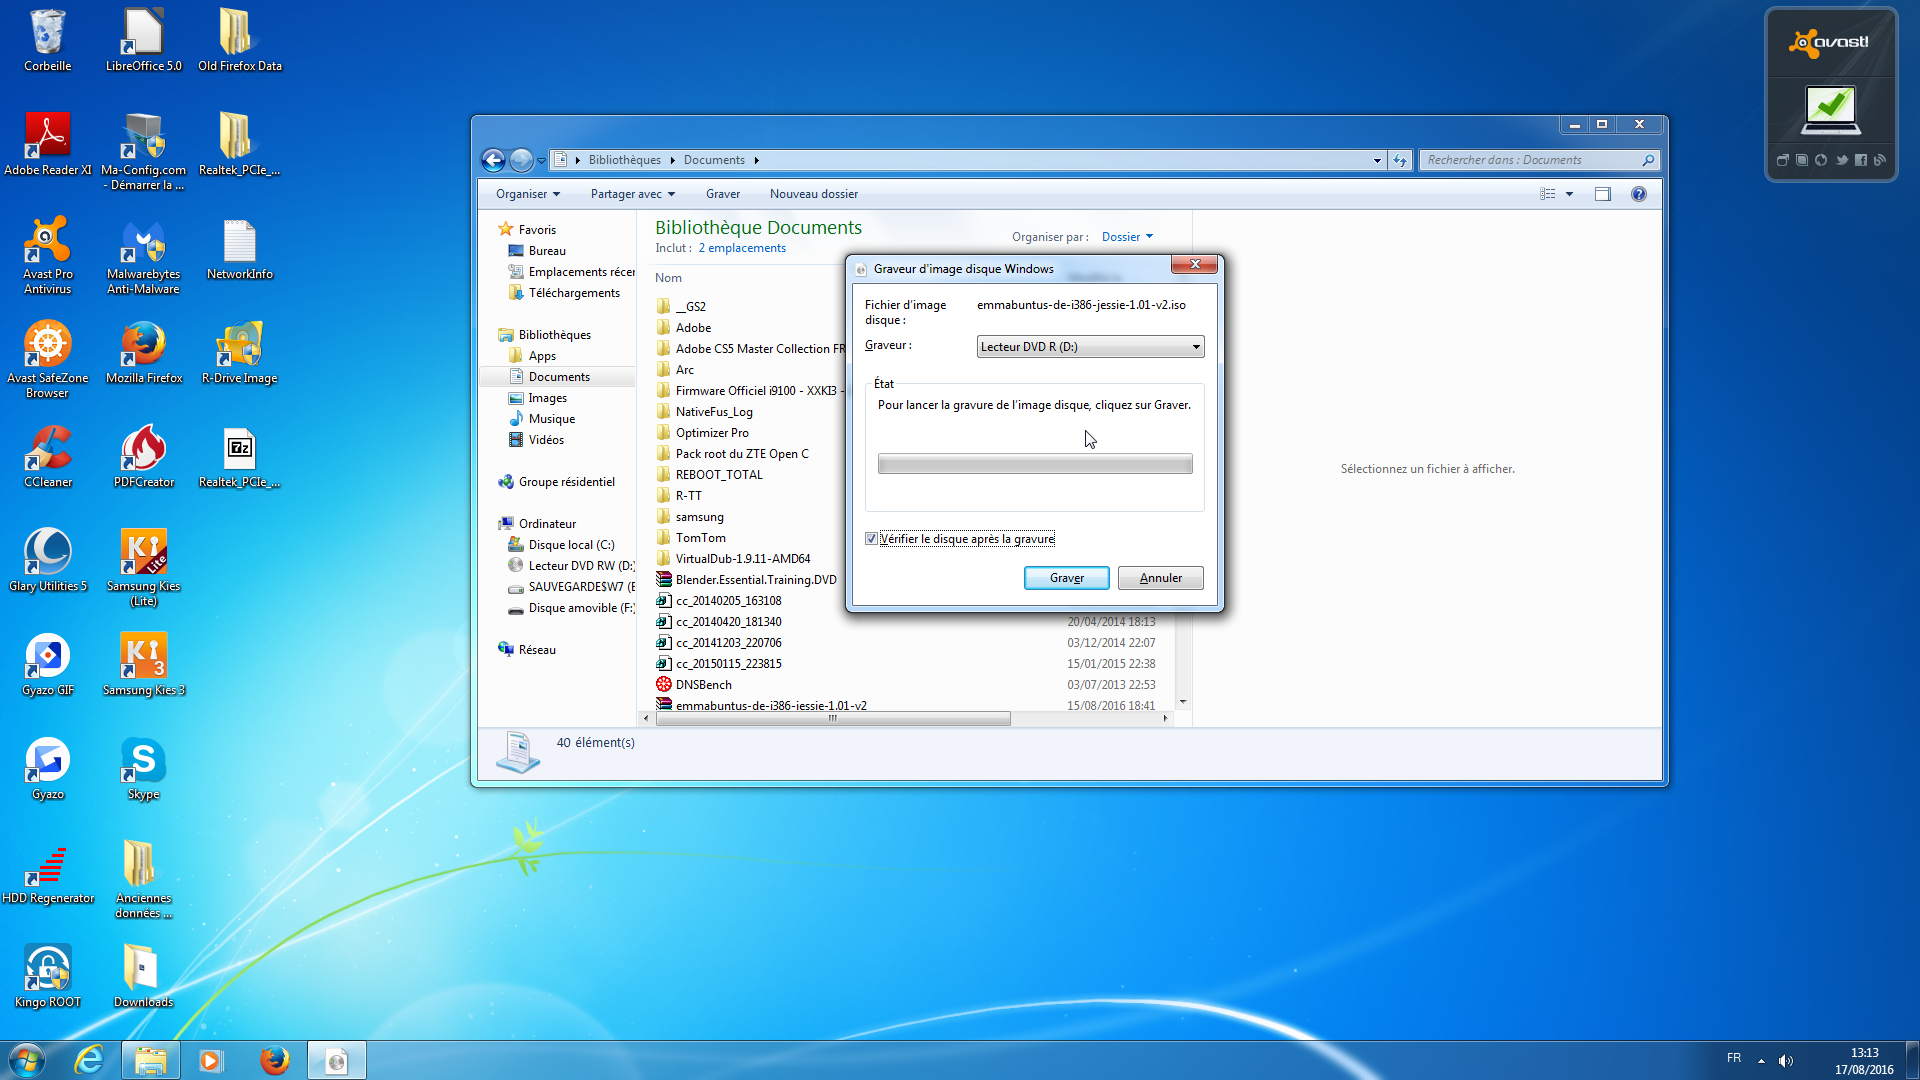
Once the DVD is written you can restart the computer, making sure you boot from the DVD drive, and select the mode “Try Emmabuntüs” (do not install).
As a matter of fact, Emmabuntüs Debian Edition includes MultiSystem within its program library and you can easily create a bootable USB key by following the path of the ISO file on the Windows partition.
You can now use MultiSystem to install Emmabuntüs Debian Edition with an USB key (which is a lot faster than using a DVD).Just make sure the boot order is correct.
VI-B-2. Using MultiSystem▲
MultiSystem is a software which let you easily create independent multi-boot USB key. This means that you can install several operating system on the same USB key, and then chose seamlessly at boot time, through a graphical interface, which Gnu/Linux distribution you want to launch in Live mode.
Since most of the documentation for MultiSystem is in French (like here), please find below some instructions to install it easily under Ubuntu/Debian systems.
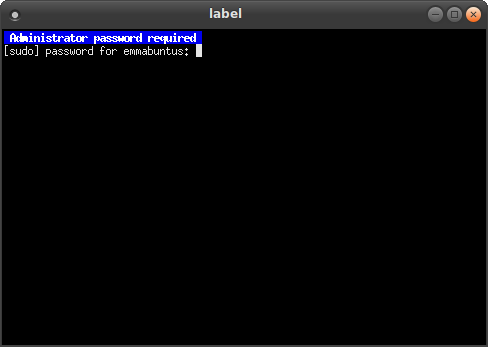
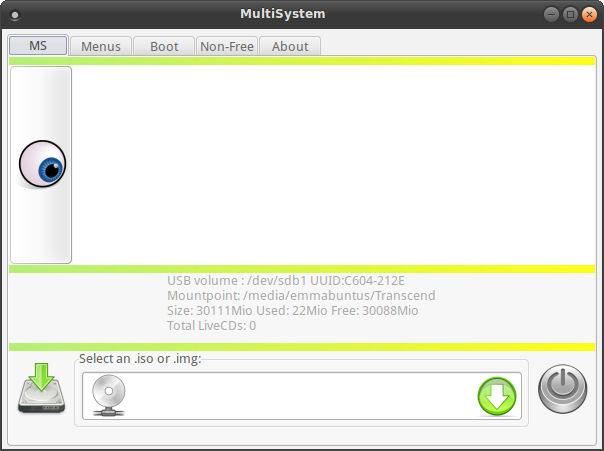
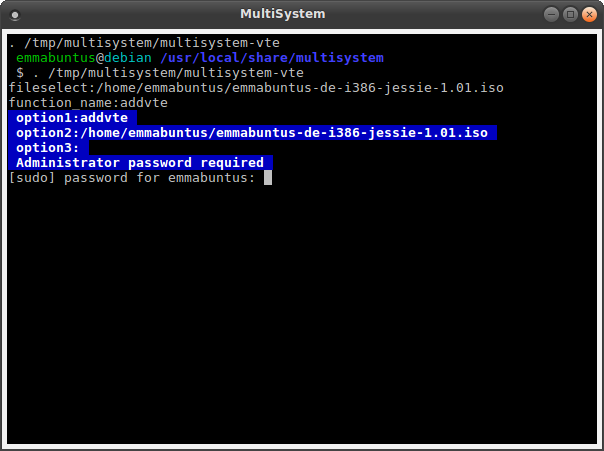
Now you can insert your USB key, mount it and launch MultiSystem. The application is going to find the USB key, will propose to rename it as “MULTISYSTEM”, and ask the administrator password to proceed.

In order to fully complete the renaming operation you need to unplug the key, then plug it back again and relaunch MultiSystem.
If you have a brand new USB key, it is highly recommended to delete the partitions and reformat with the type FAT32. Some factory formatting, even in FAT32, or not recognized correctly by MultiSystem.
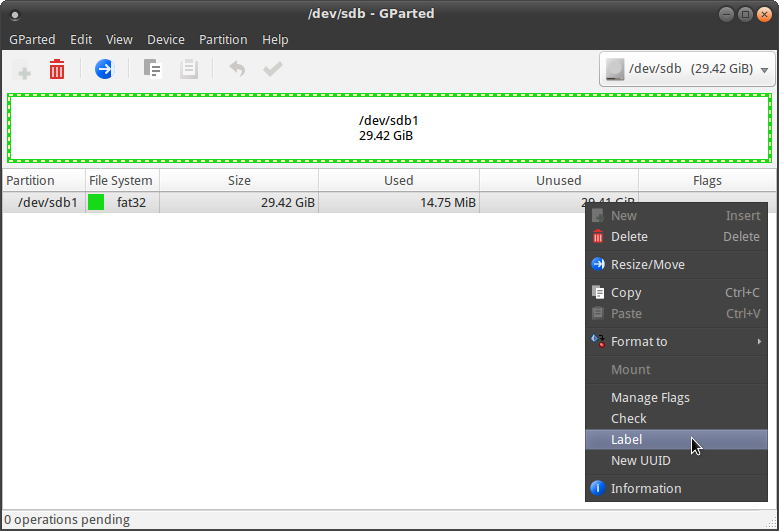
In case Multisystem fails to change the USB key label, we suggest that you do it yourself by using the GParted application. See below the procedure to follow.

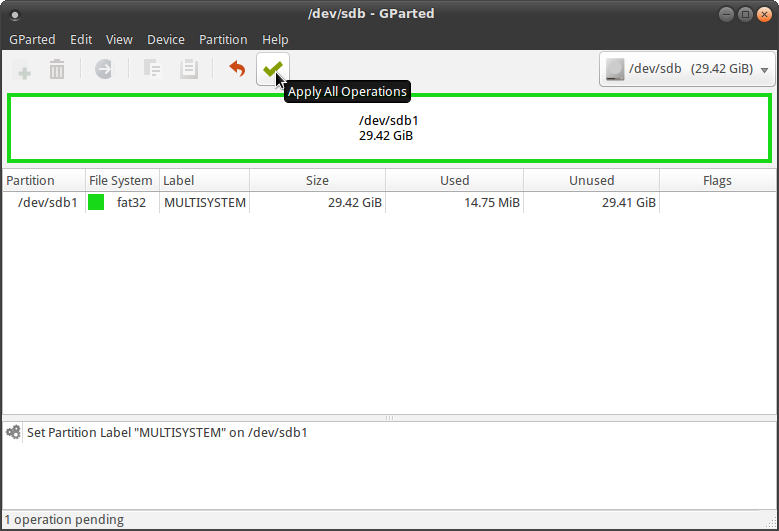
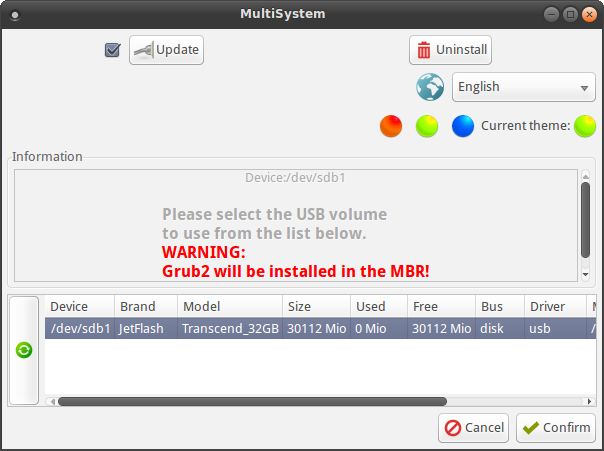
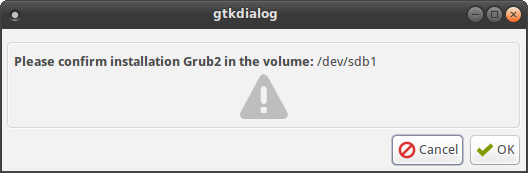
Then, remember to mount the key, for example by opening the file manager, and restart MultiSystem which, in turn, will propose you to format in Fat32 and to install the GRUB2 loader. Accept.
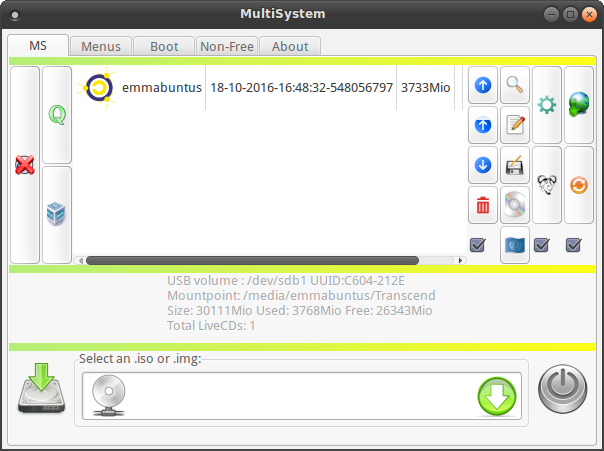
The Multisystem window is open.
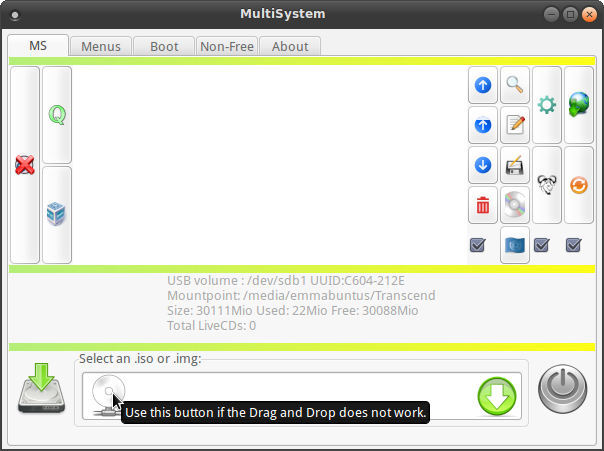
To have access to the advanced parameters, click on the eye in the left panel. You can add several utilities like the Plop Boot Manager which allows you to create a bootable CD on the USB key (useful when the computer BIOS does not have the capability to boot directly with an USB key), SuperGrub2 Disk which allows to retrieve a Grub startup, or Memtest to verify the integrity of the memory bars (RAM).
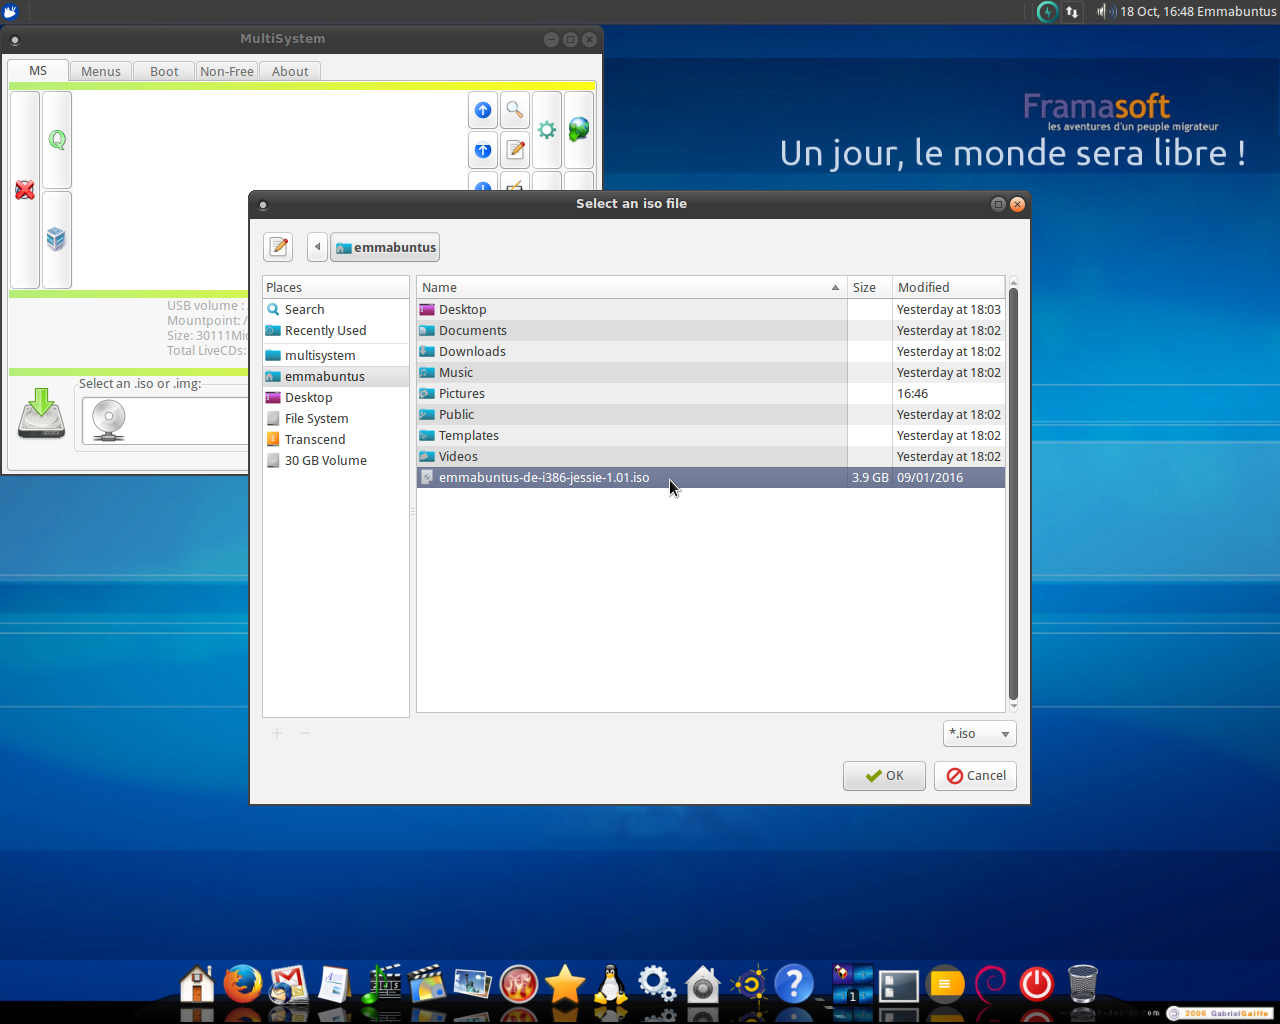
To install a distribution on the key, you can either make a drag and drop of the ISO in the bottom box, or use the disk button to navigate to the file and select it. The administrator password will be asked, and then ISO image will be uncompressed on the key, and the Grub2 parameters on the key updated.
Now your Live-USB is ready ! You can restart your computer, but remember first to change the boot order to make sure the system will start with the USB key.
VI-B-3. With Rufus▲
Rufus is a utility that helps format and create bootable USB flash drives, such as USB keys, memory sticks, etc.
This is the recommended ISO transfer tool under Windows®.
- First, plug your USB key in the computer.
Rufus is going to erase all the content of the key. If you have important data on it, please save them on another medium.
- Download the Rufus software using this dedicated web page :
http://rufus.akeo.ie/?locale=en_US -
Launch Rufus, chose your preferred language (click on the top right icon) and fill in the various fields as follows :
- “Device”, select the USB key you want to use for this new distribution.
- “Partition scheme and target system type”, select “MBR partition scheme for BIOS or UEFI”.
- “File system” : use “FAT32 (Default)”.
- “Cluster size” : keep the “xxxx bytes (Default)”, where xxxx is usually 4096.
- “New volume label” : pick a meaningful name like, for example, “Emmabuntus-DE Install”.
- Check the “Create a bootable disk using” box and select “ISO Image” (assuming you downloaded an ISO file, which is usually the case).
- Then click on the disk icon next on the right, and find the Emmabuntüs DE ISO file (you presumably downloaded recently).
- Make sure the “Quick format”, “Create a bootable disk” and “Create extended label and icon files” check box are ticked.
- Then press the “Start” button to launch the precess.
Wait a little while and you will hold a bootable Emmabuntüs Debian Edition USB key.
You just need to reboot your computer from this USB key and launch the installation.
VII. Help▲
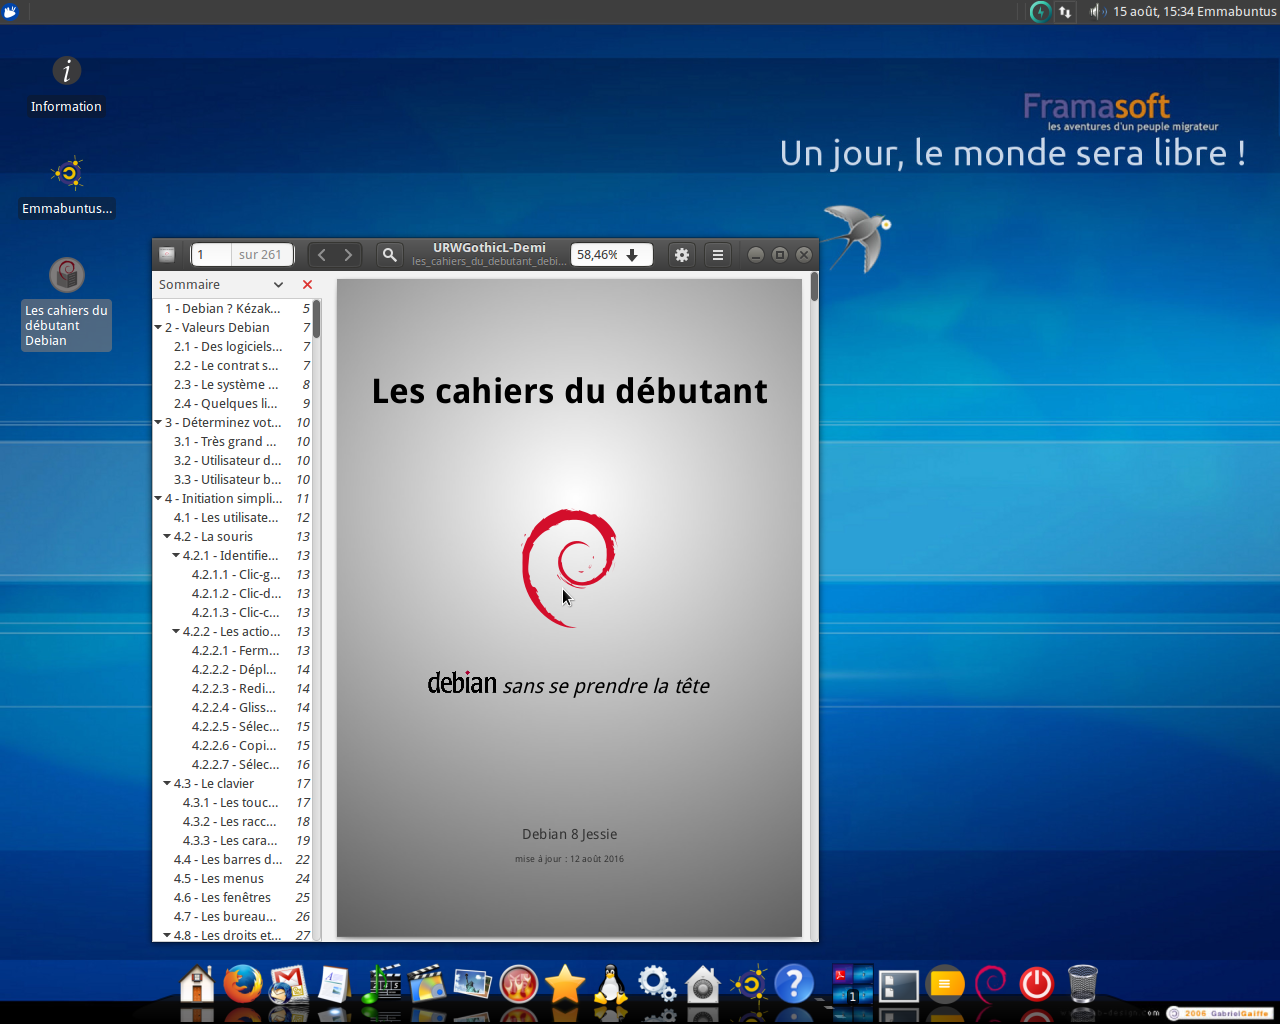
If by chance you can read the French language, please consult Les cahiers du débutant pour Debian (unfortunately not translated in English yet), which is also available within EmmaDE 1.01 (Icon on the desktop).
You don't know exactly which program to use on your Emmabuntüs system, this web page is for you (language selection near the top). We suggest to the beginners in the GNU/Linux world to read the article “Easy migration from Windows XP to Linux”.
You can also get a list of software equivalents between Windows and GNU/Linux here.
And if you have any questions, the Emmabuntüs Forum (French/English) and the Debian Forum are there for you.
VIII. Conclusion▲
We have seen that a classic installation of Emmabuntüs Debian Edition is as easy as installing Debian, followed by one step to select the non-free software, and another optional one to install the LXDR lightweight desktop environment.
When you boot from the DVD or some USB Key handlers, several modes of installation are available. They can be invoked in the first Installer menu in order to minimize the number of data entry requested during the installation process in the refurbishing workshops.
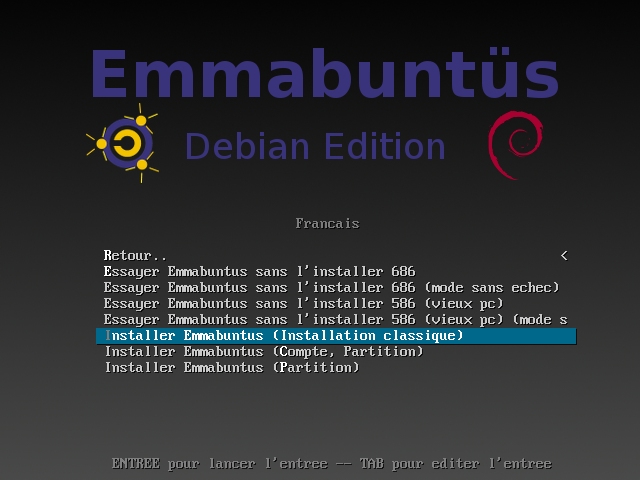
- Entry : ”Install Emmabuntus (Account, Partition)”
- Entry : “Install Emmabuntus (Partition)”
The mode “Install Emmabuntus (Partition)”, creates the administrator account “Emmabuntus”. During the post-installation all the input boxes are pre-filled by default, to avoid boring repetitive operations.
For the time being, these installation modes are available in French language only.
Using a good quality USB key, instead of a DVD, is a very good solution in the frame of the computer refurbishing, because tend to malfunction after few years of intensive usage.
In addition, the USB installation is three time faster than when using a DVD.
When transferring the Emmabuntüs on an USB key, the MultiSystem software retains the installer menu of the DVD, with the special entries to accelerate the refurbishing tasks within the French workshops.
For computers not supporting the bootstrap from the USB ports, a Boot CD based on the Plop Boot Manager can be downloaded here.
All these different procedures can be found in the Emmabuntüs Wiki article How to recondition old boxes with Emmabuntüs.
IX. Acknowledgements▲
Thanks to ideefixe who built the initial frame of this tutorial for Emmabuntüs 2 & 3, based on Ubuntu.
Thanks to Zoom61Zoom61 for helping with the publishing process.
Thanks to f-leb for the elimination of the grammatical and spelling errors.
A big thank-you to arpinux for his sound technical advices during the conception of EmmaDE, the writing of this document, as well as his cahiers (French) which are the main document to support for the Emma DE beginners.
And an enormous thank-you to Ian who passed away prematurely, and without whom this new adventure won't be possible. We will keep in our hearts an eternal gratitude for the total body of his work.

