


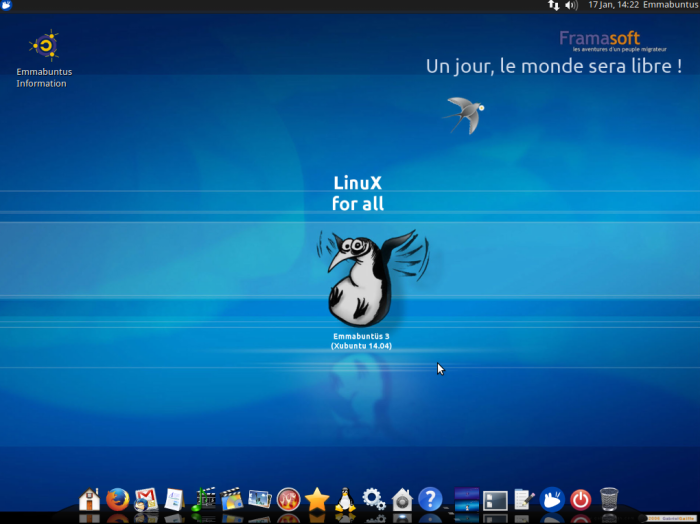
1. Introduction▲
Emmabuntüs is a GNU/Linux distribution. This project was launched in 2011 by the Emmabuntüs Community. It is a full “ready to use work and leisure station” distribution which greatly eases the refurbishing of old computers given to humanitarian associations like Emmaüs, helps the beginners to discover the GUN/Linux world and expand the lifetime of aging computer hardware.
This tutorial explains how to install Emmabuntüs 3, based on Xubuntu 14.04 LTS. We strongly suggest to the beginners to read the paper Replace the retiring Windows XP with Linux before starting this installation.
2. Prerequisites▲
The following requirements are mandatory before starting the installation:
- Hardware configuration including a 2,0 GHz processor, 40 GB on the hard disk drive and 1024 MB of RAM.
- Availability of the 3.5 GB ISO Image. Download here;
- Please verify the MD5SUM of this ISO;
- Burn this ISO image on a DVD with the « burn an image » function of your Burning SoftwareInfrarecorder ;
- When you start the computer from the DVD (how to modify the boot order) you can use the option “Check disk for defects” displayed on the first menu (see screen capture below)
We also recommend to make a first test in live mode to verify that there is no compatibility issue (1 GB of RAM is needed to run a live DVD or live USB session).
Emmabuntüs is designed to be installed without Internet connection. Please unplug your Ethernet cable and disable the WIFI device!
3. Installation▲
Insert the Emmabuntüs DVD in the CD/DVD reader and start your computer
3-A. Starting Up▲
If the BIOS is configured to boot first from the CD/DVD reader - and it is usually the case - you should see at the bottom of the screen a pictogram (The Vitruvian Man). Press the space bar and you will see the following screen which let you choose the language you want during the installation process (English by default).
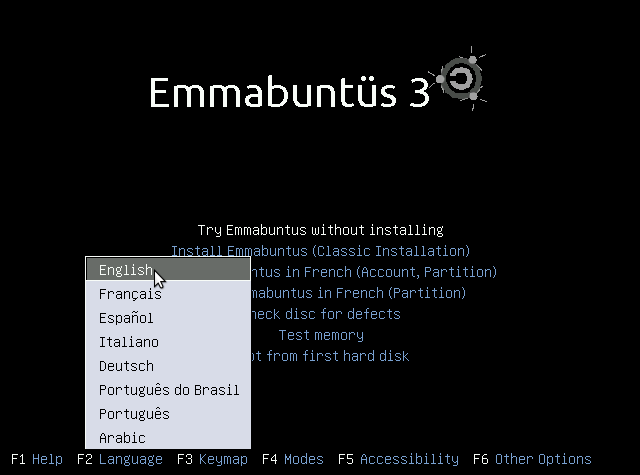
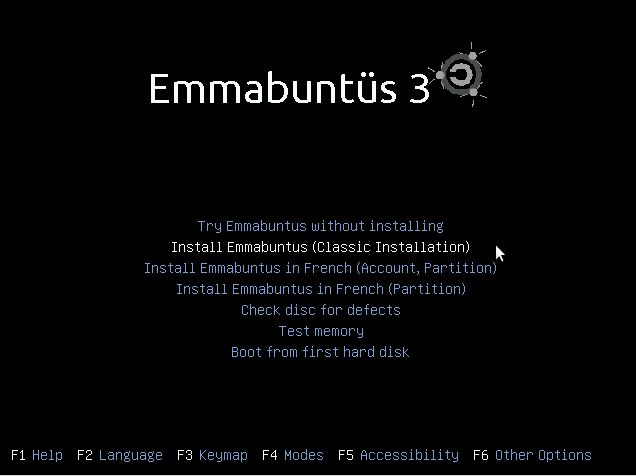
Pick the option « Install Emmabuntüs (Classic Installation) ». The installation process will start:

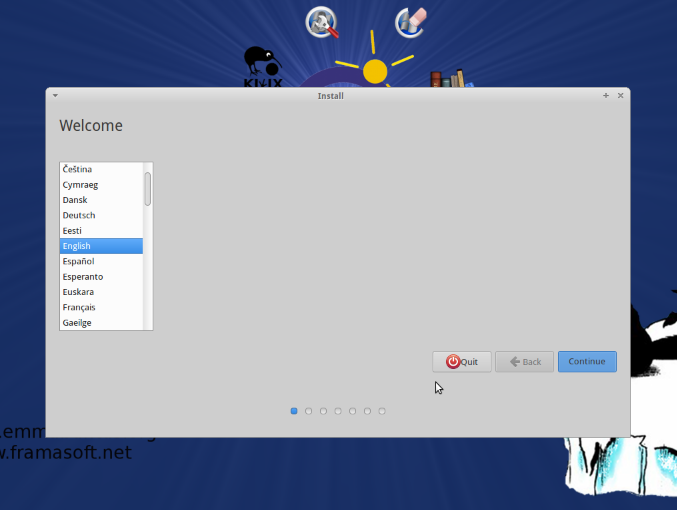
You are asked to confirm your language of choice:
Then the install preparation window is displayed:

The installer offers you to download updates during the process in order to install some third party proprietary software (Flash, MP3).
Please leave this options unchecked, the non-free software installation will be offered during the first restart after the installation is complete. Then click on “Continue”.
3-B. Partitioning▲
The partitioning will divide the hard disk drive into several partitions and format them.
Before anything else you should think about backing up your important data; the formatting is a very dangerous action which might badly corrupt your data.
Depending on your current configuration, Emmabuntüs will propose you a limited number of choices:
- If you want to keep another Operating System on your machine, like a dual boot with Microsoft Windows or another GNU/Linux distribution, choose the option “Install next to...”. This option will show up only if you have an OS already installed on your machine. You just need to click and choose the amount of disk space you want to keep for the old system. Keep in mind that you will need a minimum of 16 GB for Emmabuntüs itself. Be aware that at the end of the installation process, the boot-loader of the old system will be replaced by the Emmabuntüs one.
- If you want to delete the existing system, or if your hard disk is empty, choose the option “Erase disk and install ”
- If you have some free unallocated space on your disk, you can use it to install Emmabuntüs; to do so pick the option “Use the maximum space available”.
- If you are an advanced user and you know what you are doing, pick the option “Something else”

When your choice is made, click on “Continue”
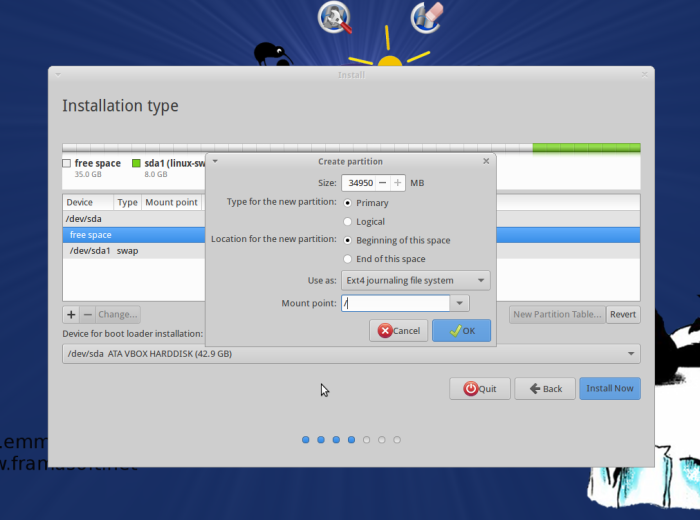
Here we have chosen “Something else” and we defined two partitions. One is /dev/sda1 as swap partition of 8 MB and the other /dev/sda2 as system (root) partition of 35 MB, and of type ext4.
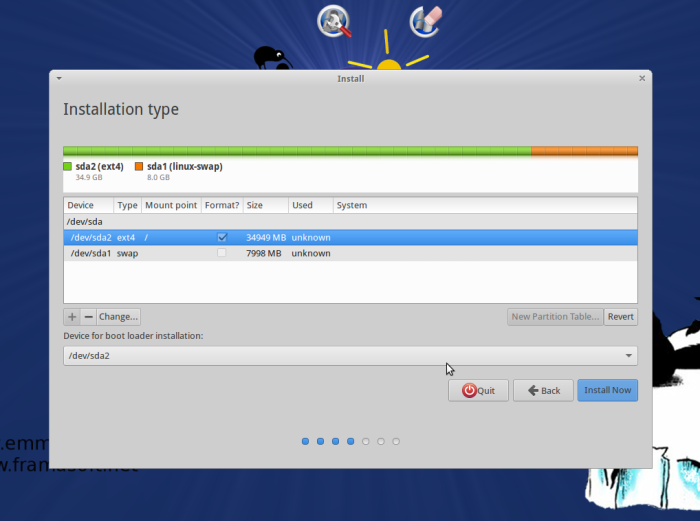
In all cases, the installer will display the partitions to be deleted and ask for confirmation. Only if you agree, you can click on “Install Now”. Then the formatting will start.
3-C. Unfolding and configuring▲
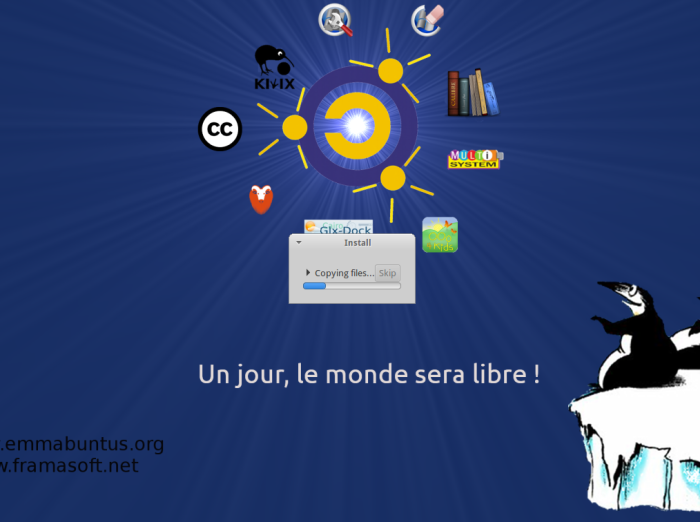
During the unfolding and installation process (partitions management, file copy …), Emmabuntüs offers you to configure your desktop in parallel. This step last around 20 minutes.
3-D. Clock configuration▲
Click on your geographical location, which will define the time zone you are in, and click “Continue”.

3-E. Keyboard configuration▲
The Emmabuntüs installer will propose by default a keyboard configuration based first on your installation language, and the time zone you just entered. At this point you can pick another layout by looking at your country in the left column. Since I use a French keyboard, I changed it to “French - French (alternative).
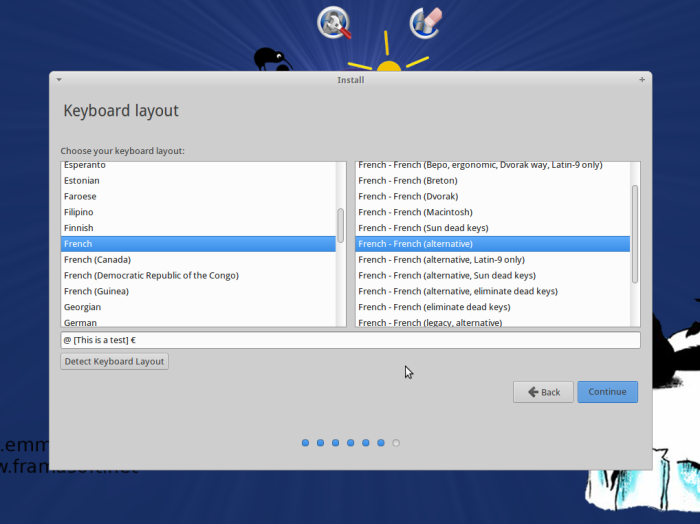
For some countries, Emmabuntüs associate several potential keyboard layouts. You can keep the one proposed by default. A small area below the keyboard layout list let you do some tests. You can use it to see if all the keys are recognized properly! Then click on “Continue”.
3-F. User Information and connection▲
Choose your login user name and password. If the later is too weak, the Emmabuntüs installer will let you know. You should then think about a mixture of letters, numbers and special characters to harden your password.
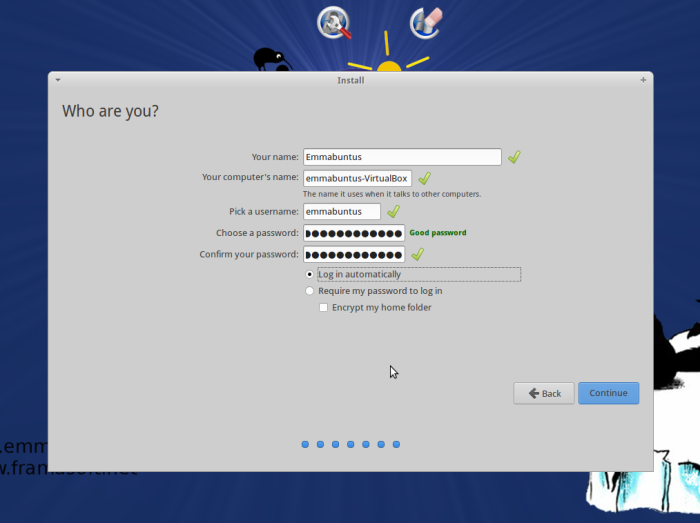
If the computer features a webcam, Emmabuntüs will ask you if you want to take a snapshot of yourself as connection icon. Your choice …
Decide if your password will be required or not at start-up. We suggest to pick the option “Log In automatically”.
For security purpose, you can also ask Emmabuntüs to cypher your personal folder. Technically speaking, Emmabuntüs will use a key to encode all the data before writing on disk. This key will be generated automatically and encoded itself with the login password. Such a cipher is double-edged: if you forget your password, you will never be able to access your data again!!!
When your choices are made, click on “Continue”.
3-G. During the Unfolding▲
The beautiful original Ubuntu slide-show has been suppressed for Emmabuntüs because it was blocking the installation. We are sorry but you will not be able to see it this time.
The installer will let you know what is going on, like copying file, installing system, creating user account, configuring hardware, running post-installation triggers etc ...
3-H. End of Unfolding▲
Once the install is done, you should see the following message:

Click on the “Restart Now” button, and wait for the system to shutdown gracefully.
Then you are asked to remove the DVD, manually close the tray, and press the Enter key for a complete shutdown.
4. Installation post-processing▲
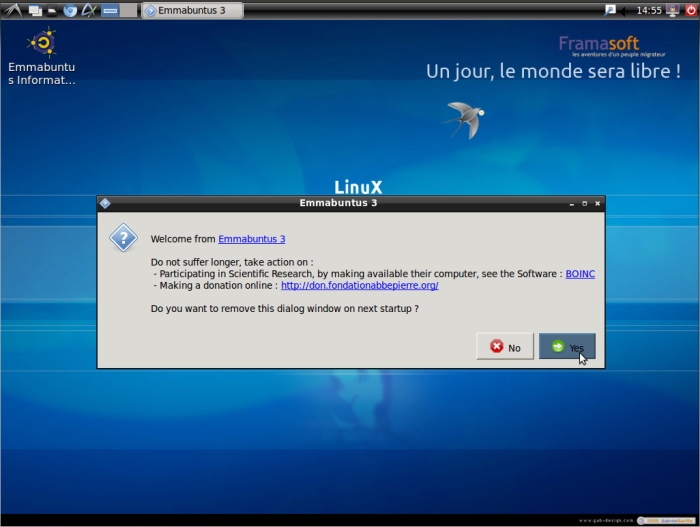
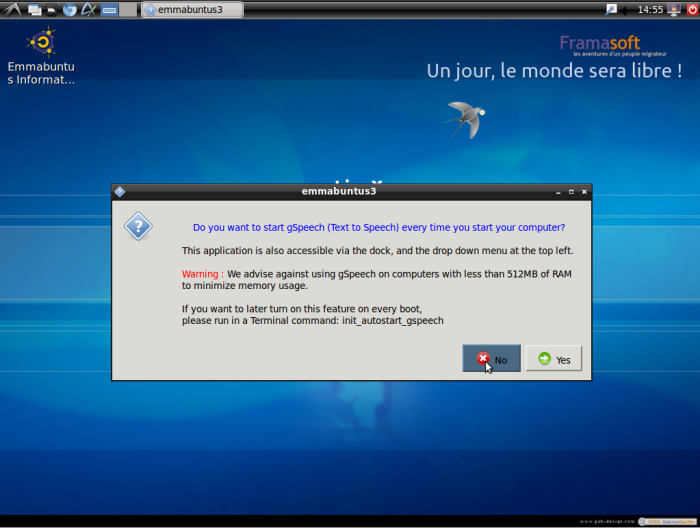
At the very first start-up time, several successive windows ask you to pick the type of menu you want, to activate or not the text to speech synthesis, to define the level of dock you prefer, to install some non-free software, the Microsoft fonts, and ask you if you want to remove some of the unused languages.
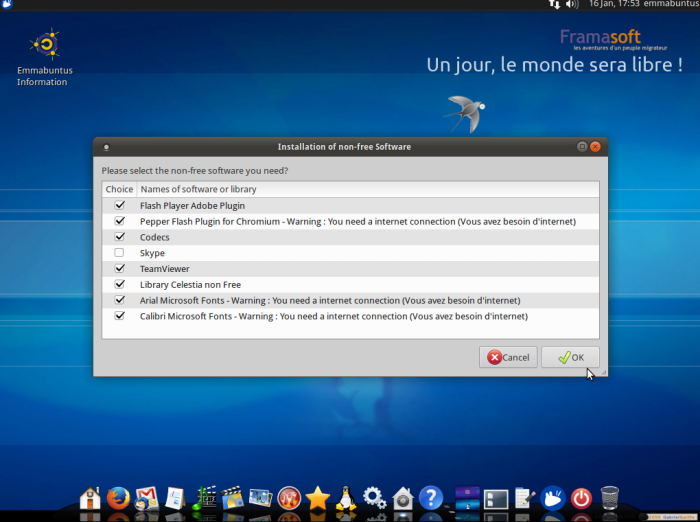
You can refuse to install the non-free software or pick only some of them. You will be able to install them later by using the “Maintenance” menu in the application launcher bar at the bottom of the screen.
An Internet connection is needed to install the ARIAL and CALIBRI fonts which will be downloaded directly from the editor site.
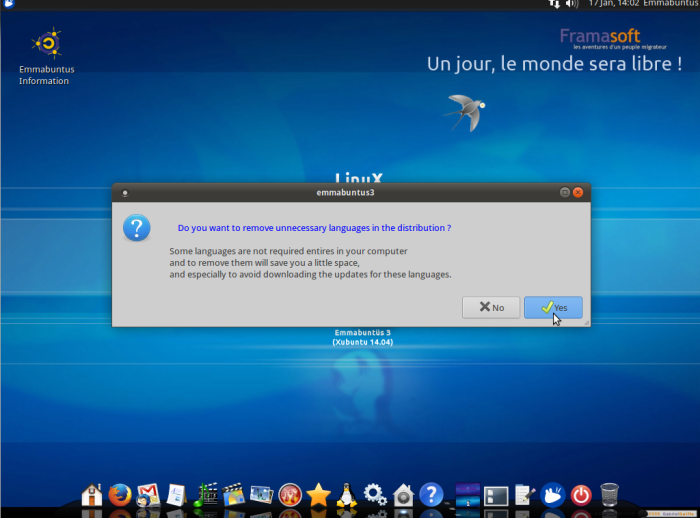
We strongly suggest that you get rid of all the unused languages to minimize the number of updates. Do not miss this step!
4-A. First Start-up▲
During the first start-up, the splash screen is displayed:
You will then be able to perform the Emmabuntüs post-installation.
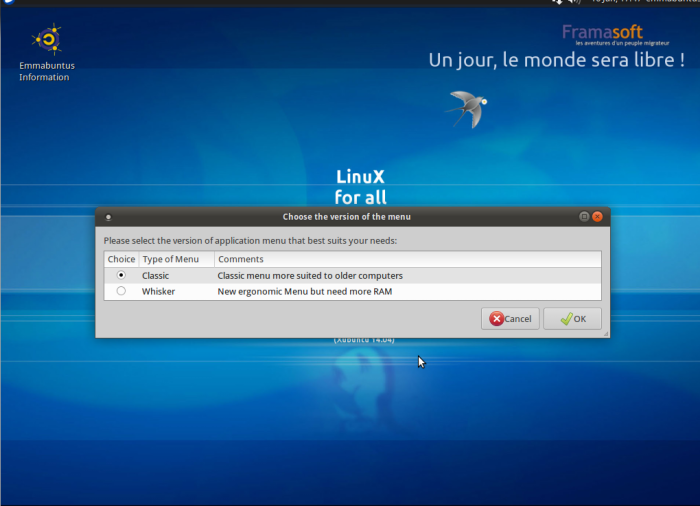
4-B. Choice of menus▲
The fist proposed choice is the Xfce menu: Classic or Whisker.
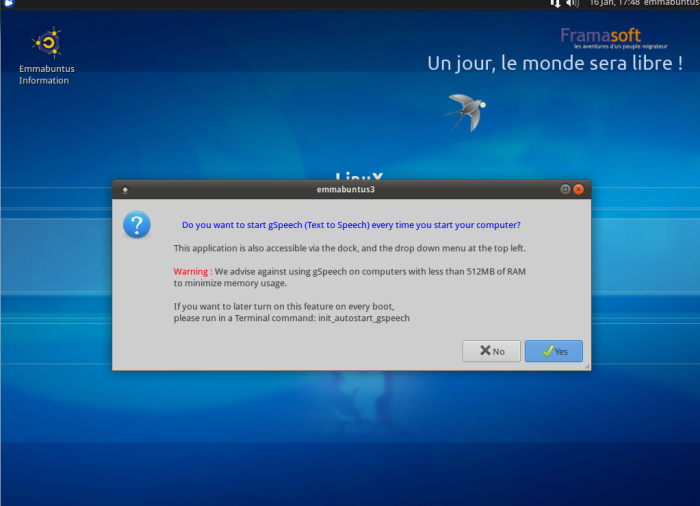
4-C. Activate Text to Speech Synthesis?▲
Do you want to activate the text to speech synthesis at every computer start-up?
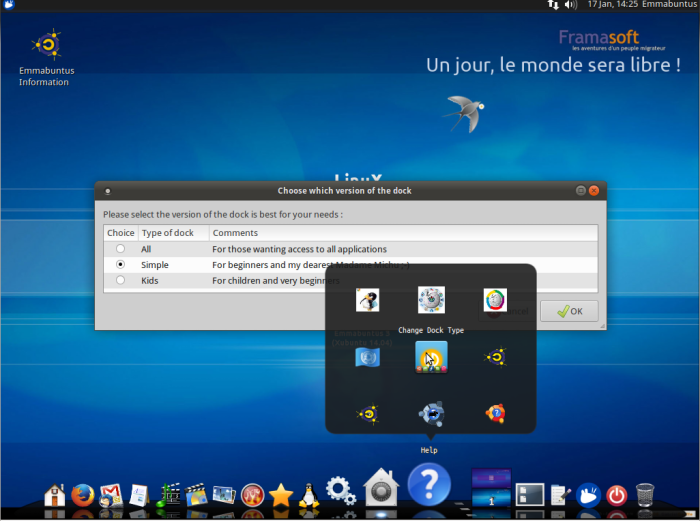
4-D. Dock launcher bar selection▲
You are offered to pick one among three types of dock: « All », « Simple », « Kids».

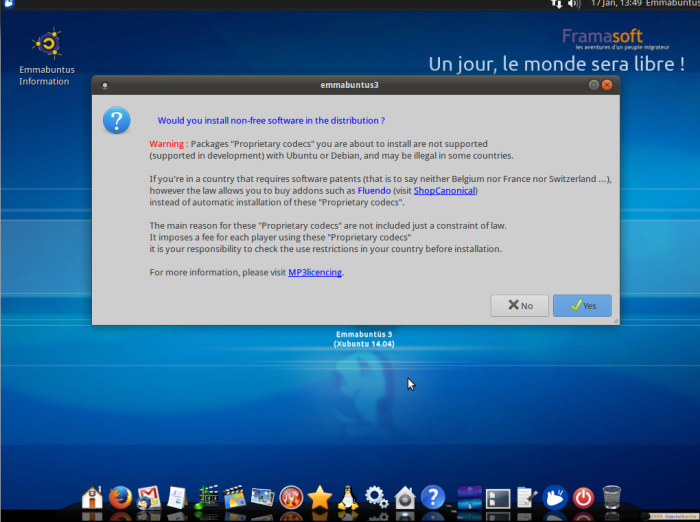
4-E. Proprietary Software Installation▲
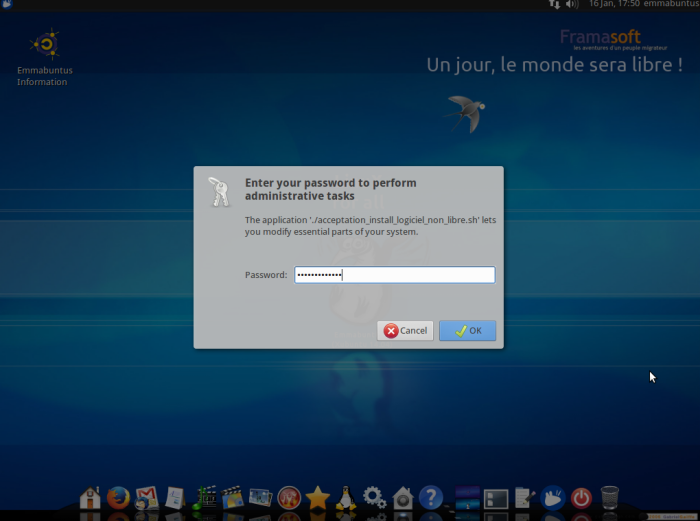
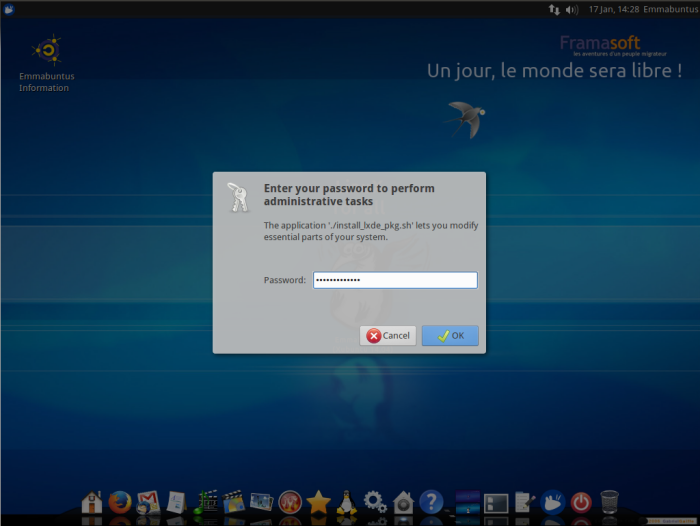
After the dock selection you will see the following dialog box: “The non-free software installation modifies essential parts of your system”. You must enter your password to perform such administrative tasks. This is the one you have registered at the beginning of the installation process.
Confirmation to install non-free software is asked:
Then you can select the non-free software you want to install:
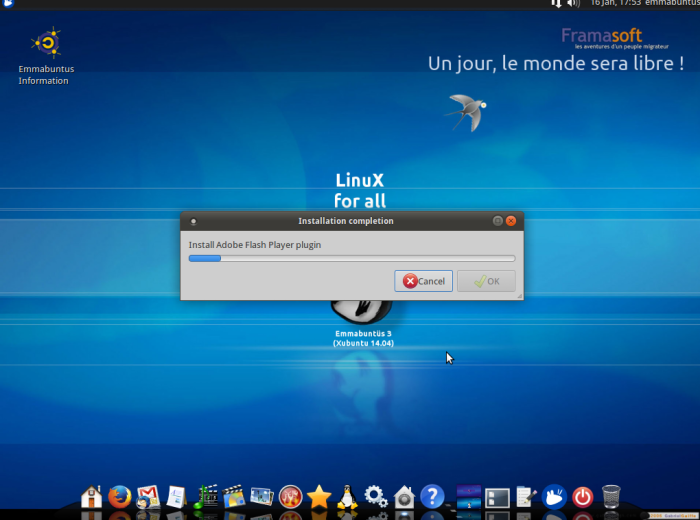
The installation starts with the Adobe flash plug-in:
Then continues with the «Pepper Flash plug-in» for the Chromium navigator:

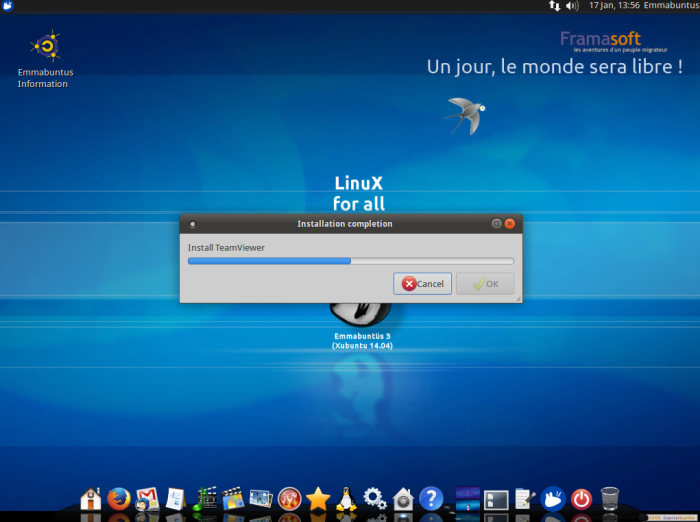
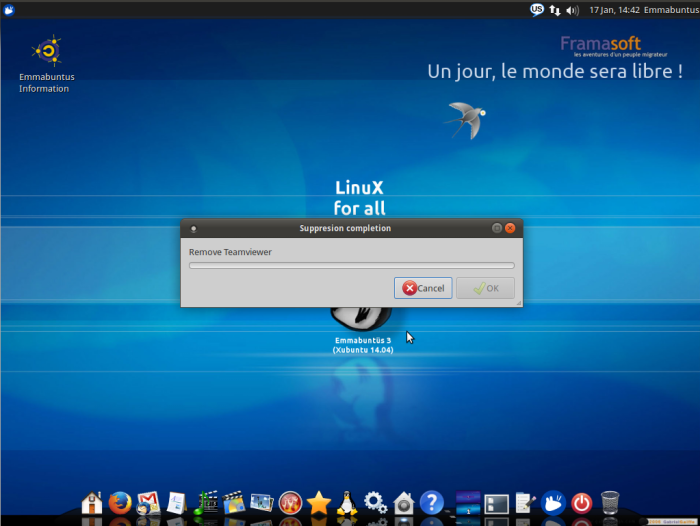
Then this is the Teamviewer installation:
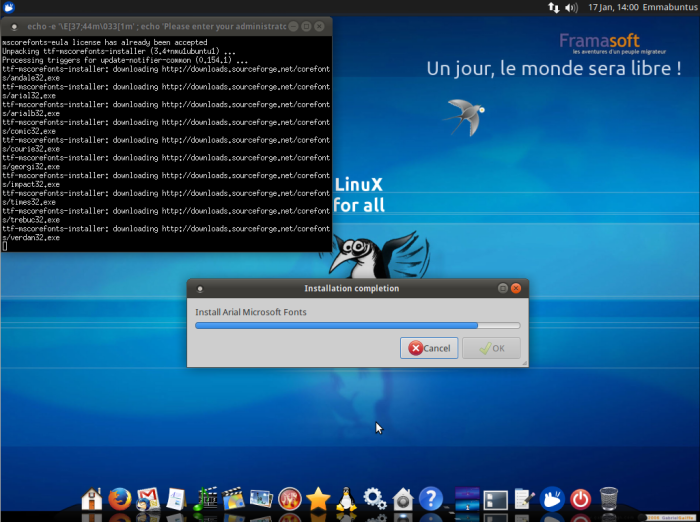
The installation of the Arial and Calibri Microsoft fonts is automatic:
4-F. Suppress Unused Languages▲
When the proprietary software installation is done, your password is asked again in order to suppress the unused languages. By doing so you will minimize the number of necessary updates:

You are asked if you want to remove (yes or no) the unnecessary languages. We strongly suggest to answer “YES”:
Then you are asked to select the languages to be deleted:
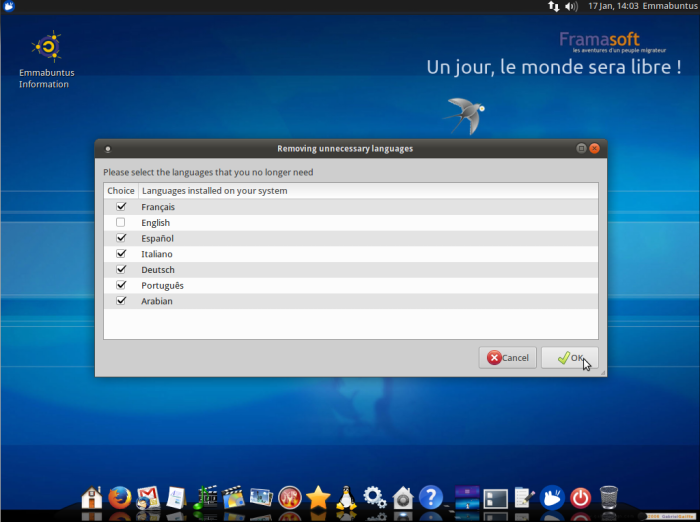
If you have chosen a login name different from Emmabuntüs, none of the options will be preselected.
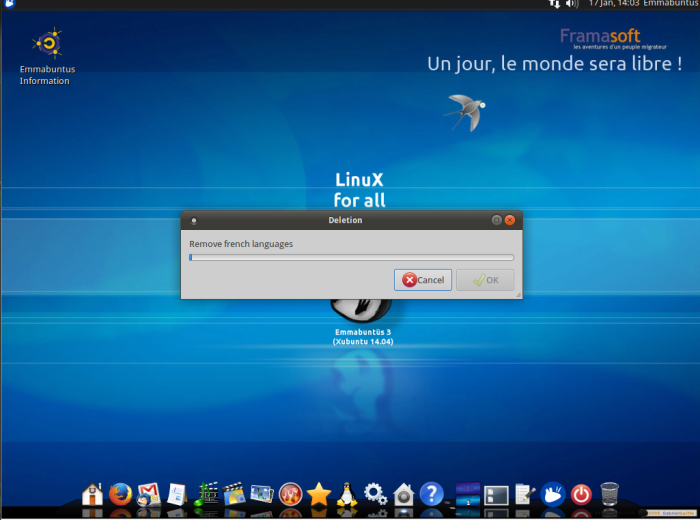
Deletion starts with the French language removal:
4-G. Using Emmabuntüs▲
The installation process is complete. You can start using Emmabuntüs.
If your computer is connected to Internet, you will see a red icon on the top right of you screen telling you that updates are now available. The only thing to do is to click on “install updates” and wait for the end of the download and installation process. A computer reboot will be mandatory to take the new kernel into account.
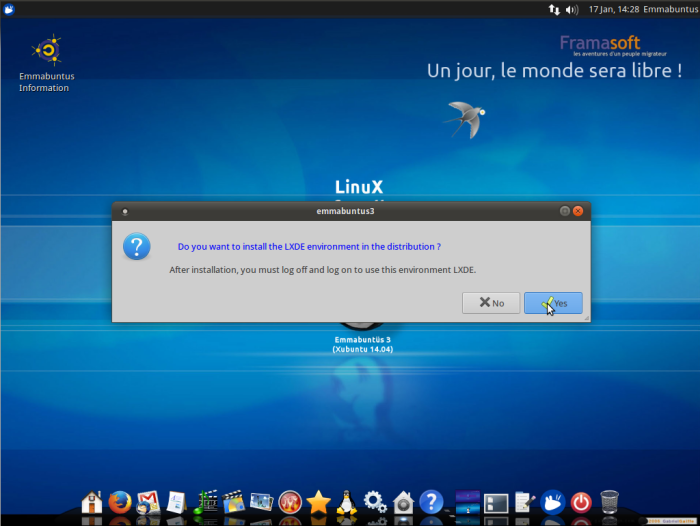
5. LXDE Installation▲
If you note that the Xfce desktop environment is not reactive enough, and consume too much RAM for your hardware configuration, there is another solution to make your computer more pleasant to use: install the LXDE desktop environment which, indeed, is included in the Emmabuntüs distribution.
However, by doing so you will lose some features existing in the Xfce environment.
5-A. Find the LXDE Installation Icon▲
The “Install LXDE” icon is accessible only via the “All” dock and in the “Utilities” category. In order to make it visible, please click first on the “Help” icon, then on the “Change dock type” icon, and select the “All” dock type in the window displaying the various dock versions.
Then in the dock you click on the utilities icon, and select the LXDE icon to launch its installation:

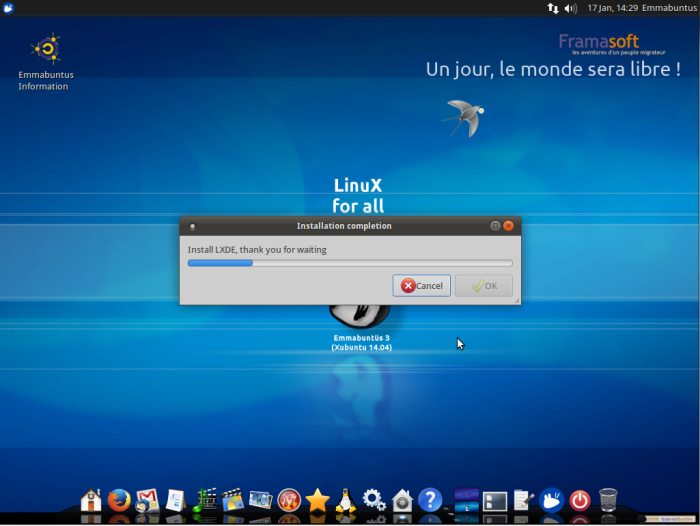
5-B. Installing LXDE▲
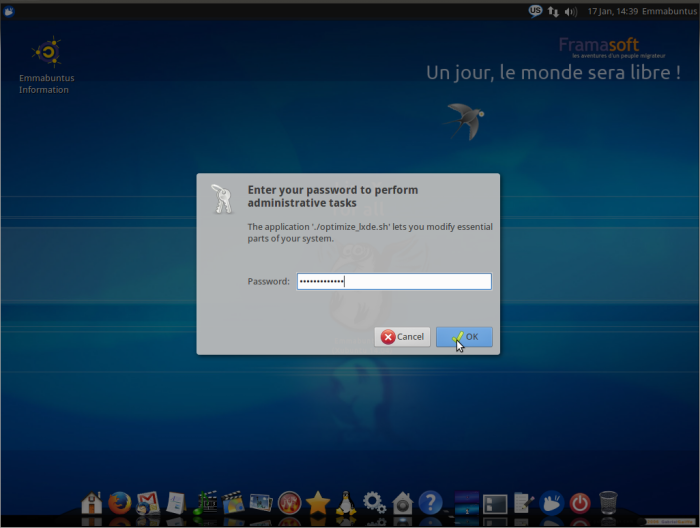
This action is under the responsibility of the system administrator and you should again provide your password (the one that you that defined art the beginning of the installation):
Confirmation is required before installing LXDE on your system:
Installation starts
5-C. Application dock activation▲
If you want an easy access to various software applications, the Cairo-Dock is very convenient but has a rather large memory footprint. Here we chose not to activate it.

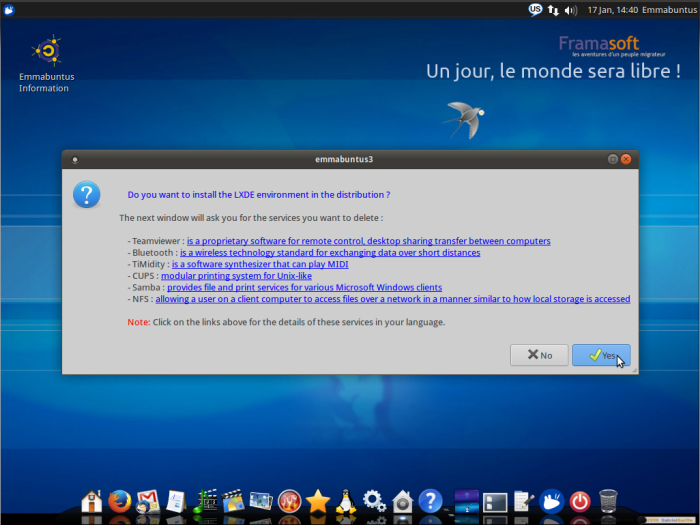
5-D. Suppression of services▲
To lighten your desktop environment, it is suggested that you remove several services.
Once deleted, they will no longer be available.
First the usual “Enter your password” box:
Information about services to be potentially deleted:
Then the selection of the services which are no longer needed:
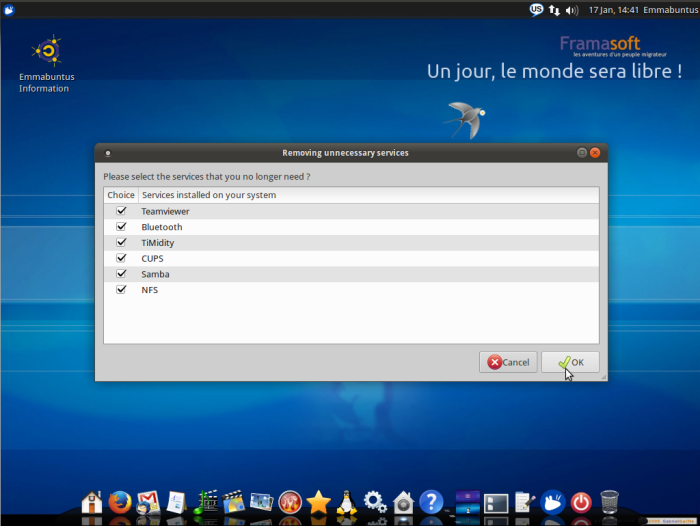
Services being removed:
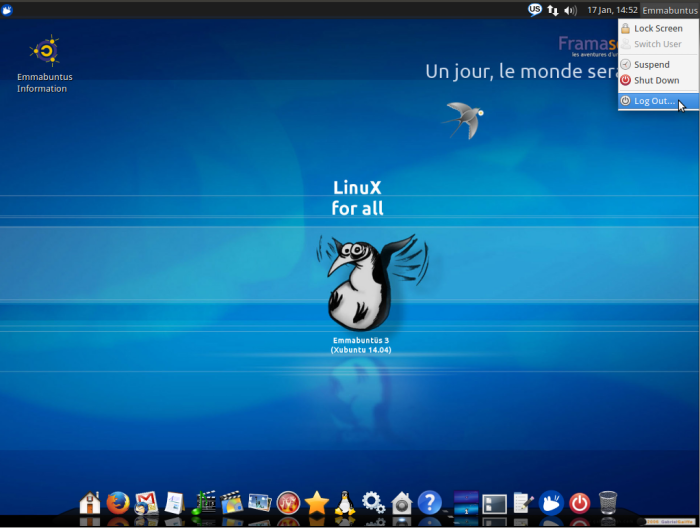
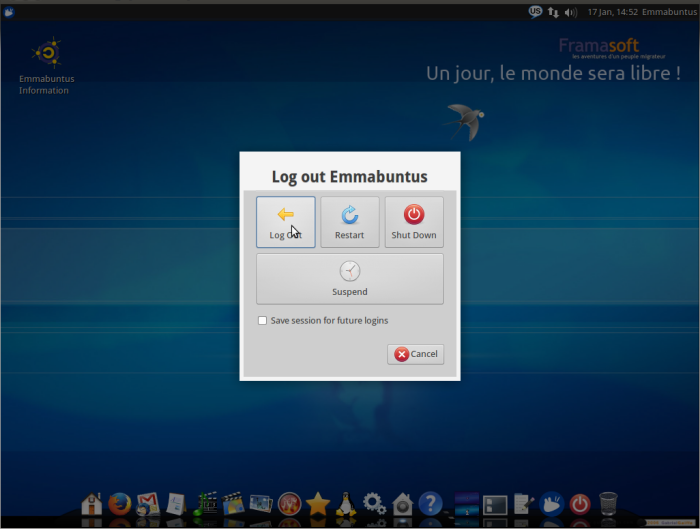
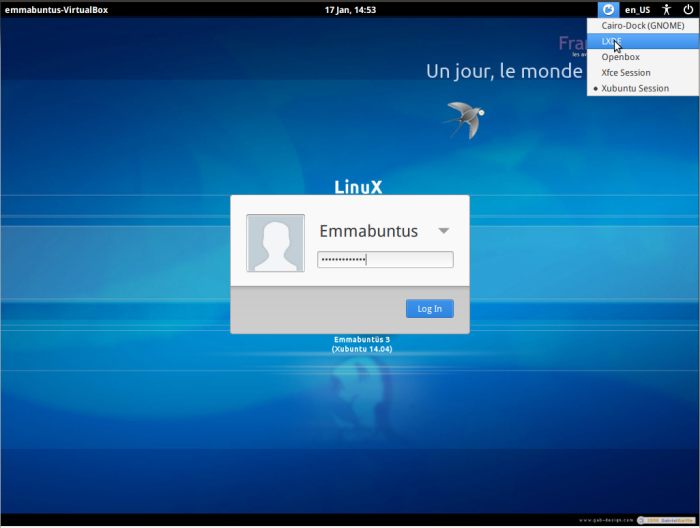
5-E. disconnect from the Xfce session and Log In back on the LXDE session▲
Log Out request:
Log Out confirmation:
Log back In, using the LXDE environment connection:
Welcome in the new lightweight environment:
5-F. Option to activate the text to speech synthesis▲
In order to spare the system resources, it is recommended to NOT activate the Text to Speech Synthesis at every start-up.
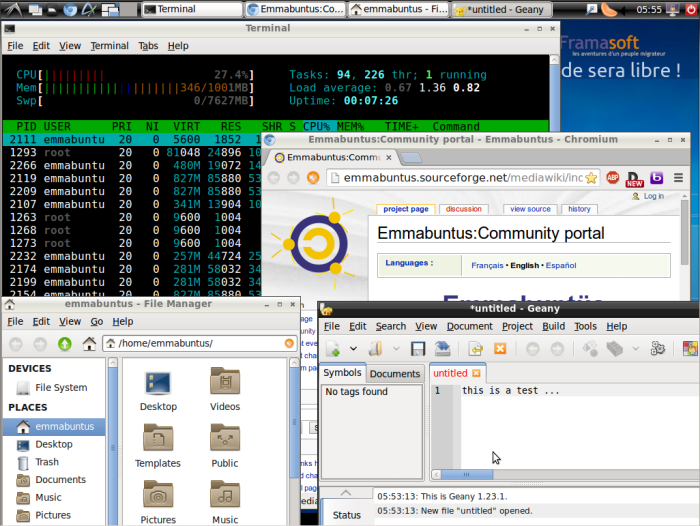
5-G. Memory consumption under LXDE▲
If you launch the HtopHtop system utility, you will note that the LXDE desktop environment consumes only 155 MB of memory at start-up.
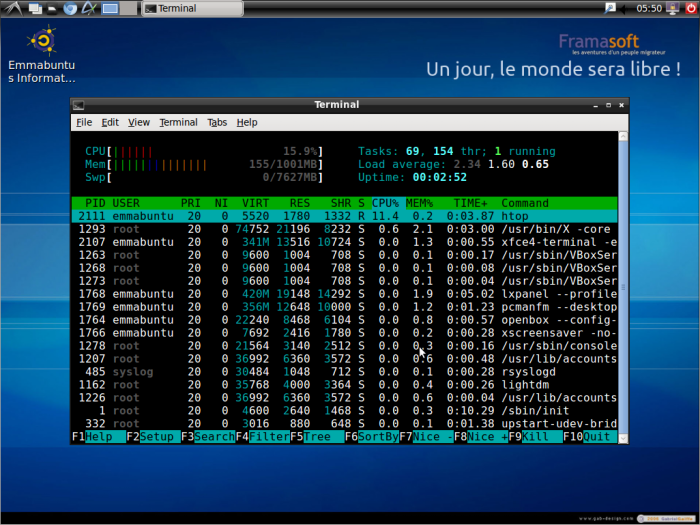
You can run a test by launching in parallel the Chromiumnavigator, the Clementine music player, the Thunar file manager, the Geanytext editor, and the Htopsystem utility. You will then note a memory utilization of 346 MB, which leaves yet another 156 MB of free space, if you have only 512 MB of RAM installed on your computer.
This optimization of Emmabuntüs with LXDE for a smaller memory footprint, induce some lost in functionality compare to Xfce which id heavier but more complete. For more information, you can have a look at this comparison of the two desktop environments, or that one.
6. Help▲
We invite you to read this first step manual (French)
If you don't know which program to use within your Emmabuntüs system, this page List Emmabuntüs programs for you.
For the beginners in the GNU/Linux world, we recommend the reading of this paper « Easy migration from Windows XP to Linux ».
You can also get a list of software equivalents between Windows and GNU/Linux here.
And if you have questions, the Emmabuntüs Forum (French/English) is here for you.
7. Conclusion▲
We just saw that the classic install of Emmabuntüs is as simple as the one for Ubuntu, followed by an extra step to choose which proprietary software to install, and another optional one to install LXDE, the lightweight desktop environment
Several other installation modes are available when booting from the DVD in order to decrease the amount of information needed during the install process when performed in the computer refurbishing shops.
- Line 3 : Install Emmabuntüs in French (Account, Partition)
- Line 4 : Install Emmabuntüs in French (Partition)
The line 4 « Install Emmabuntüs in French (Partition) » creates the administrator account « Emmabuntüs ». During the post installation process all the options are defined to avoid boring repetitive actions.
In the frame of computer refurbishing, the use of a good quality USB key, instead of a DVD, is also a very good solution, because DVD readers tend to be malfunctioning after years of operation. On top of that the installation will be 3 times faster than with a DVD.
For the transfer of the Emmabuntüs ISO on an USB key, using the Multisystem software will keep the DVD Menu Options with Line 3 and 4. On the other end, if you use the Linux Live USB Creator under Windows for this transfer, only the classic install option will be kept.
For old computers which cannot boot from an USB port, you can use the application Plop Boot Manager on a bootable CD, which in turn will bypass the BIOS and let you boot from the USB port. Download here.
All the different installation methods are detailed in the Emmabuntüs Wiki: « How to recondition your old boxes with_Emmabuntüs»
8. Acknowledgments▲
Thanks to Léa-LinuxLéa-Linux documentation Install-index for its three tutorials which are merged here.
Thanks to Zoom61Zoom61 and Ideefixe for the publishing help and support.
Thanks to spelling and syntax checkers.
